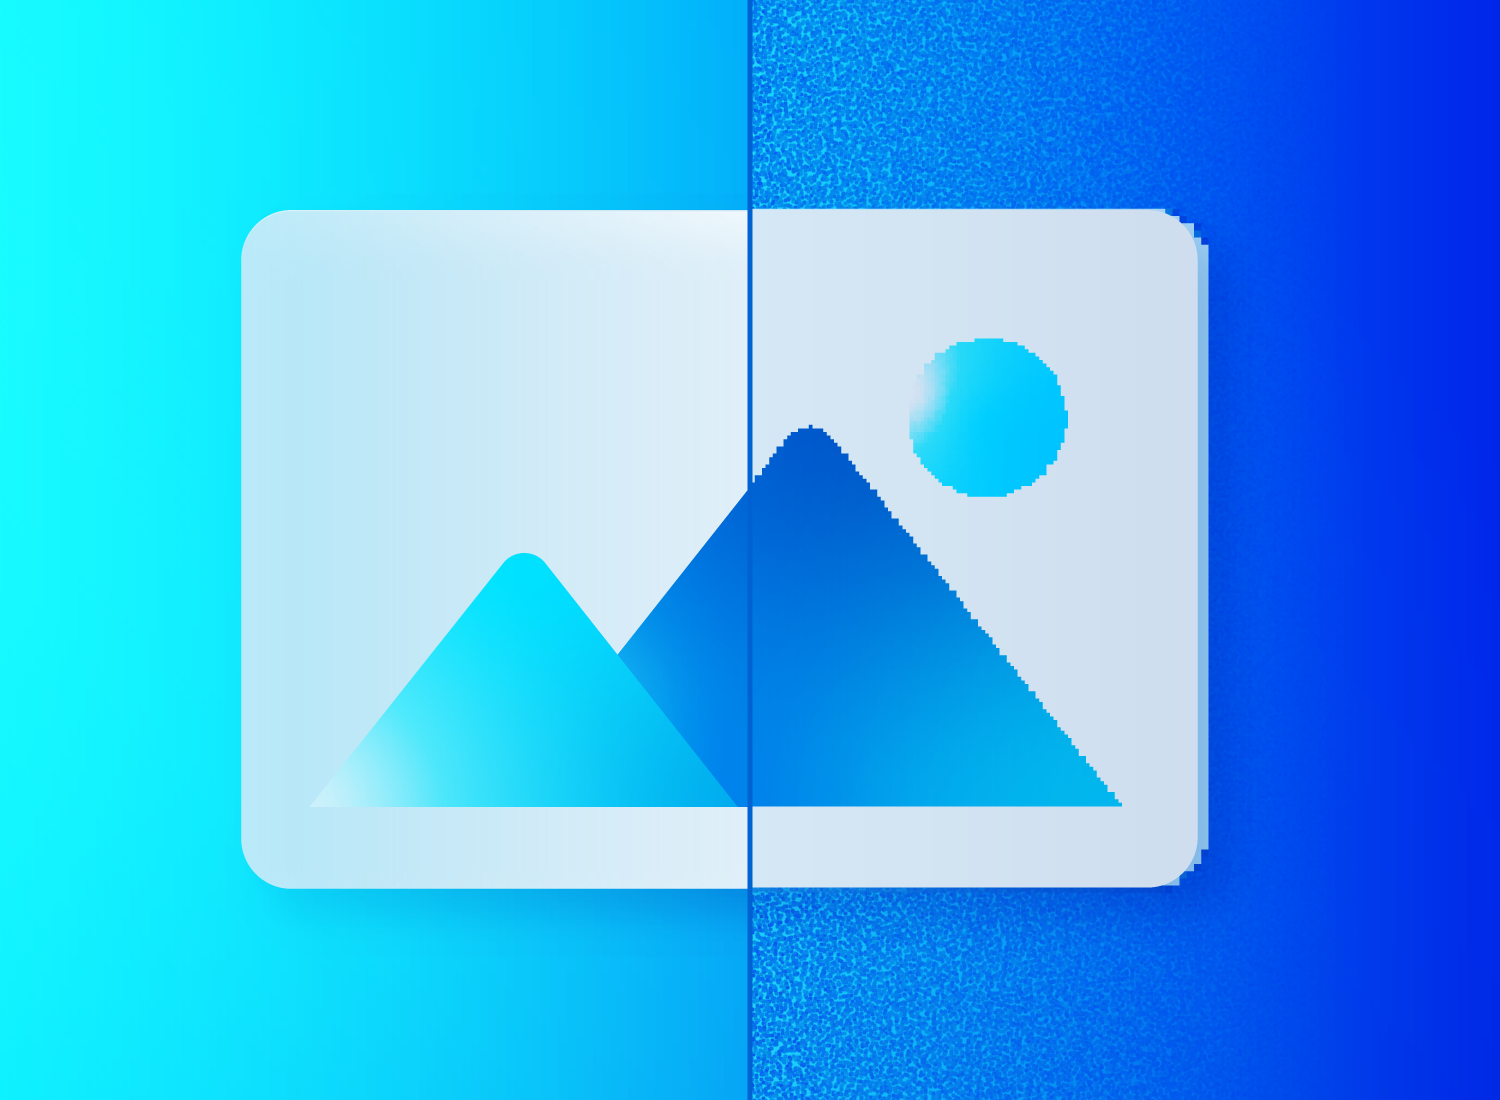
Picture resolution is incredibly different between lo-res (low-resolution) and hi-res (high-resolution) images. It can mean the difference between a company logo that looks fuzzy, or one that is crystal clear.
To understand when a hi-res image is a must (such as for printing and enlarging), we should first discuss what exactly hi-res means.
The best snipping tool for Windows and Mac
Don’t let clumsy built-in tools hold you back. Take and edit screenshots with Snagit!
Get Snagit
What is the meaning of “high resolution”?
Digital images are made of tiny pixels (picture elements), or squares of color. You usually don’t notice individual pixels because they all blend to form the picture that you see.
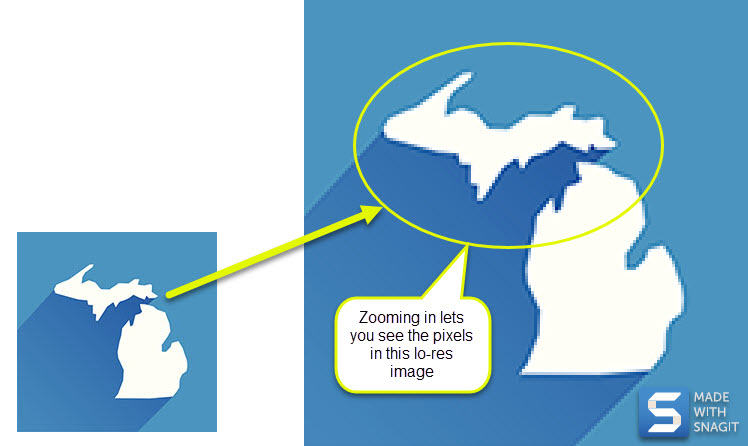
But, those pixels are still there! You can see them either when you zoom in too much, or you try to enlarge an image beyond what it can handle — which is why it’s important to know how to resize an image correctly.
As you can see, the lo-res image on the left looks great at its normal size, but when we zoom in or enlarge the image, it looks choppy.
In other words, it’s “pixelated” because you can distinguish each pixel, in a block pattern. Anyone that pre-dates smartphones might recall this distinctive, low-tech aesthetic from retro video games.
Early video games looked pixelated because they purposefully used minimal colors to preserve memory and processing power. Today, we usually only see pixelated images when they’re either:
- Overly enlarged
- Too zoomed-in
- Printed from a low-resolution file.
You’ll be glad to know that we’ve got a whole post about how to prevent blurry pictures (and it’s easier than you might think).
What are high-resolution images?
Lo-res images have around 72-pixels, or squares of color, per inch. This makes them great for the web because that’s usually as much as most computer screens can display. Lo-res images are also lightweight (because they have fewer pixels), which helps websites load quickly.
Hi-res images, on the other hand, are at least 300 pixels per inch (PPI). This resolution makes for good print quality and is pretty much a minimum requirement for anything you want hard copies of, especially to represent your brand or other important print materials.

Ink is expensive, so using hi-res photos to produce sharp prints without any blurry or jagged lines is the best way to avoid any printing regrets.
How to tell if an image is high or low resolution?
Just because a picture looks good on your computer screen doesn’t mean it’s hi-res, and you can’t tell by the aspect ratio, either. A hefty image size might suggest an image is high-res, but this isn’t always the case.
The best way to check image resolution is to open it up in an image editing program, like Photoshop or TechSmith’s Snagit, and view the file properties. While this particular feature is currently only available on the Windows version of Snagit, you can also use it to extract text from images and remove the backgrounds from photos — on both Windows and Mac.
While Snagit is great for quick photo editing, most computers come with a basic editing program that will help you see whether or not a picture is hi-res.
Do you need high-res or low res-images?
So now that you know the difference between low and high-resolution imagery, and you understand how important it is, the next hurdle is knowing when you do and don’t need hi-res images.
Ultimately, this all comes down to what an image will be used for. Whether you’re a budding photographer planning your first exhibition, or an entrepreneur working on a new website, understanding the format and context of where your image will be seen is the key to knowing the resolution you need.
In this section, we’ll look at some typical examples of where low and high-resolution photos are required, to help you decide what best suits your needs.
The best images resolution for screens and monitors
Whether it’s a computer monitor, mobile device, or television, high-resolution images are often praised for their clarity and sharpness on screen, but there’s still a balance to be struck.
Digital screens have a finite number of pixels, and it’s this pixel count (often referred to as screen resolution) that limits the detail they can display. Using an image with a resolution higher than the screen’s probably won’t improve the picture quality, as the screen simply can’t render the extra detail.
What’s more, because high-res images make for heavy files, they can slow down websites and use unnecessary storage space on your device. This means that low to medium-resolution images are usually best for screen-based applications.
The best image resolution for posters
To make posters — particularly life-sized ones — high-resolution images are generally the way to go. This is because large-scale prints need more detail to maintain the integrity of the image, ensuring that they don’t appear pixelated when printed.
The viewing distance is one essential caveat. If your poster is going to be seen from far away, then there isn’t as much need for ultra-high image definition.
This is because, from a distance, our eyes can’t discern the same level of detail as up close — but you knew that already. This is where intermediate resolutions come into play, as they can provide a perfect balance between giving posters a clear and detailed appearance without needing extremely high resolution.
The best image resolution for printing
Whether it’s a business card or a glossy magazine, you’ll need the level of detail that only high-resolution images can provide to ensure the printed image is crisp and clear.
For this reason, images intended for print should have a minimum resolution of 300 DPI (dots per inch). This isn’t just a random number — it’s the perfect resolution to provide a high-quality image at arm’s length.
Speed up your screenshot workflows
Stop wasting your time with built-in snipping tools, and try Snagit!
Learn More
The best image resolution for artwork and fine photography
When you’re dealing with artwork or fine photography, every detail matters. Here, the texture of a brush stroke, the delicate shading in a charcoal drawing, or the interplay of light and shadow in a photograph can be the difference between an image that looks good and one that truly captivates onlookers.
As you might expect, high-resolution images are especially useful in such scenarios, as they capture subtle details with the kind of precision that lo-res simply can’t.
That said, it’s still worth thinking about how your image is going to be used. Are you planning an exhibition where your work will be displayed in large formats? Or are you building a digital portfolio? While high-resolution images are a must for a physical exhibition, low-res photos might be better if you’re planning to display them online.
The best image resolution for nature photography
Nature photography is all about capturing the world around us. From the textured bark of an ancient tree, to the vibrant hues of a sunset, there are hundreds, if not thousands, of intricate details that make each photograph a unique testament to the beauty of nature.
As such, high-resolution photos are crucial for capturing and sharing such photos. Think about it, have you ever seen a blurry picture in National Geographic?… Exactly.
Hi-resolution images, the FAQs
If possible, it’s always best to try and recapture an image in high-resolution, rather than make a lo-res image, hi-res.
That said, software such as Adobe Photoshop or online services like Let’s Enhance use sophisticated algorithms to upscale images and improve their resolution while minimizing the appearance of pixelation. However, the end-result might not be as sharp as an image originally captured or created in high resolution.
While the file size of high-resolution images varies greatly, hi-res is typically defined by its pixel dimensions and the number of pixels per inch (PPI or DPI).
An image is generally considered high resolution if it has 300 PPI or more, with typical dimensions ranging from 2,000 x 2,000 pixels for smaller images to 5,000 x 5,000 pixels (or more) for larger ones. Keep in mind that the specific pixel requirements will likely depend on the intended use of the image.
You can determine if an image is high resolution by checking its DPI (dots per inch) and its pixel dimensions. This can be done by looking at the image’s properties on your computer, or in an image editing suite.
Generally speaking, if an image has 300 DPI or more and has large pixel dimensions (usually in the thousands), it is considered high resolution.
To make a high-res image low-res, you can use software such as Snagit or Photoshop or free online tools like PIXLR. These tools allow you to decrease the image’s size in pixels or change its resolution (DPI).
By reducing these parameters, you can essentially lower an image’s resolution by creating a smaller, less detailed version of the original image.


Share