Introduction
1. Record a Video with Snagit (3:07)
Steps to Record a Video
- In the Capture window, select the Video tab.
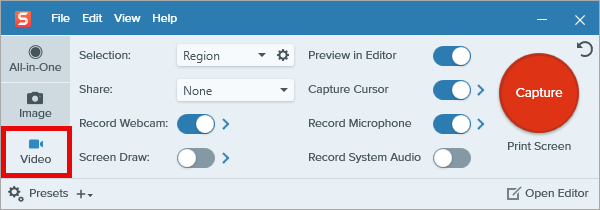
- On the Video tab, adjust the settings as needed, for example to record your microphone, webcam, or cursor.

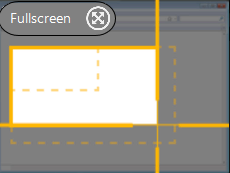
- The orange crosshairs appear. Click and drag to select the area to record on the screen or click the Fullscreen button to select the entire screen.
- The Video Recording toolbar appears.

- Click a button on the toolbar to turn the option on or off before or during recording:
- Webcam: Record live video from the connected or built-in webcam. Click the dropdown to select the camera device and Picture-in-Picture or Fullscreen webcam options.

- Capture Cursor: Record your cursor while screen recording. Click the dropdown to turn the cursor effects on or off.

- System Audio: Record the sound from your computer such as application alerts or the audio playing from your computer speakers.

- Microphone audio: Record the audio from your computer’s built-in microphone or from a connected USB microphone. Click the dropdown to select a device.

- To begin recording, click the Record button or press Shift+F9 (Windows) or Command+Shift+Space (Mac).

- To pause recording, click the Pause button or press Shift+F9 (Windows) or Control+Shift+Space (Mac).

- To stop the recording, click the Stop button or press Shift+F10 (Windows) or Control+Shift+V (Mac).

For more information and video options, see:
2. Edit a Snagit Video (1:22)
Cut out mistakes or unwanted parts, or trim away the beginning or end of a video.
Steps to Edit a Video
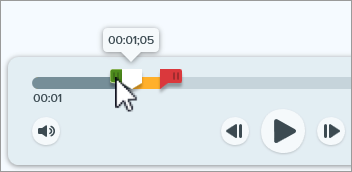
- Drag the green Start handle on the timeline to the location to start the cut.
- Drag the red End handle on the timeline to the location to end the cut.
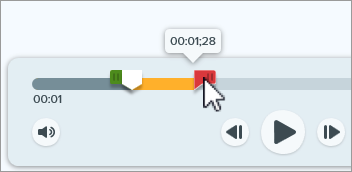
- To review the segment to be cut out, drag the white playhead across the timeline.
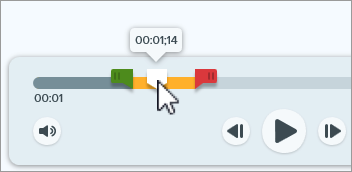
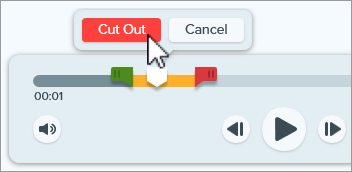
- Click the Cut Out button.
3. Combine Snagit Videos (2:02)
Record multiple videos with Snagit, then combine them into a single video. For example:
- Record a video in segments rather than a single take.
- Record additional information missed in the first recording.
- Import and add a video or segment recorded by another person.
Steps to Combine Videos
- In the video playback toolbar, click Add Videos.

- In the Combine Videos dialog, click to select additional videos in the order you want to combine them.
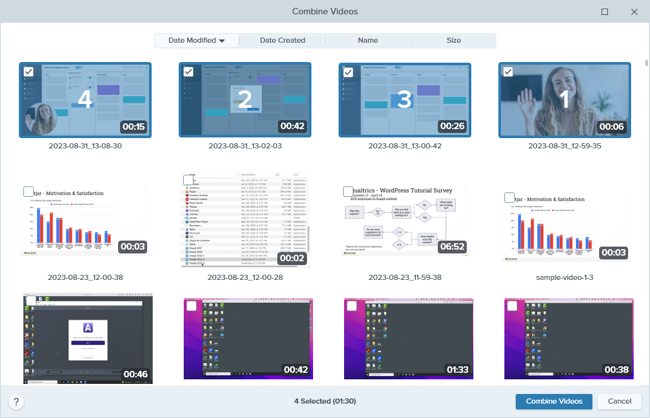
- Click Combine Videos.
The combined video appears on the canvas to review, edit, and share. The original videos remain in the tray and/or library for future use. For more information, see Combine Videos.
4. Share or Save a Snagit Video (1:26)
Share directly to the app, hosting service, or file location of your choice.
Steps to Share or Save Your Video
- In Snagit Editor, click to select a video in the recent captures tray.
- Click the Share Link dropdown or Share dropdown and select a destination:
- File: Save an mp4 to your computer or network drive.
- Screencast: Upload your video to TechSmith’s online video sharing site with built-in conversations, and comments. Snagit automatically copies the link to your clipboard. Learn about Snagit + Screencast for workplace communications.
- Hosting platform or cloud destination: Select Google Drive, Dropbox, YouTube, or another destination to upload your video. Snagit automatically copies the link to your clipboard. See Share Captures.
Note: This tutorial is for Snagit version 2025. Previous versions may look or function differently.
All Snagit Tutorials
