The Magic Wand selects an area based on color. Use it to:
- Delete a background.
- Move or delete elements in a mockup.
- Cut or copy a selection to paste elsewhere.
Note: The Magic Wand tool is ideal to select areas of a solid color or objects outlined with a contrasting color. It is not recommended to select areas with a gradient, complex background, or pattern.
Note: Magic Wand and other tools in the Snagit Editor toolbar are available to edit images. To edit and enhance video captures, share your video to TechSmith Camtasia.
- Click the Magic Wand tool in the Snagit Editor toolbar.

- Edit the tool properties to customize the tool. See Tool Properties.
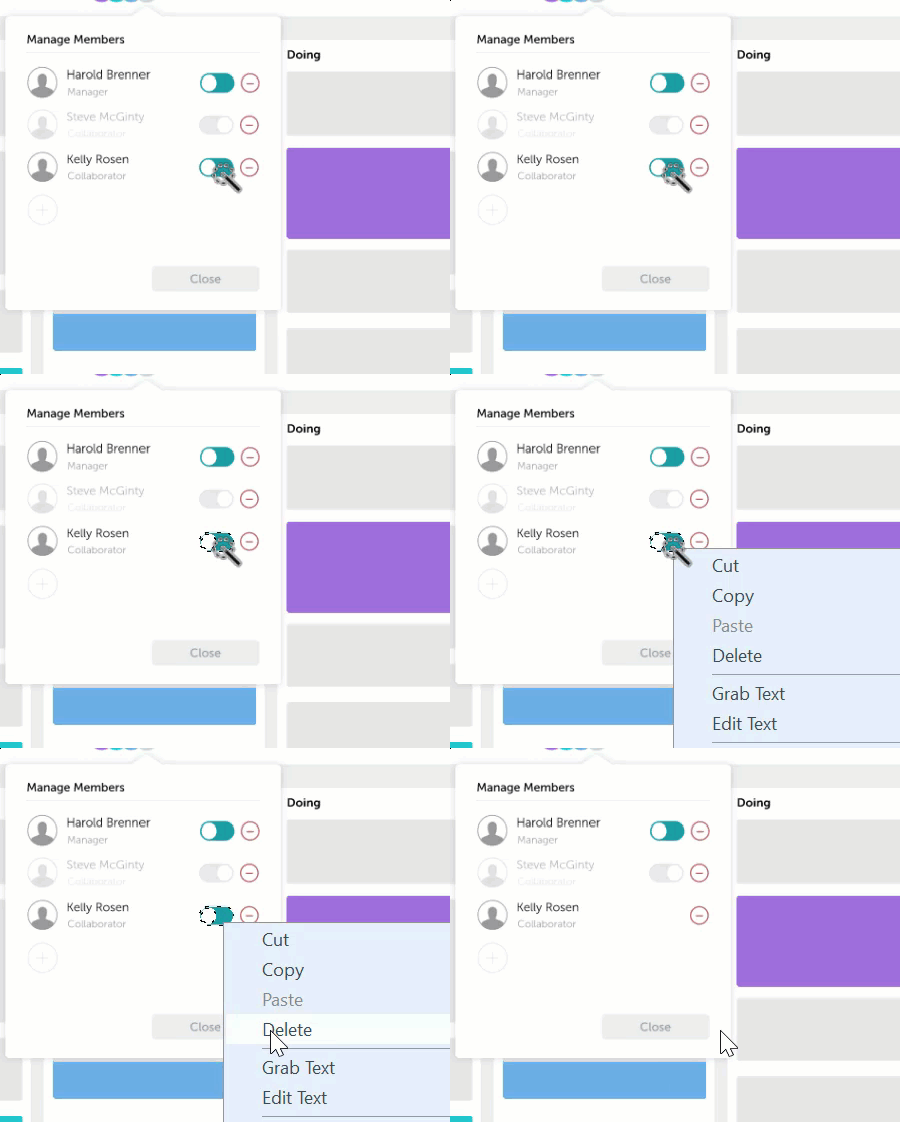
- Click to select an object or color block on the Canvas.
- If Snagit selects too little or too much of an area on the Canvas, drag the Select slider in Tool Properties to adjust the selection radius:
- Less selects fewer pixels based on a smaller range of colors.
- More selects more pixels based on a wider range of colors.
- Complete any of the following to edit the selection:
- Move an Object: Click and drag the selection or object to a new location.
- Delete the Object or Selection: Right-click (Windows) or Control-click (Mac) the selection and select Delete.

- Cut or Copy and Paste an Object: Right-click (Windows) or Control-click (Mac) the selection and select Cut or Copy to paste the selection elsewhere.
- When you are finished with the Magic Wand tool, click the Move tool in the toolbar to select, move, edit, or delete objects you added to your image.

Snagit automatically fills the space of the moved or deleted object with the Background Fill option selected in the Tool Properties.
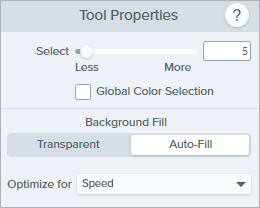
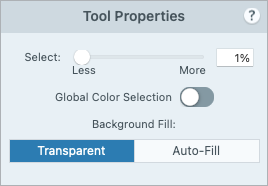
Edit the properties to customize the tool.


Select
Drag the slider or enter a percentage to adjust the range included in the selection:
- Less selects fewer pixels based on a smaller range of colors.
- More selects more pixels based on a wider range of colors.
Global Color Selection
Expand the selection to include all instances of the selected color within the image.
Background Fill
- Transparent: Fills area with transparency.
- AutoFill: Automatically fills the area based on the content surrounding the selection.
- Optimize for Speed (Windows only): Use for solid colored content or if fill details are not important.
- Optimize for Photo Quality (Windows only): Use for advanced customization and higher quality fill.
Note: This tutorial is for Snagit version 2025. Previous versions may look or function differently.
All Snagit Tutorials


