Note: Logo customization on the content page is only available with Screencast Pro subscriptions. Upgrade today!
Replace the default Screencast logo with a custom logo to help viewers identify you as the content owner.
Add logos to:
- Build trust in your content with viewers by brand recognition.
- Establish context for the source of the content (ex. communications from an external consultant).
- Designate internal communication with your company’s or product’s logo.
Add a Custom Logo to a Content Page
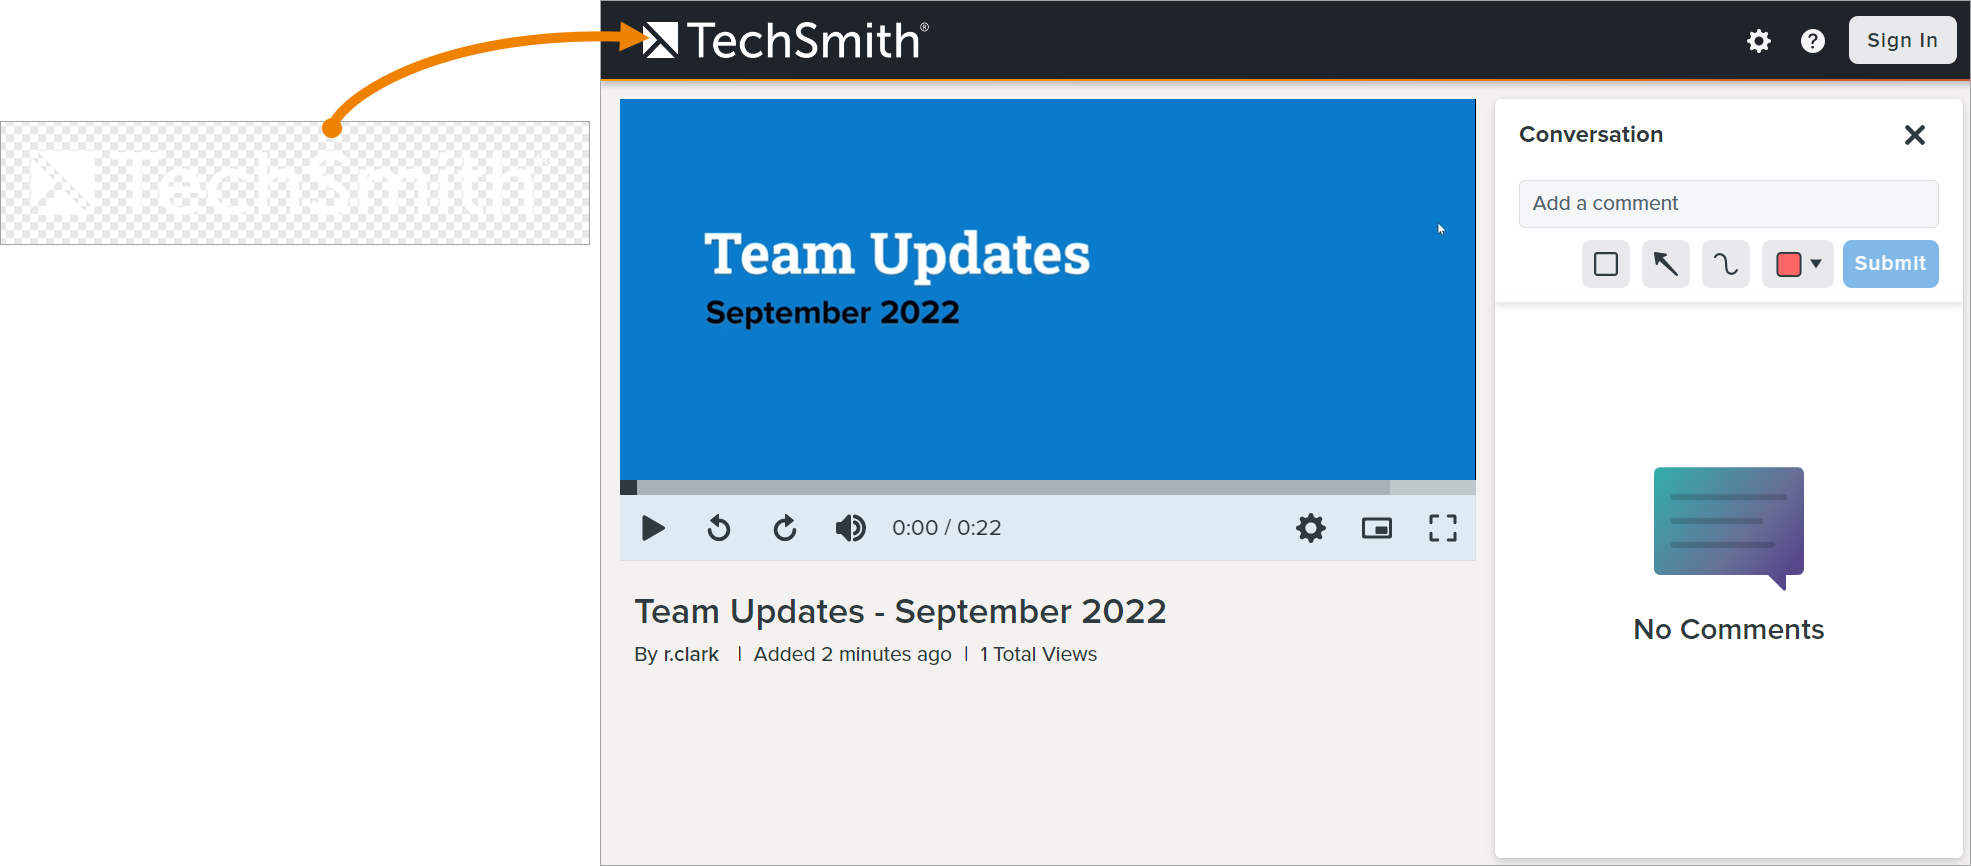
The logo appears in the upper-left corner of your content pages and replaces the default Screencast logo.
- Your logo must be a PNG file.
- The available content area is 192×28 pixels. Larger images will be scaled to fit the available area.
- For the best viewing on high-resolution displays we recommend using 2x scaled images, meaning up to 384×56 pixels @ 2x pixel density.
To add a custom logo:
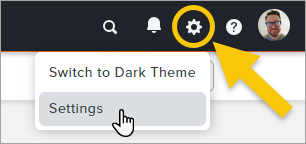
- In the Screencast site header, click the gear icon and then select Settings.
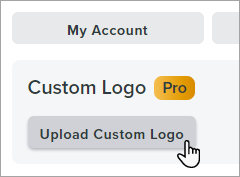
- On the Settings page, select Upload Custom Logo.
- The Upload Custom Logo dialog appears. Drag a PNG file onto the dialog or click Browse for file.
- A preview of the logo appears. Click the Upload Image button.
The logo appears in the upper-left corner of your content pages.
Remove a Custom Logo
Remove your custom logo to change the image back to the default Screencast logo.
- From the Screencast Settings page, select Edit Custom Logo.
- Click the Reset to Default button.
- A confirmation message appears. Click the Remove button.
All Tutorials