Camtasia records the screen and cursor data separately in the Camtasia Recording file format (TREC). This allows you to edit the cursor and eliminates the need to rerecord to perfect cursor movement or position.
Camtasia’s cursor editing and effects help to:
- Smooth jumpy cursor movements.
- Fix the cursor position when it doesn’t match the narration.
- Emphasize the cursor to support the message in your videos.
- Add or edit cursor clicks.
Edit a Recorded Cursor Path
In Camtasia Recording files (TREC), you can fix the cursor position when it doesn’t match the narration or smooth out cursor movements post-recording.
- Select a Camtasia recording (TREC) on the timeline or canvas.
Note: You can only edit the cursor path on screen recordings captured with Camtasia (TREC) or after a new cursor path is added. To create a new cursor path in a video or image imported into Camtasia, see Create a New Cursor Path.
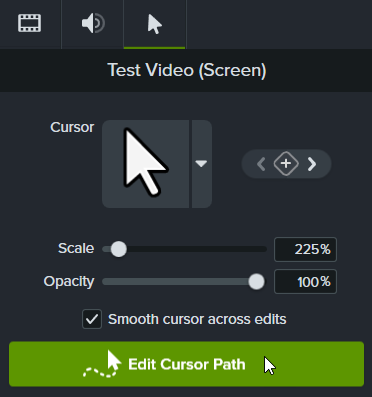
- On the cursor tab in the Properties panel, click the Edit Cursor Path button.
- In the Edit Cursor Path dialog, select Simplify Existing Path or Create New Path in the dropdown and click Continue.
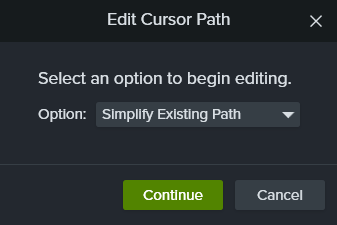
Note: You only need to complete this step the first time that you edit the cursor path.
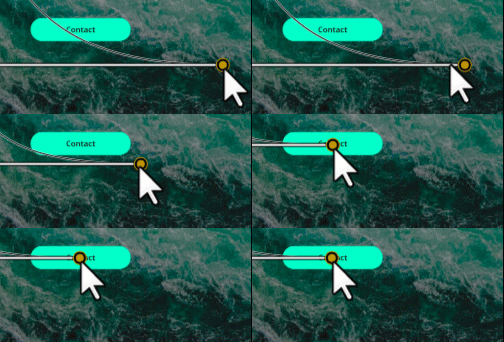
- The cursor path and points appear on the canvas and timeline.


- Click to select a point to edit, then complete any of the following options:
- Click and drag the playhead on the timeline to the location to edit. Right-click the playhead line, then select one of the following options to edit the cursor path:
- Add Cursor Point at Playhead: Adds another point to the path to allow for more detailed control over the cursor movement and look.
- Split Cursor Path at Playhead: Adds a new path segment and two new points to the timeline. This is useful if you want the cursor to pause at a location before continuing on its path.
- Extend Cursor Path to Playhead: Extends the path duration to the selected location and adds two new cursor points on the timeline.
Note: The Extend Cursor Path to Playhead menu option is only available if the playhead is on a cursor keyframe and there is no timeline cursor path in that location.
- If you have split cursor paths after editing, click the Smooth cursor across edits checkbox in the Properties panel to improve the cursor flow.
- Click and drag the Scale control to adjust the size of the cursor on the canvas.
- Click Finish Editing to exit cursor path editing.

Create a New Cursor Path
No need for the perfect recording! You can design your own cursor path and add cursor clicks to simulate cursor movement on any image, video, or TREC recording file.
Note: You cannot add the Cursor Path Creator effect to media recorded with Camtasia. To edit a cursor path in a Camtasia recording (TREC), see Edit a Recorded Cursor Path.
- Drag the Cursor Path Creator effect from the Cursor Effects or Visual Effects tab on to an image or video on the canvas or timeline.
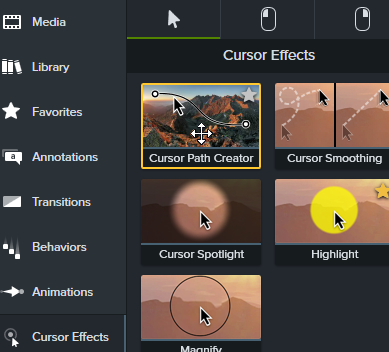
- The cursor path and points appear on the canvas and timeline. Click to select a point to edit, then complete any of the following options:
- Click and drag the playhead on the timeline to the location to edit. Right-click the playhead line, then select one of the following options to edit the cursor path:
- Add Cursor Point at Playhead: Adds another point to the cursor path to allow for more detailed control over the cursor movement and easing of the cursor path.
- Split Cursor Path at Playhead: Adds a new path segment and two new cursor points to the timeline. This is useful if you want the cursor to pause at a location before continuing on it’s path.
- Extend Cursor Path to Playhead: Extends the path duration to the selected location and adds two new cursor points on the timeline.
Note: The Extend Cursor Path to Playhead is only available if the playhead is on a cursor keyframe and there is no timeline cursor path in that location.
- If you have split cursor paths after editing, click the Smooth cursor across edits checkbox in the Properties panel to improve the cursor flow.
- Click and drag the Scale control to adjust the size of the cursor on the canvas.
- Click Finish Editing to exit cursor path editing.

Restore the Original Cursor Path
To restore the original cursor path, click Restore Path in the Properties panel.

Get Camtasia
Unleash the world’s most powerful screen recorder and video editor.
All Camtasia Tutorials






![]()