The ability to record your screen on a Windows PC can be a real lifesaver if you are trying to create a tutorial or video presentation. After all, showing is better than telling! But how do you get started? We got you!
The good news is screen recording has become easier than ever, thanks to built-in tools and powerful third-party options. Whether you’re looking to record quick how-to videos or need more advanced editing, we’ll walk you through everything you need to know.
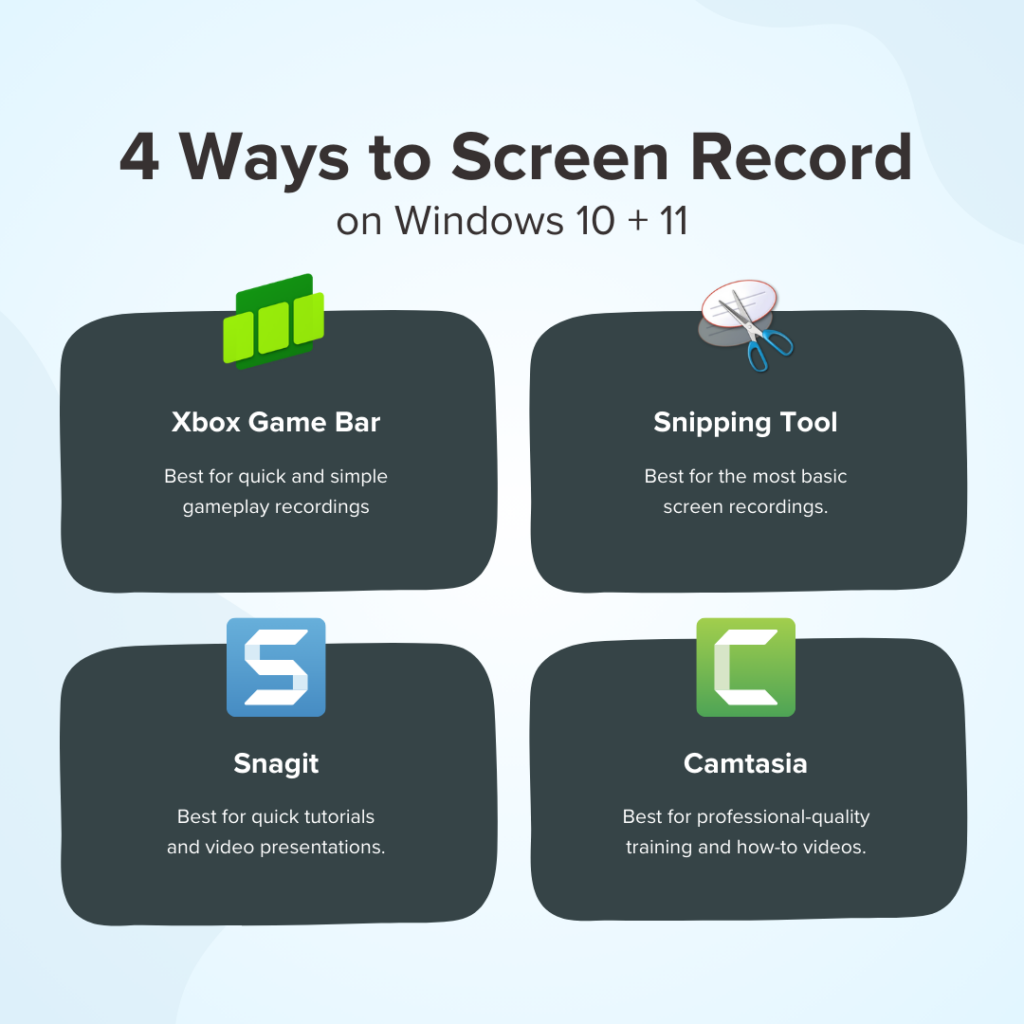
Best methods for screen recording on Windows
When it comes to recording your screen on a Windows machine, you have a couple of built-in options to start with.
Xbox Game Bar
The Xbox Game Bar is readily available on Windows 10 and Windows 11 computers. Initially designed for gamers wanting to capture their gameplay, it can be used to record anything!
Here’s how to make a Windows screen recording using the Game Bar:
Step 1: Open the Game Bar
Starting up the Game Bar is super easy. All you need to do is press the keyboard shortcut Windows logo key + G at the same time. This will open a control panel near the top of your screen.

Step 2: Choose your audio inputs
If you want to narrate or add live commentary to your screen recording, click on the Record Mic option. But remember, you can also record your audio separately and add it later if you prefer.
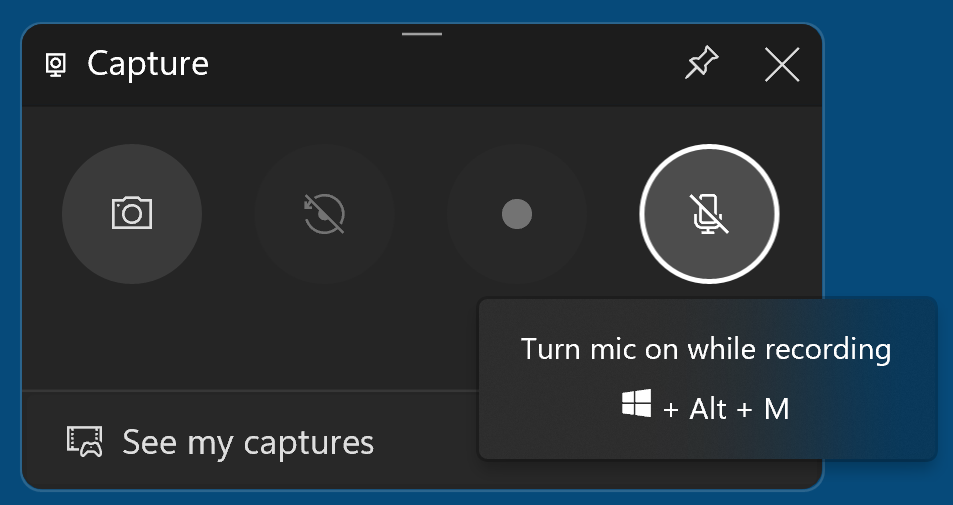
You might want to think about the equipment you’re using and whether you’ve got the best microphone for recording videos. It’s not a deal-breaker, but it can make a difference.
Step 3: Start recording
Next, start your screen recording by clicking on the bright red recording icon. Then, when you want to stop recording, click on the red recording panel that appears in the top right corner of your screen.
All screen recordings are automatically saved on your laptop as MP4 files and can be found in the videos folder.
While the Xbox Game Bar is enough for quick recordings, there are a few limitations to keep in mind:
- You can’t trim, cut, or add effects to your recordings without using separate software
- You can record the full screen or a specific window, but it lacks the flexibility to easily select a specific region of the screen
- Some users report performance slowdowns during recording
Snipping Tool
Did you know that the Snipping Tool on Windows isn’t just for screenshots anymore? The new Snipping Tool, available only on Windows 11, now offers limited screen recording capabilities.
Step 1: Open the Snipping Tool
Simply search for Snipping Tool in the Start menu search box.
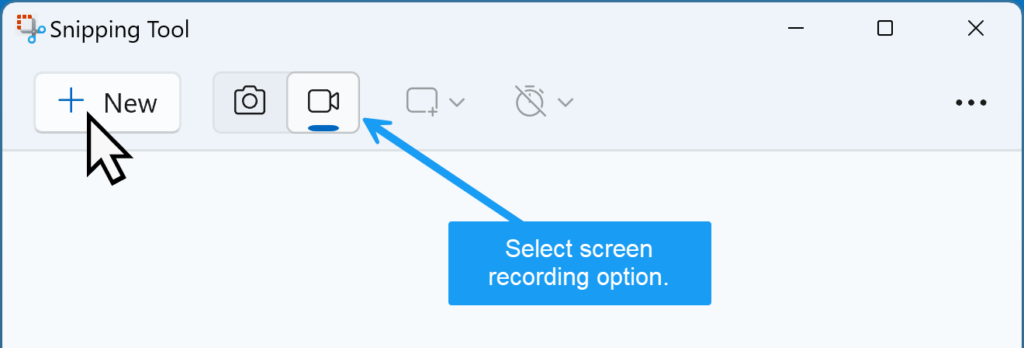
Step 2: Select what you want to record
Press the Record button, then click to draw a rectangle over the area of your screen you want to record.
Step 3: Press start
Once the area of your screen is selected, press Start. You will see a 3-second countdown begin for your recording. Once you’re done, click the Stop button. Your recording will be saved in the Videos folder by default.

This route will be ok for some basic recordings, but Snipping Tool has some screen recording limitations you should know about:
- No ability to edit video without using separate software
- The only supported file format is MP4
- There is no keyboard shortcut for recording
Other ways to record your screen on Windows
While built-in tools can get the job done for quick capture, they often fall short when you need more control, higher quality, or advanced editing options.
If you’re creating professional tutorials, presentations, or online courses, upgrading to a third-party app is going to save you a lot of time and headaches.
Snagit
When you need more than just basic screen capture and editing capabilities all in one tool, Snagit is your BFF. It’s ideal for everything from walking your co-worker through a process to more detailed tutorials and how-to videos.
Unlike built-in tools, Snagit lets you record your screen, camera, microphone, and system audio simultaneously. In this section, we’ll walk you through the step-by-step process of video recording your screen using Snagit.
Record your screen with Snagit
Snagit makes it easy to share quick updates and how-to’s by capturing exactly what’s happening on your screen.
Get Snagit
Step 1: Choose what you want to record
To start, open Snagit and select the video tab from the start menu. Make sure that Region is selected from the drop-down menu, as this will make it easy to record part or all of your screen.
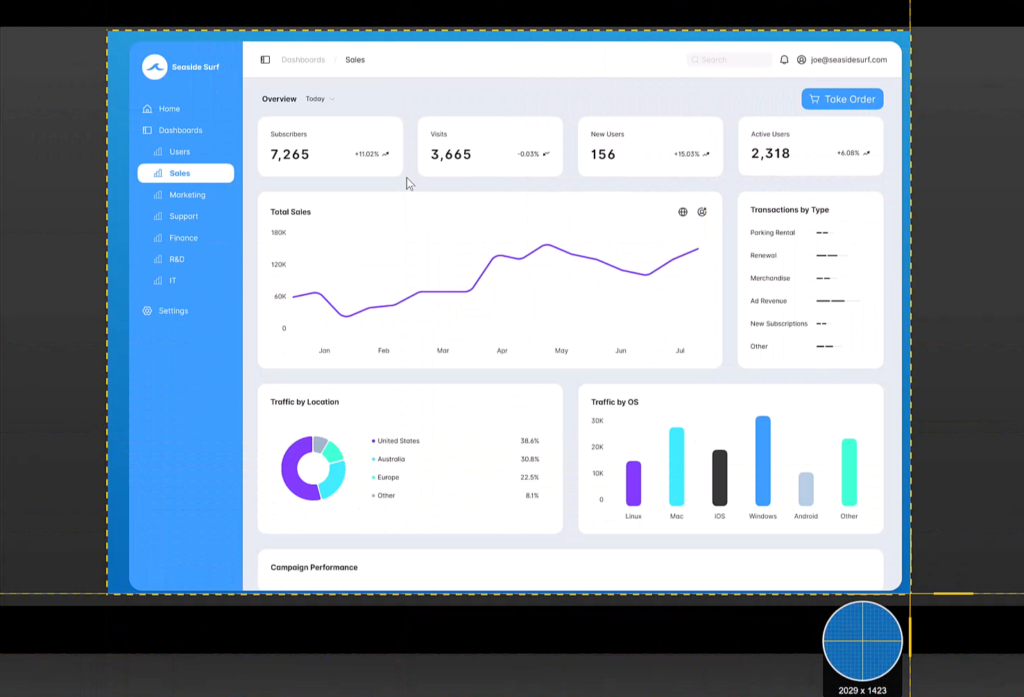
When you’re ready, hit the Capture button—you can’t miss it! The crosshairs will then appear, allowing you to select the area you want to record.

You’ll notice that the selection will automatically snap to the windows you have open. However, to manually select a portion of your screen, just click and drag the crosshairs accordingly.
Step 2: Select the elements you want to record
Unlike built-in tools, Snagit makes it easy to create more engaging screen capture recordings. Before you start recording, you can adjust the following settings to fit your needs:
- Cursor: Add a custom highlight to your cursor or an eye-catching animation to your clicks
- System audio: Include sounds that come from your computer
- Webcam: Include a webcam overlay on your screen recording
- Microphone: Record your voice while you record

Pro tip: You can create custom keyboard shortcuts in Snagit for common captures, so you don’t have to make these adjustments every time.
Step 3: Start your screen recording
Click Record. Snagit will then give you a three-second countdown, and anything that appears in the recording area will be captured in your video.
If you want to highlight a specific area of your screen, you can use the screen draw tool to add elements like arrows and step numbers while you record.
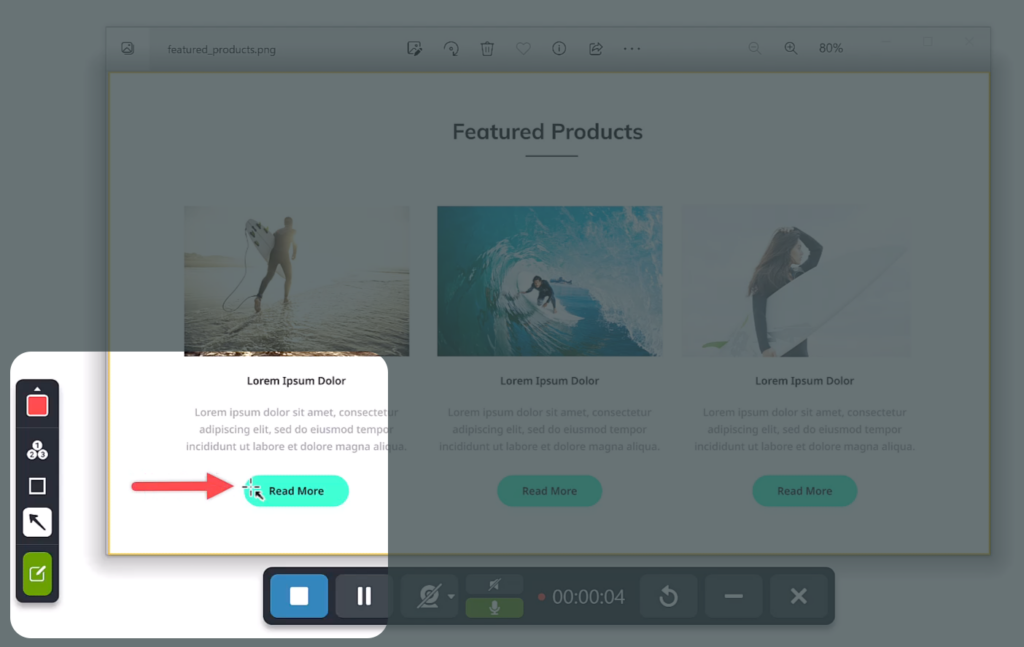
Once you’ve recorded everything that you want to be included in your video, click the Stop button in the toolbar. Your video will automatically open in the Snagit Editor.
Step 4: Trim your video
Of course, once you’re finished with your screen recording, you’ll probably want to edit it a little. Even the most carefully planned recordings will likely have something you want to cut, and with Snagit, you can easily trim your recording to remove unwanted clips.

On the other hand, to combine multiple clips or snippets and produce a longer video, you can use Snagit’s Combine Videos feature. This allows you to merge several clips together to create one cohesive video.
Step 5: Save or share
To save your video, go to File and click Save as. Then, decide where you want to save your file and click Save.
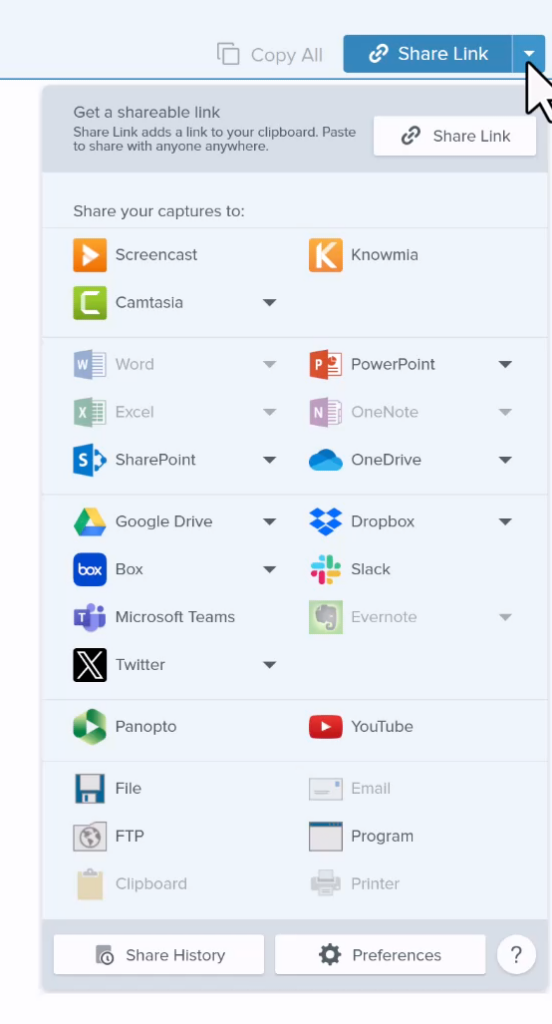
However, you can click on the Share Link button in the top-right corner of the Snagit Editor too. This will automatically upload your video to Screencast.
The link to your video will be automatically copied to your clipboard so that you can share it instantly with anyone. Simply paste the link into an email, a direct message, a Slack channel, or any other form of communication and send it!
Camtasia
Camtasia is the go-to screen recording tool for creating polished training videos, software demos, and other professional content. It uses Screentelligence to capture not only your screen but also layers of information that allow you to edit your cursor movements, remove distractions, and more.
Camtasia also offers full non-linear editing functionality with an intuitive interface, making it easy to produce high-quality videos with animations, transitions, and effects.
Take control of your screen recordings
With Camtasia you can adjust your cursor, edit your webcam footage or tweak your screen content without worrying about them being burned into the recording.
Try Camtasia FreeStep 1: Set up your recording
First, open Camtasia and click the New Recording button to open the recorder window. From there, you can make the selections for what you want to include in your recording:
- Recording area: Choose the full screen, a specific window, or a custom region.
- Camera: Include video from your computer’s built-in camera or select an external one.
- Microphone audio: Include audio from your computer’s built-in microphone or select an external one.
- System audio: Include the sounds of your computer.
- Camtasia Rev: Speed up your editing process with a selection of customizable screen and camera layouts.

Step 2: Start recording
Once you’ve configured your settings, click the Record button. You’ll see a quick countdown before your recording starts.
Step 3: Edit your video
Once you’re done recording, hit the stop button on the recorder window and drag your recording from the media bin onto the timeline.
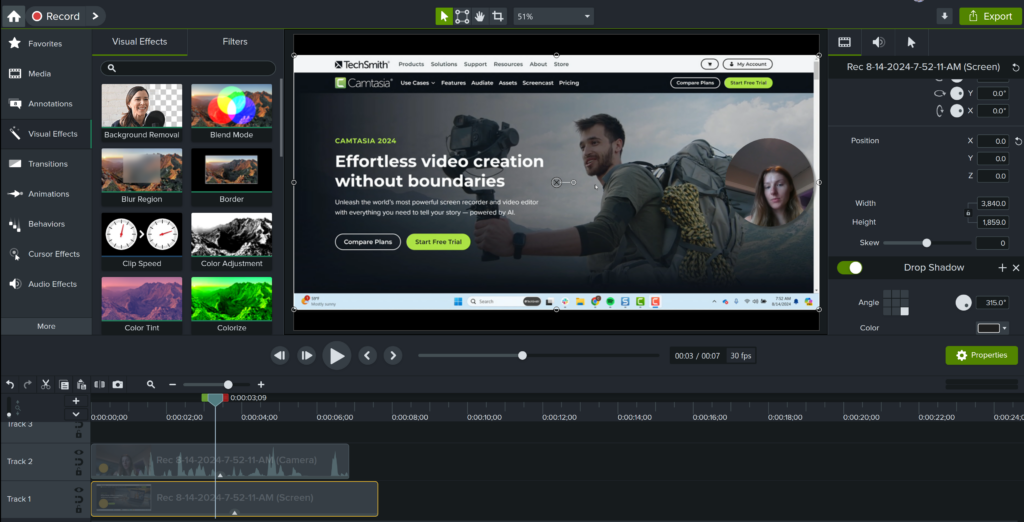
What sets Camtasia apart from other screen recorders we’ve covered is that all of the elements you include in your recording will be put on separate tracks. This means you can edit each element individually. For example, you can trim and move your webcam footage independently of the main screen recording.
You can trim unnecessary sections, add transitions, and make your video look more polished with text callouts, annotations, and animations. You can also adjust the audio levels and add background music.
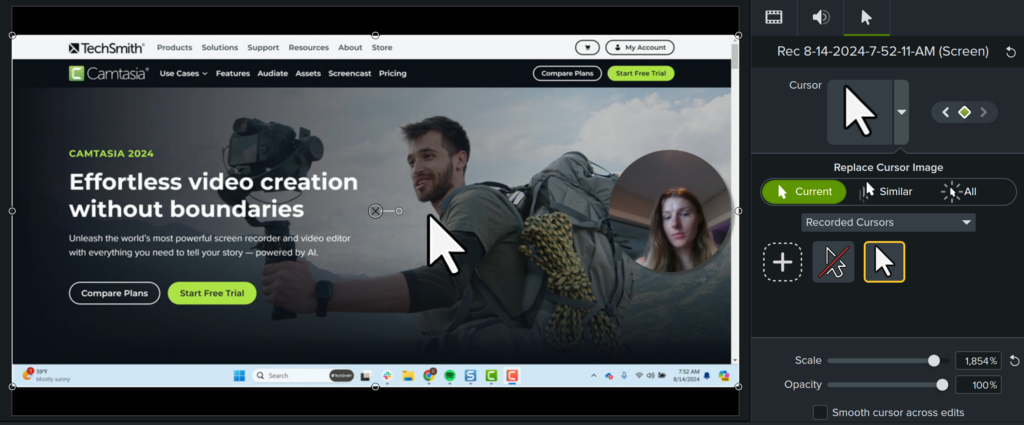
Additionally, Camtasia’s screen recorder captures an impressive amount of metadata, like cursor movements. After you record, you can resize and even change the path of your cursor within your video. These cursor effects can save you a lot of time since you won’t have to re-record when you make a mistake.
Step 4: Export and share
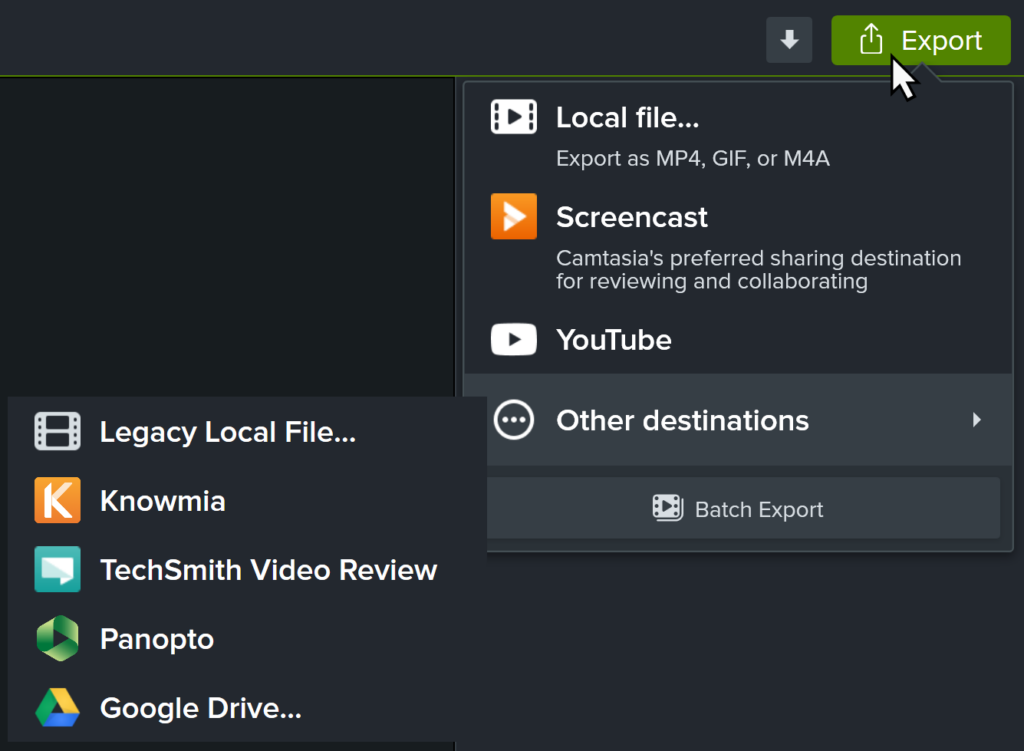
Once you’re satisfied with your video, it’s time to export. Click Export to export your video as a file or send it directly to platforms like YouTube, Google Drive, and Screencast.
Frequently asked questions
Windows 10 and 11 come with a built-in screen recorder called Xbox Game Bar. You can activate it by pressing Win + G, but it’s primarily designed for recording games and may lack advanced features.
Yes, many screen recording tools, including Xbox Game Bar and third-party apps like TechSmith’s Snagit or Camtasia, allow you to record your screen with audio. These tools offer more customization, like choosing between system audio, microphone input, or both.
The Xbox Game Bar is free to use on Windows. However, if you need advanced editing tools or higher-quality output, software like Snagit (for simple captures and edits) or Camtasia (for more advanced video creation) may be worth considering.
There is no inherent time limit for screen recording on Windows using tools like Camtasia. However, free tools or built-in features like the Xbox Game Bar may impose restrictions.
MP4 is the most commonly recommended format because it’s widely supported and provides a good balance of quality and file size. Tools like Camtasia let you save in multiple formats depending on your needs.


Share