

Adding and editing videos in PowerPoint can elevate your presentations, making them more engaging and visually dynamic. But how do you effectively edit a video in Powerpoint?
In this guide, we’ll walk you through the process of editing videos in Powerpoint. From inserting a video file to trimming and formatting, we’ll show you how to do everything using Camtasia and Snagit as your go-to tools.
Why use videos in PowerPoint?
Videos are great communication tools, but why use them in PowerPoints?
Keep your audience engaged
Videos are a great way to break up large blocks of text and keep your audience stimulated. You can find explainer videos that are perfect for presentations.
Explain complex concepts
You can use videos to explain ideas that are hard to convey through words or static images alone. After all, a picture is worth a thousand words, so imagine what a video is worth!
Professional presentations
A video in Powerpoint can add a professional touch to corporate presentations, training materials, and product demos.
How to insert a video in PowerPoint
Inserting a video in PowerPoint is easy and only takes a few steps:
Step 1: Open your presentation
First, open your existing PowerPoint presentation or create a new one.
Step 2: Go to the insert tab
Navigate to the “Insert” tab in the ribbon on the top of the PowerPoint window. Make sure you have the PowerPoint slide open where you want the video to be placed.
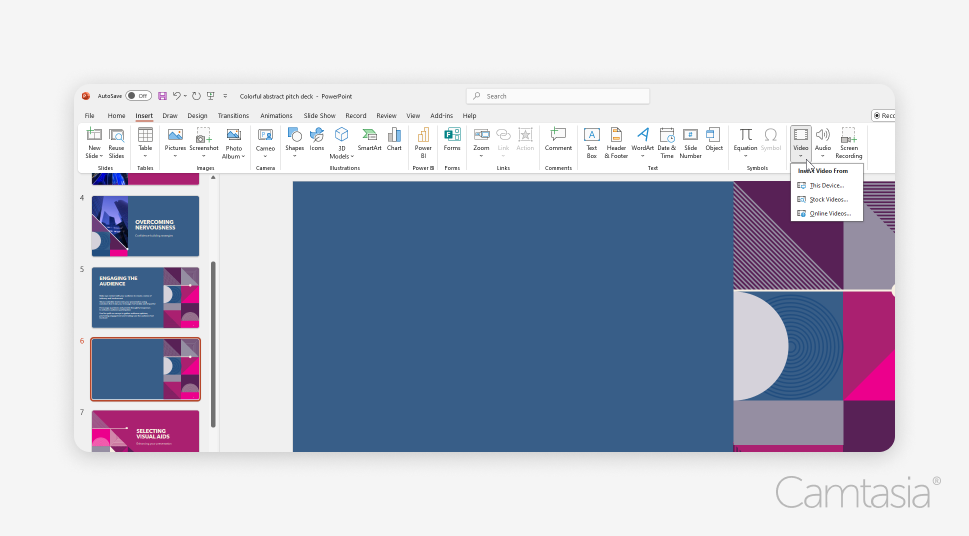
Step 3: Insert the video file
Click on the “Video” button and choose “This Device” if your video is saved locally on your computer.
Select the video file you want to insert and then click “Insert” to add it to your slide.
Step 4: Adjust video placement and size
Once the video is inserted, resize and move it to fit your slide design. There are tons of options for you to frame your video and edit it to fit your design preferences.
Basic video editing features in PowerPoint
After inserting your video, you can edit it right in PowerPoint.
Trimming your video
Select the video, click on the Video Tools Playback tab that appears. From there, choose “Trim Video” to set new start and end points for your video.
Adding playback options
You can control how your video plays during the presentation. In the Playback tab, choose whether the video should play automatically, on click, or loop.
Formatting your video
Powerpoint allows you to add borders, shadows, and other visual effects to your video. Select the video, go to the Format tab, and explore options like “Video Shape” and “Video Border” to customize.
Advanced video capture with Camtasia and Snagit
What if you need to add a video to PowerPoint, but you don’t have one, and need to create one first? Luckily, Camtasia and Snagit make it easy to record any video from quick how-tos and tutorials, to high-production instructional videos and social media content.
Snagit’s simple screen recorder
With Snagit, you can create simple screen recordings fit for any occasion.

The Screen Draw feature is a great tool for quick explainer videos or instructional videos. While you record your screen, you can highlight important information, point to certain details, and outline specific points.
Plus, Snagit lets you record your screen, webcam, microphone, and system audio. Or, choose from a combination that will let you create comprehensive videos.
With a fully-functioning free trial available, you can get started and create a video right away! Check out the full library of tutorials if you would like to review some how-to content as you’re getting set up with the program.
Camtasia’s advanced screen recorder
Think of Camtasia as Snagit’s more experienced and serious sibling.
With Camtasia’s multi-track recording powers, you can screen record your screen and edit out extremely detailed elements with ease. For example, you can enable cursor highlight or click animation so that your viewers never miss a beat – or a click.

Plus, you can resize and move around your webcam recording over your screen recording to keep your viewers engaged.

Camtasia also offers a free trial–no credit card required. Just note that videos produced in trial mode will have a watermark, but the screen recorder plus all video editing features are fully functioning during the evaluation period. You can get better acquainted with how to use the Camtasia by exploring the instructional tutorial library.
Advanced video editing
When PowerPoint’s built-in tools aren’t enough, you may need the advanced editing features that Camtasia or Snagit provide.
Editing video with Camtasia
Camtasia is a powerful tool that allows for detailed video editing before you insert it into PowerPoint.
First, you can either record your video with Camtasia or upload the file into the editor.
Second, edit your video by adding annotations, transitions, or even animations to make it more engaging.
With Camtasia you can make basic edits like splicing and reordering clips, to advanced edits like cursor smoothing and dynamic captions.
Lastly, export the editing video file and insert it into PowerPoint using the steps we mentioned earlier.
The easiest way to edit videos
Stop wasting time and discover how Camtasia Editor makes creating incredible videos easier than ever.
Free Download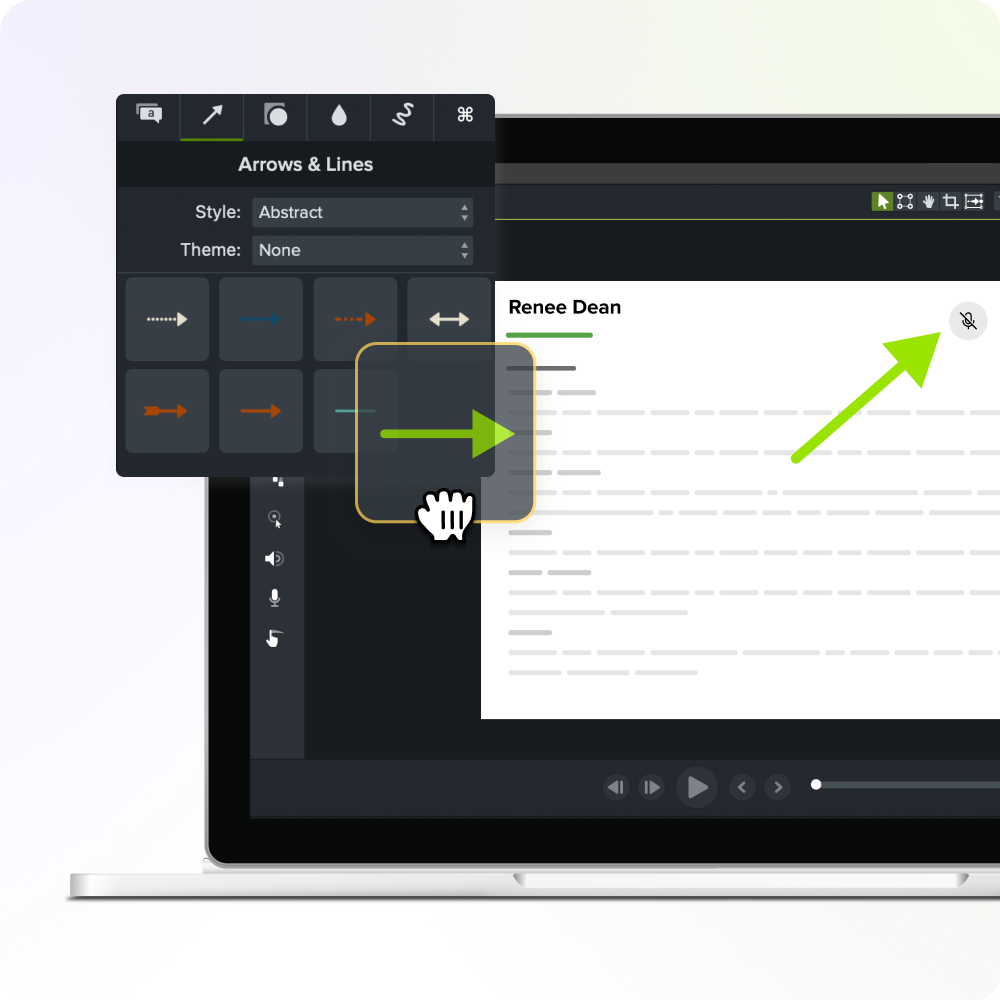
Editing video with Snagit
For videos that need minor edits and quick capture, Snagit is a great option.
First, capture your screen recording with Snagit or upload a video to the editor.
Then, use Snagit’s basic video editor to trim, annotate, or adjust the video. Then, just export the video and insert it into the PowerPoint.
Record your screen with Snagit
Snagit makes it easy to share quick updates and how-to’s by capturing exactly what’s happening on your screen.
Get Snagit
How to play videos during your PowerPoint presentation
You can adjust the way your video plays during your presentation by using the Playback tab. Choose between playing the video automatically when the slide opens, or playing it only when you click on it.
Pick the one that works best for your video needs. Usually it’s best that the video does not play automatically, since you may need to introduce it.
How to share your PowerPoint with a video
Make sure the video is embedded, not just linked. This ensures that the video will play even if you share the PowerPoint on a different computer or device.
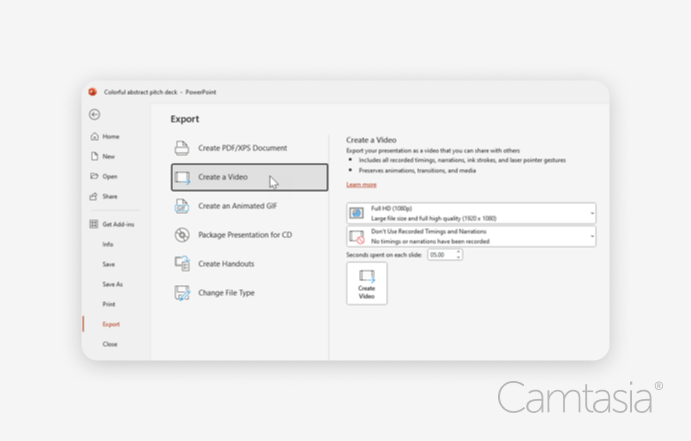
You can also export your entire PowerPoint presentation—including embedded videos—as a standalone video file. This is useful when you want to upload the presentation to YouTube or share it via email. To do this, go to File > Export > Create a Video.
Troubleshooting common issues with editing videos in PowerPoint
Sometimes, things go wrong, so let’s dive into the most common issues here:
Video not playing correctly
If your video doesn’t play during the presentation, it may be because of an unsupported file format. Convert to MP4 and try reinserting it.
Video quality issues
PowerPoint may compress videos, leading to a loss in quality. To avoid this, ensure that your video file is optimized before inserting it. Using Camtasia or Snagit to export in high quality can help.
Audio not syncing with video
Ensure the video’s audio settings in PowerPoint are correctly configured. If the issue persists, edit the video using Camtasia to adjust and sync the audio track.
And that’s it, now you know how to upload, edit, and share a video in PowerPoint.
Share