Blurring parts of your videos can be a great way to add privacy, eliminate distractions, and enhance the audience’s focus on your content. It’s also the best way to ensure you’re complying with privacy laws when showing content that includes sensitive information.
Note: If you’re trying to find out how to fix a blurry video, click here.
Why blur your videos?
There are more reasons to blur a video than simply wanting to hide someone’s identity or sensitive information. In fact, blurring can be a powerful tool in editing, offering several aesthetic and practical benefits.
Whether it’s to maintain focus, ensure privacy, or add a professional touch, being able to use the blur tool properly can transform your content, here’s how:
1. You have a busy background
It’s an easy thing to overlook, but having a busy background can detract from the primary subject of your video. However, by blurring out distracting elements, you can keep your viewers focused on what matters.
Whether it’s a cluttered room or an unorganized desktop, a blur effect helps maintain the audience’s focus on the content, ensuring your message is heard loud and clear.
Easily and quickly blur your videos!
Ready to create some professional-looking videos with blur effects?
Download Your Free Trial2. You want to hide unwanted objects
Photobombs are the worst. Whether it’s an email notification popping up while you record your screen, or someone unexpectedly appearing in your shot, your viewer’s eyes will be drawn to these distracting intruders.
However, blurring these elements allows you to keep your content professional and focused without needing to start recording all over again. It’s an easy fix for those unforeseen intrusions that can occur while filming.
3. You need to protect privacy
Protecting privacy is crucial, especially in today’s digital age. Blurring videos is key when displaying faces, license plates, emails, or other sensitive information that should be kept private.
Blurring sensitive data isn’t only the right thing to do, it could well be a legal necessity, especially if your video will be available to the public. It’s not just about protecting the person’s details — it’s about protecting yourself from a lawsuit should anything go awry.
How to blur videos with Camtasia
Step 1: Record or import your video
If you want to know how to make a video blurry, then you probably have some footage already. But if you don’t, we’ll show you how to import or record a video too.
To record a video with Camtasia’s video editing software, open the application and click the Record button. You can choose to record your microphone, computer screen, webcam, or other video source, and system audio at the same time, or individually.
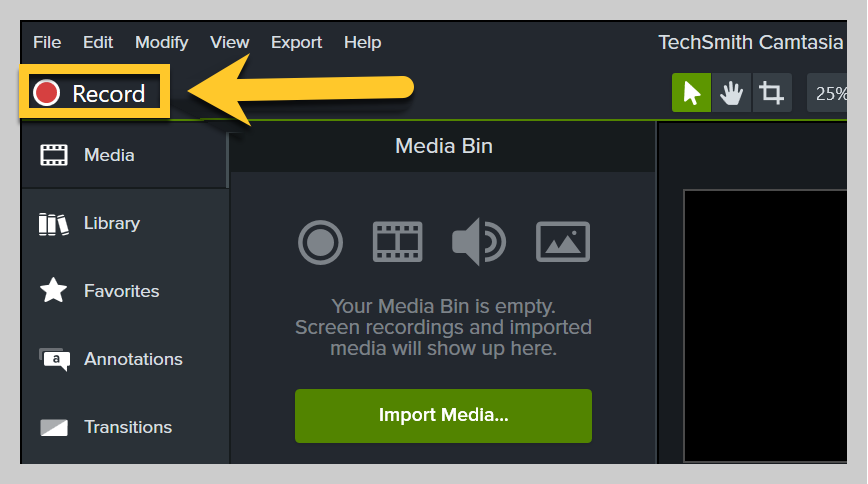
When you finish recording, click Stop, and your video will automatically appear on the Timeline, ready for editing.
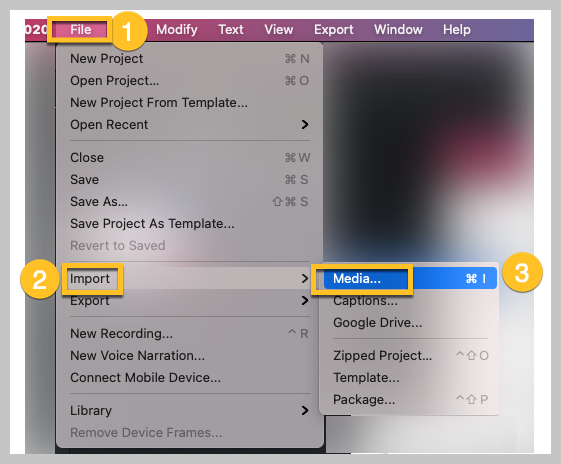
You can also import a previously created video by clicking on, File > Import > Media and selecting the video you wish to import. You can also use this method to import other assets such as images, presentation slides, and video clips.
When you have all the files you need inside the video editor, simply drag them from the Media Bin to the Timeline. We told you it’s easy!
Step 2: Add the blur effect
To blur a part of your video, click the Annotations tab and then the Blur & Highlight tab.
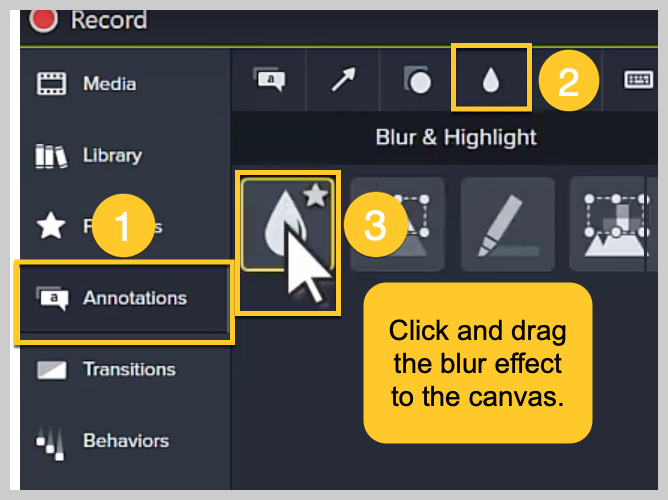
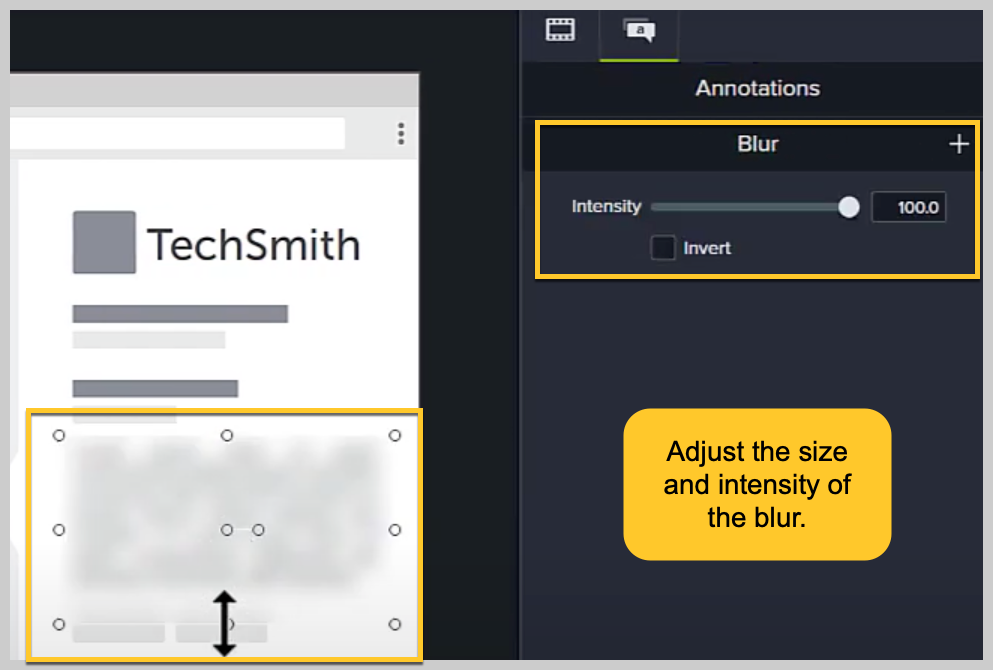
Next, drag-and-drop a blur annotation to the Canvas. From there, you can adjust the size and position of the blurred area to cover the desired section. You can also change the intensity of the blur to make it more or less blurry.
How to completely block something in a video?
If you need to completely cover a piece of information, we recommend using the Shapes feature. Simply click and drag a shape to the canvas and adjust its size and position until what you’re trying to cover is completely hidden.
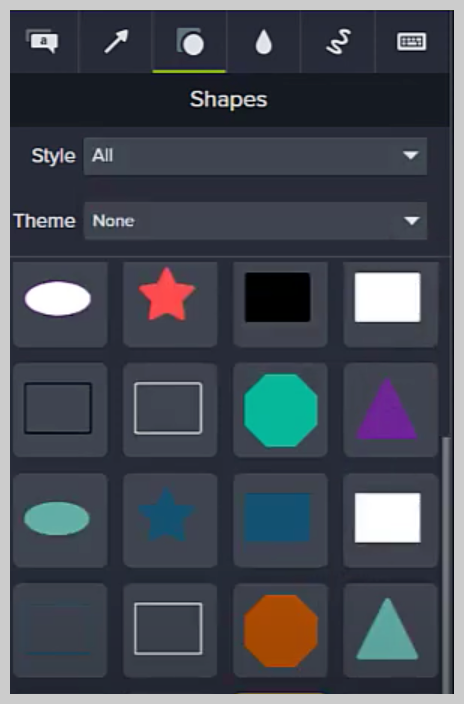
There’s a wide variety of different shapes that you can use, and you can change the color of each one to suit the style you’re looking for. For more information about Annotations, Callouts, and Titles, check out the tutorial below.
Step 3: Share your video
Once you’ve blurred all the information you need to hide, it’s time to share it with the world. Camtasia will give you the option to export your footage to a range of the most popular sharing destinations, including YouTube, Vimeo, and Screencast Classic — to name a few.
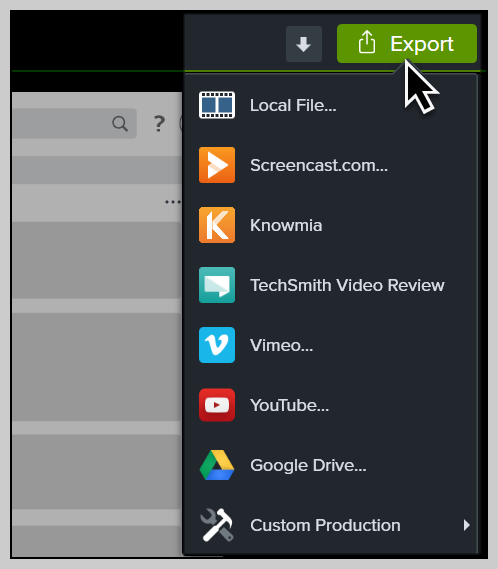
And that’s all there is to it! You now know how to blur a video like a pro! No more worries about privacy issues or viewers seeing a part of your screen that isn’t relevant.
For more tips on how to get the most out of Camtasia, be sure to check out our guides on merging videos, cropping footage, and how to make a split-screen video. Now get out there and make some secure and professional content!
The Marketer’s Ultimate Guide to Video
In our FREE ebook, we’ve put together practical strategies to get out of the woods and create engaging, powerful video content on your own that reaches your audience.
Download now!
How to blur a video, the FAQs
With Camtasia, you can easily drag a blur effect to any image in your video that you’d like to hide. You can also adjust the blur effect to cover as large or small of an area as needed.
If you’re looking to hide someone’s face, Camtasia makes it easy to click and drag either a blur or shape effect to cover the person’s image and protect their identity.


Share