

Have you ever needed to communicate an important topic and it would have been easier to show someone instead?
Taking a screenshot of what’s on your monitor is a great way to communicate and share information effectively. There are many different use cases for capturing a specific area of your screen, such as creating documentation, presentations, or providing technical support.
Snagit is an easy-to-use tool that offers enhanced screenshot capabilities beyond what the Windows snipping tool is capable of.
This blog will take you through how to take a screenshot on a single monitor, as well as add annotations, enhancements, and other basic edits.
Methods for taking a screenshot on a single monitor
Screenshots come in many forms. You can capture the entire area of your monitor, which is a full-screen screenshot.
Programs like Snagit also allow you to capture a specific window you have open. Or it can capture a screenshot showing only a specific area that you select.
It is important to choose the right type of screenshot. It saves time and helps make sure that only the most relevant information is captured. Or you can choose that all of the information is captured to help provide context to the person you’re sharing the image with.
How to take a screenshot on a single monitor
Option 1: Using built-in tools (Windows/Mac)
No matter if you are on Windows or Mac, you can use the built-in operating system tools to capture screenshots. These screenshots will capture all monitors if you have dual monitor setups.
On Windows, you can hit PrtScn on your keyboard. Then you can paste (Ctrl + V) that screenshot in Word, Paint, or in an email.
You can also use the ALT + Print Screen to screenshot your active monitor. This is always helpful when working with a dual-screen setup.
On Mac, you can hit Shift + Command + 4 to take a screenshot and then paste (Command + V) into a program of your choice.
Option 2: Taking screenshots with Snagit
If you need more flexibility in the screenshots you are taking, Snagit offers control over how you capture your screen by offering options like full screen, region, and scrolling capture.
Start by opening the program and selecting which type of image capture you’d like to take.
Next, you can configure additional options. A few of the options include whether you want to capture the cursor on the screen or apply image effects automatically.
Once you’ve configured your options, click the red capture button to take your screenshot.
The best snipping tool for Windows and Mac
Don’t let clumsy built-in tools hold you back. Take and edit screenshots with Snagit!
Get Snagit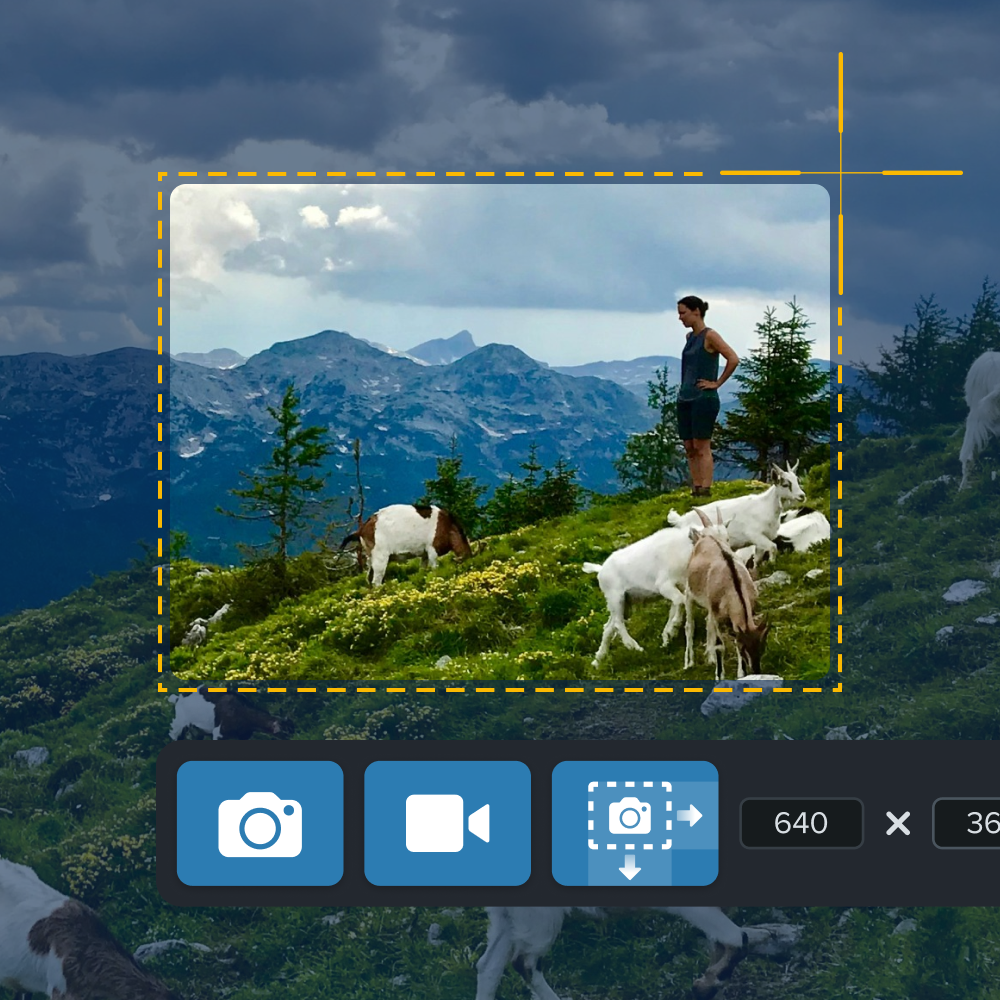
Editing and enhancing your screenshots
Once you’ve taken a screenshot with Snagit on your monitor setup, you can enhance your image by utilizing Snagit’s powerful editing tools, including annotations, callouts, arrows, and text.
One of my favorite tools to use is the blur effect. This allows me to blur out and redact sensitive information that I do not want being shared.
Using shapes and arrows can be a great way to highlight key elements. The elements draw the users attention to a specific area of the screenshot.
Why use Snagit for screenshots?
Snagit allows users to capture scrolling windows, menus, and specific regions with precision. Built-in tools are unable to capture scrolling windows. They limit the captures to what is visibly seen on the monitor.
Snagit’s editing capabilities let users enhance their screenshots without needing additional software, making it ideal for creating polished, professional-looking images.
Moving from capturing to editing your screenshot is a seamless experience in Snagit.
Snagit provides the ability to easily and quickly share screenshots through various channels (email, cloud storage, Slack).
Sharing an image with a colleague or friend can be done with a click of a button. To save your capture to your hard drive, you can click on the floppy disk icon.
Snagit also allows you to organize captured images for future use within the Snagit Library. Organizing your captures plays a large role in helping you work efficiently.
Ready to take better screenshots with Snagit?
To get started with Snagit, first download the program.
From there, you will be able to start capturing, editing, and organizing your screenshots. Having Snagit as your screen capture tool will help you communicate more effectively.
To really get a head start on becoming a Snagit expert, be sure to check out all of our quick tutorials. Free webinars are also available that help you get started with Snagit or learn new tips and tricks.
FAQ about taking screenshots on a single monitor
Yes, you can capture an entire webpage on a single monitor by utilizing Snagit’s scrolling capture feature.
With your screen capture in the Snagit Editor, select an annotation tool from the top of the Snagit Editor. You can choose from arrows, text, shapes, callouts, stamps, or more options.
Snagit is the perfect tool for capturing, editing, and sharing screenshots easily. After capturing your screenshot, you can quickly make any edits and share your screenshot to any number of destinations.
Annotate and edit screenshots with Snagit
Professional mark-up tools and powerful features make it easy to create helpful images.
Try it Free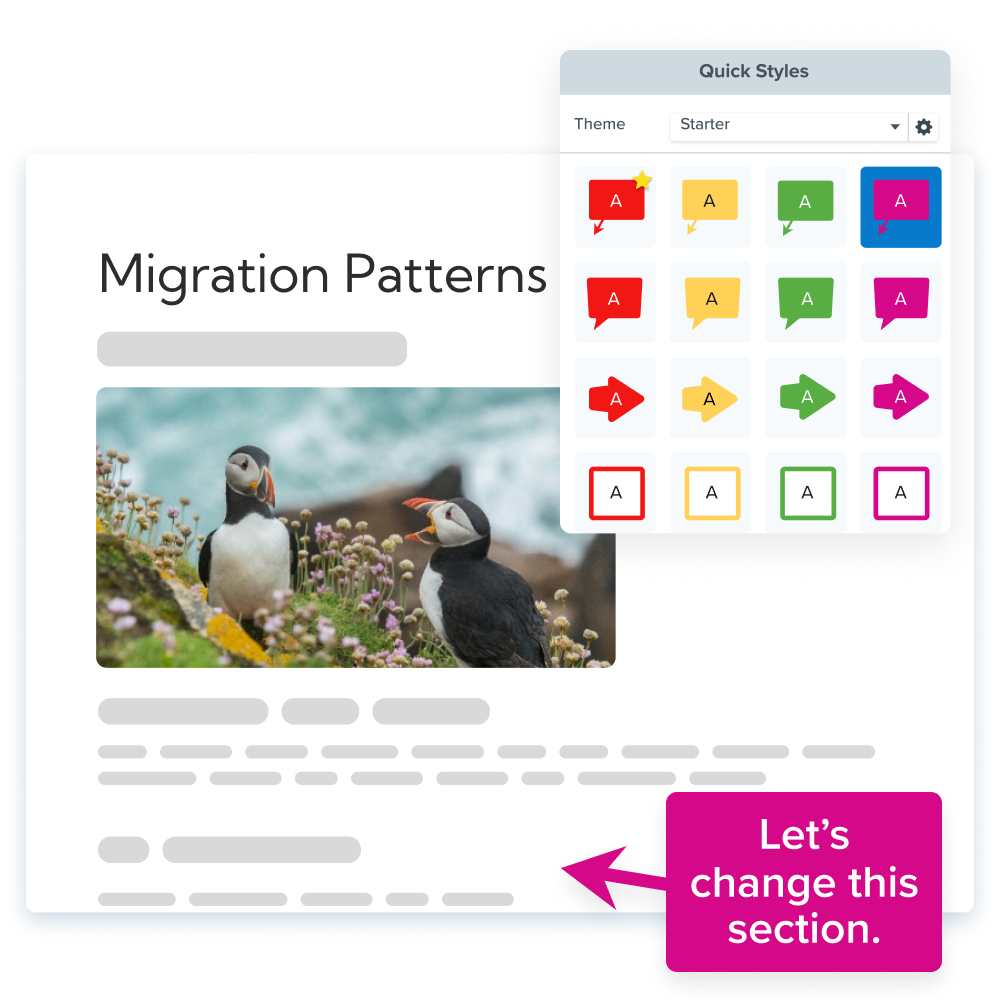
Share