

Do you remember your high school teacher expecting you to “show your work” when solving a problem? While we rolled our teenage eyes at the teacher back then, we never realized that visual communication would be a practical benefit in our adult lives.
Visual content improves our daily communication skills by making content easy to digest, whether we are creating peer-to-peer instructions or a presentation for a larger audience.
Grabbing that dropdown or pop-up menu can be a hassle, but there are a few tricks for effectively capturing the dropdown menu content.
Why it’s hard to screenshot dropdown menus
The only thing more frustrating than explaining a complicated process is struggling to capture a screenshot of the menus in the complicated process.
Modern computer operating systems now have built-in screenshot programs to help grab a visual of your steps, but those screenshot applications are not always user-friendly for the menus requiring mouse cursor contact.
Windows screenshots
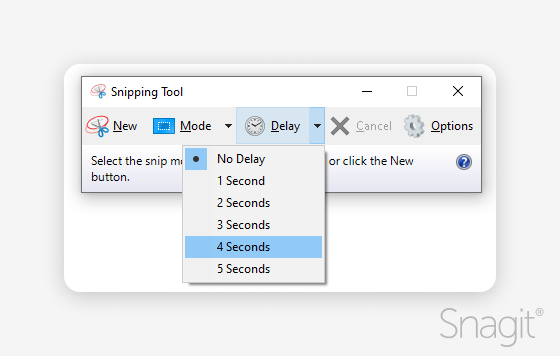
Windows Snipping Tool can get the job done, but its lack of functionality can be disappointing.
When you need to capture a dropdown menu, how can you get that capture if you are pressing the capture button?
To capture dropdown menus or areas that aren’t visible on the screen, you need to start the capture using your mouse cursor or a keyboard shortcut.
With the Snipping Tool, you can also set up a delay capture. The delay provides time to open the area you want to capture. The delay can be used with capturing a region or the entire screen.
However, these are the extent of the customizations, and the app is otherwise limited.
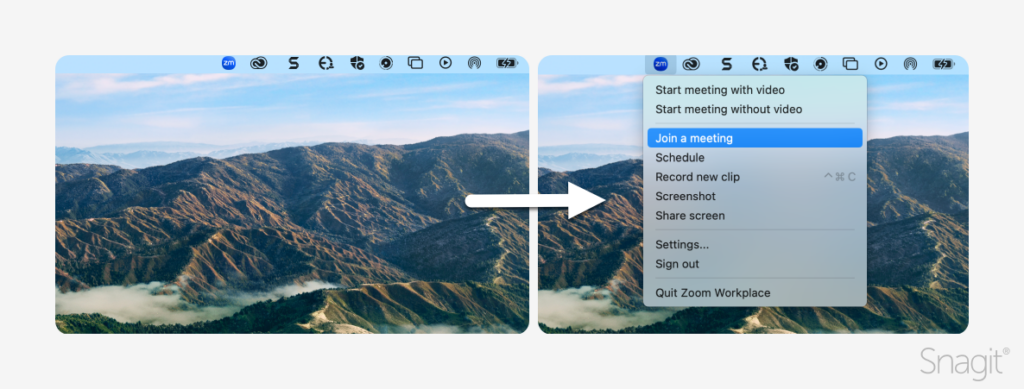
MacOS screenshots
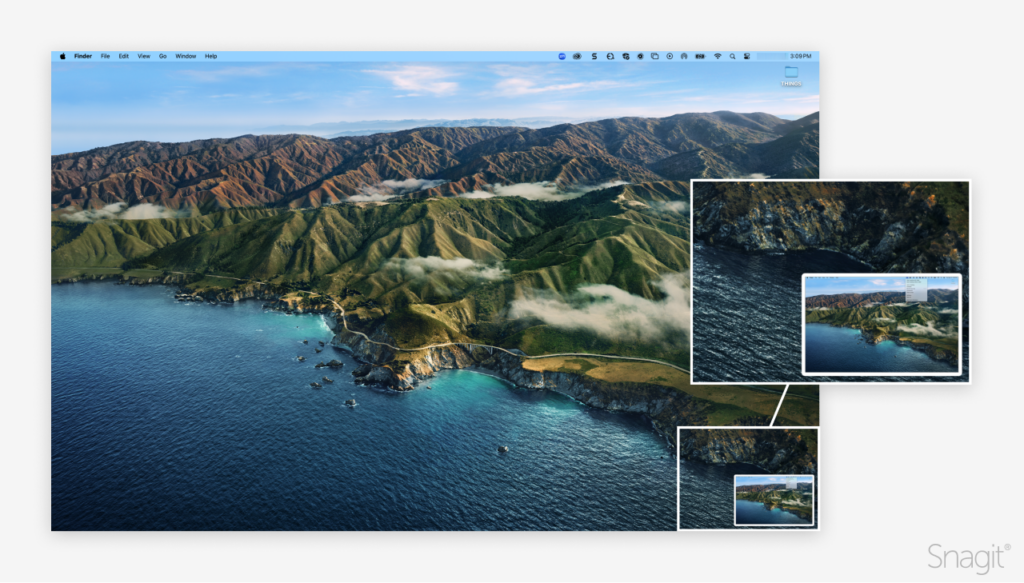
Apple also has a built-in screen capture in the macOS environment. Use hotkeys to start the capture. Pressing and holding Command + Shift + 3 will take a full-screen capture, or Command + Shift + 4 will capture part of the screen.
Extra steps are needed to modify or crop captures.
You’ll need to open the drop-down menu, press the hotkey to take the screenshot, and then open the screenshot for editing.
The editing tools are similar to the screenshot editing tools found on the iOS platform, making this application familiar for iOS users, though not always intuitive.
If the built-in apps are not meeting your needs, TechSmith Snagit may be the solution you’re looking for!
Try out a no-obligation free trial today for a hassle-free screen capture tool to create dynamic screenshots, easy-to-follow step-by-step instructions, or engaging content for your audience.
How to screenshot a dropdown menu using Snagit
Step 1: Set up Snagit
Install Snagit on a Windows or a macOS device and follow the steps to create an account or sign in with your TechSmith account.
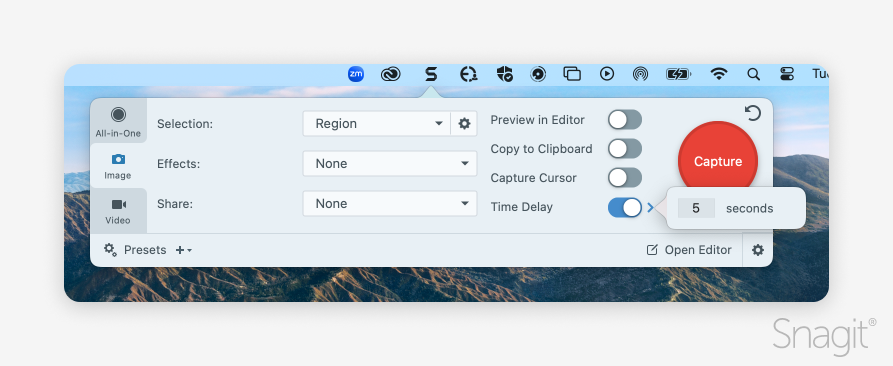
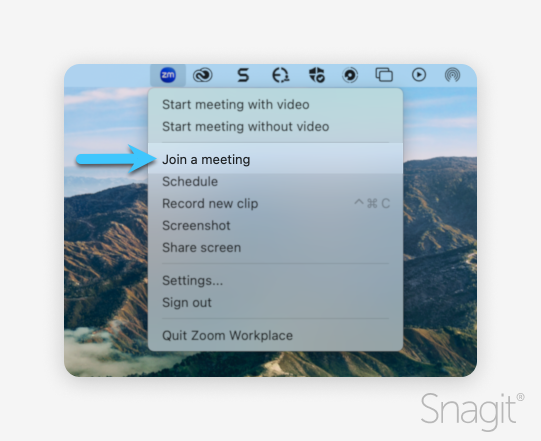
Step 2: Use Snagit’s hotkeys to capture the menu
Take a moment to learn the Snagit Capture Menu and utilize the default hotkeys to engage the capture. Once you are ready, expand your dropdown menu and hit the hotkey. Windows uses Print Screen (PrtSc) and macOS uses Control+Shift+C.
Step 3: Annotate and edit your screenshot
Once the capture is taken, the screenshot of your dropdown menu will open in the Snagit Editor. Snagit offers a rich editing experience to enhance screen captures with a variety of tools.
Step 4: Save or share your screenshot
When it is time to send the screenshot out, Snagit supports several platforms for managing or exporting the image, including email, cloud locations, or Screencast. The Share Link menu provides several output options, or you can simply copy and paste the final image.
Why Snagit is the best tool for capturing dropdown menus
When you need a screenshot of a dropdown menu, Snagit is the everyday tool you never knew you needed.
Screen captures, edits, and sharing content are easy and save time. The program’s many options give you a ‘one-stop shop’ for images and screenshots. Snagit is compatible with Windows and macOS and efficiently integrates with the operating systems for custom hotkeys and capture presets.
Unlike the built-in screen capture applications, Snagit can take your instructional screen captures a step further with scrolling capture, video recording, easy-to-use templates, and the ability to convert still images to videos.
The best snipping tool for Windows and Mac
Don’t let clumsy built-in tools hold you back. Take and edit screenshots with Snagit!
Get Snagit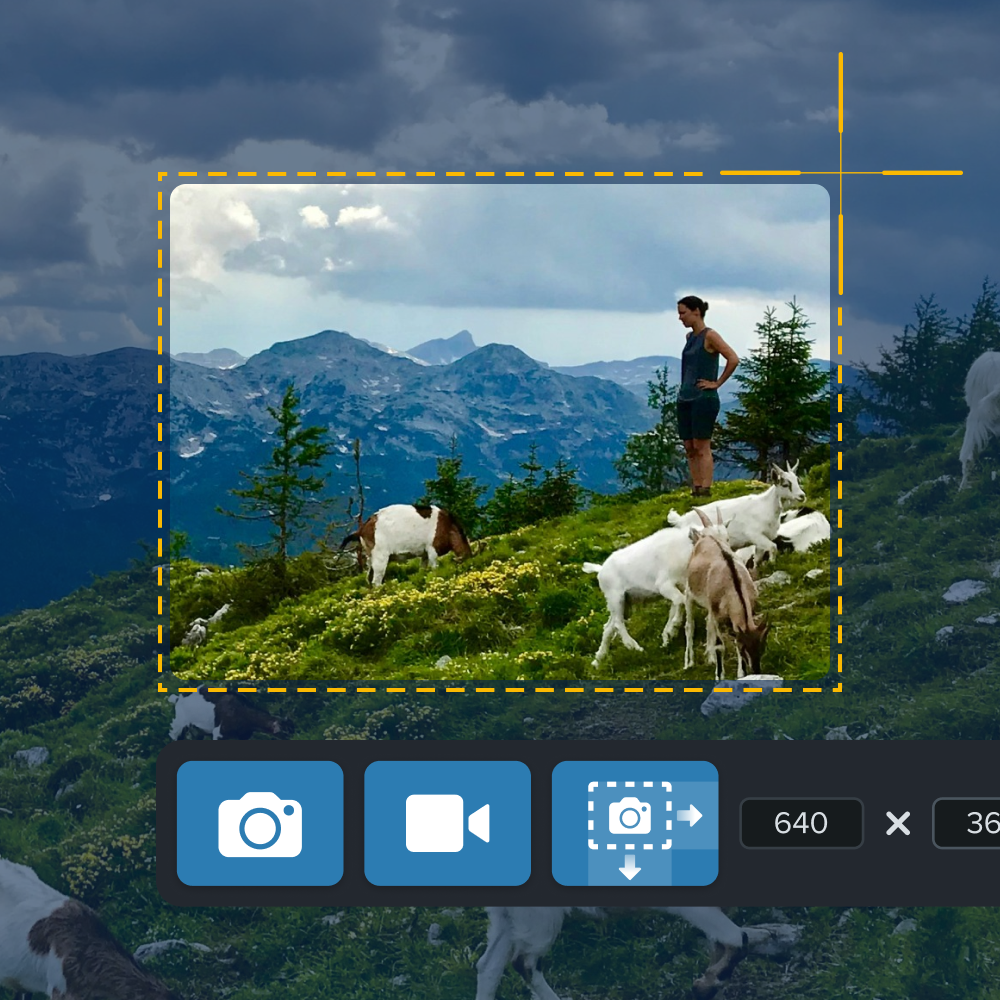
Share