Trying to figure out how to screen record on Mac? Look no further!
In this guide, we’ll dive into how to create basic screen recordings using built-in tools like the QuickTime player. But, we’ll also show you how to record a video on Mac using third-party options.
For Windows users, we’ve also got a guide on how to screen record on a Windows PC.
Record your screen with Snagit
Snagit makes it easy to share quick updates and how-to’s by capturing exactly what’s happening on your screen.
Get Snagit
Recording on Mac with built-in tools
When screen recording on your Mac, Apple’s built-in tools offer straightforward solutions that are good enough for basic recording needs.
In this section, we’ll show you how to record your Mac screen with Apple’s screenshot toolbar and QuickTime player and discuss some of the pros and cons of each.
With the Screenshot toolbar
If your Apple computer is running the macOS Mojave (or later) then you can use the Screenshot Toolbar for screen recording on a Mac.
- First off, push the following buttons on your keyboard, at the same time: Shift + Command + 5. This will open the Screenshot Toolbar.
- With the Screenshot Toolbar open, you’ll see several icons, which you can hover over for information about each one.
For now, just focus on the icons that are on the left of the toolbar. One will let you record your entire screen while the other will let you record a specific part of it.
- For a partial screen recording, just drag and choose your area, and hit Record.
- Click the Stop icon in your menu bar when finished.
This tool has editing features, like cutting and trimming the screen recording, but they are limited compared to third-party options like Snagit.
The built-in QuickTime Player
For computers running an OS earlier than Mojave, you can create a screen recording on a Mac with QuickTime player.
- Start by opening QuickTime Player. Navigate to File in the Menu Bar and click New Screen Recording.
- Next to the Record button, there’s an arrow. Click it to select your audio input source. Hit the Record button to start recording.
- To record your entire screen, just click anywhere. If you only want to capture a part of it, drag your cursor to define the area and click Start Recording.
- To stop, you can click the Stop button in the Menu Bar, or press the Command + Control + Escape keys simultaneously.
The only real difference between QuickTime Player and the Screenshot Toolbar is that QuickTime is compatible with older macOS versions.
Recording on Mac with dedicated software
With Snagit – for easy screen recording
If you’re looking for a dedicated screen recorder, Snagit stands out as a user-friendly option. It creates clear, informative, and informal screen recordings that still have a polished look.
Snagit combines the ease of screen capturing with the most essential editing tools, including basic trimming and cutting. This is ideal for quick tutorials or walk-throughs where speed and clarity are key, but excessive editing isn’t required.
Step 1: Choose what you want to record
First, open Snagit, and select the video tab from the Capture Window. Make sure that Region is selected from the Selection drop-down menu.
Next, hit the Capture icon. This will make Snagit’s crosshairs appear on your screen, which you can use to select the part of your screen that you want to record.
The selection will automatically snap to the windows you have open. To manually select a region, just click anywhere on the screen and drag the crosshairs.
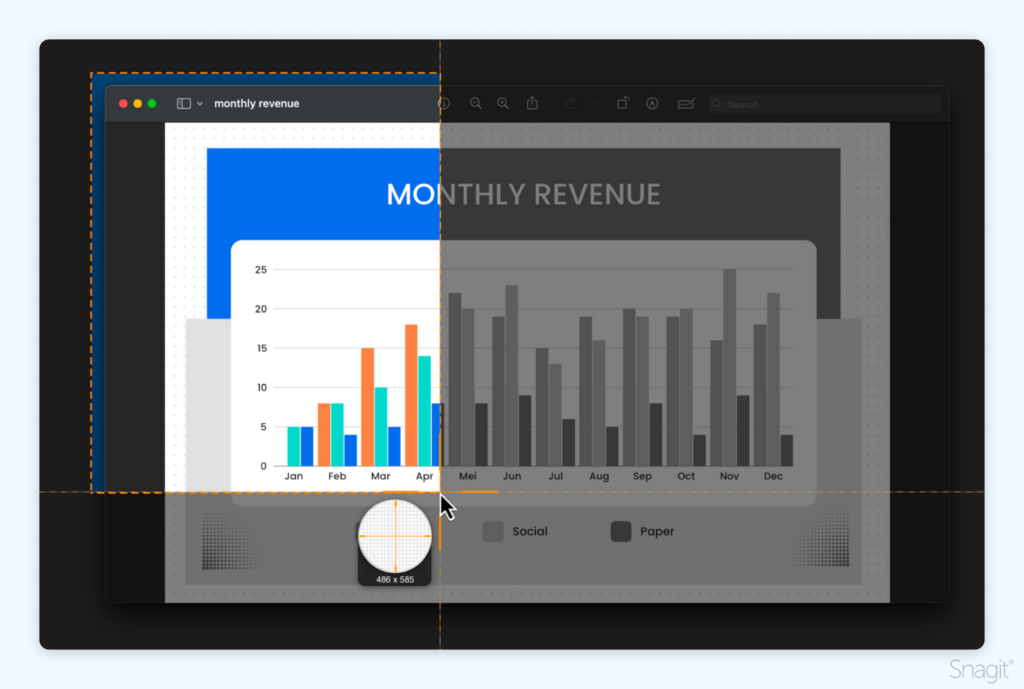
Step 2: Choose audio to record
Additionally, let’s cover how to screen record on Mac with audio. Snagit will let you further enhance your videos by letting you record a microphone, as well as your screen.
If you’re looking to add a personal touch by recording a voiceover, simply select the Record Microphone option.
To record the sounds that come from your computer, like notifications, make sure to select Record System Audio as well.
Step 3: Annotate and animate while recording
To add even more detail to your screen recordings, you can use Snagit’s Screen Draw feature, which allows you to annotate and animate directly on your screen while recording. This tool is perfect for highlighting areas or demonstrating steps in real-time, making your content more engaging and easier to understand.
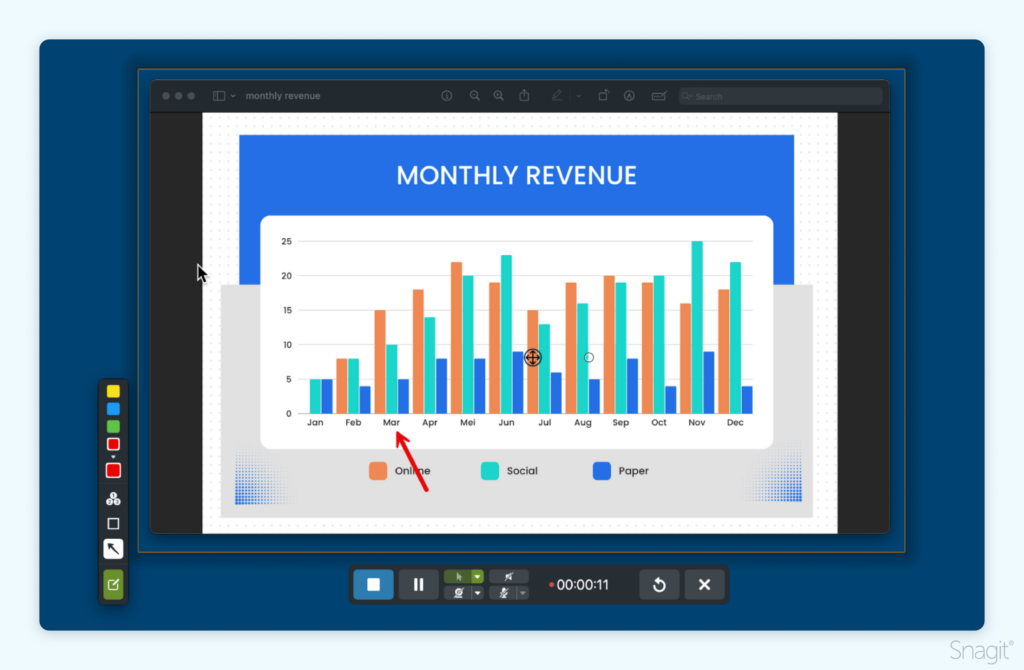
To use the Screen Draw feature, first ensure the Screen Draw option is enabled. Then, when you start recording, select your desired tool from the Draw Toolbar and draw arrows or shapes by clicking and dragging your mouse.
You can also highlight your cursor and add click animations to your videos to draw attention clearly.

Step 4: Start your screen recording
- When you’re ready, click the Record button and Snagit will give you a three-second countdown before filming. After that, anything that shows in the chosen recording area will be captured.
- For your viewers to see your face while you’re recording, click the webcam icon on the Recording toolbar to turn webcam recording on or off.
- To stop recording, click the Stop button and Snagit will open the recording in the Snagit Editor, where you can edit and share your video.

Step 5: Trim your video
Once you’ve completed your recording, your video will open in the Snagit Editor, ready for reviewing, editing, and sharing. You don’t have to wait for your footage to render either, as your video will be ready immediately.
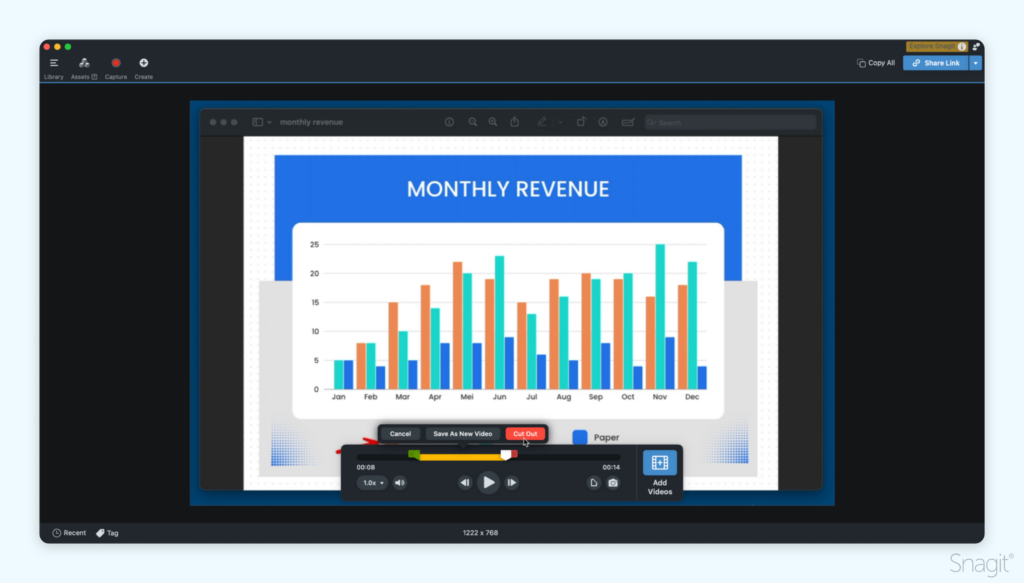
If you find mistakes or parts you want to remove, make a selection with the playhead, and click cut.
Snagit’s simplicity and efficiency make it perfect for Mac users wanting to record their screen, especially when you need a quick, polished result without a steep learning curve.
Step 6: Save or share
When you’re finished with your video, click Share, and choose the destination that’s best for you. If you’re not sure what to choose, we recommend Screencast.
Screencast gives you an easily shareable link that you can paste into an email, Slack channel, or any other communication platform. Plus, it’s free — and the person you’re sending it to doesn’t need to have Snagit to watch your video!
The best snipping tool for Windows and Mac
Don’t let clumsy built-in tools hold you back. Take and edit screenshots with Snagit!
Get Snagit
With Camtasia – for professional recordings
When your project calls for high-quality, professionally edited screen recordings on Mac, Camtasia should be one of your top choices.
Whether you’re recording a live stream, or creating a video presentation, Camtasia has hundreds of editing features to give your videos a more polished look and feel. But don’t worry, despite being full of advanced editing tools, Camtasia’s intuitive interface has been designed with beginners in mind.
That means the more complex features are there when you need them, without making the interface more complicated than it needs to be. In fact, most actions are a simple drag-and-drop away, making it accessible to everyone!
Now let’s look at how to record your screen on a Mac with Camtasia.
Step 1: Choose your recording options
To start, open Camtasia and click the Record button in the Tools Panel. This will open the Camtasia Recorder. This is essentially the control center for your screen and audio recordings and will be automatically set to capture everything that happens on your screen.
Step 2: Select what you want to record
Start by selecting the part of your screen that you want to record.
In some cases, it might make sense to record your entire desktop, in others you might want to capture a specific window, or even a small portion of it.
Remember, if you’re doing a full-screen recording you might want to clean up your desktop and turn off your notifications to make sure nothing is distracting or unwanted in your video.
Step 3: Record your audio
Camtasia is the perfect choice when you need to know how to record screen and audio on Mac at the same time.
If you plan to narrate your recording, writing a script (or at least some talking points) is a good way to make sure you stay on track and cover all the essential information.
When you’re ready to record, select which microphone you want to record from and decide whether you to record your Mac’s system audio at the same time
Step 4: Edit your video
Camtasia comes with a built-in video editor, and it only takes a few short steps and little editing know-how to get a professional and polished look for your video.
To start, cut out mistakes by selecting them with the Playhead, and clicking Cut. To trim extra footage from the ends of your recording, simply drag the end of the clip in.
Once you’ve got your footage all sorted, you can work on adding additional effects.
Your all-in-one screen recorder and video editor
Camtasia’s intuitive interface and drag-and-drop features help anyone create professional-quality video.
Download Free TrialStep 5: Produce and share
The final step is to export and share your video to the hosting platform of your choice. With Camtasia, you can easily share your video to a platform like YouTube, Vimeo, or Screencast, or save the video file locally on your Mac.
Learning how to screen record on Mac is easy, and now you have comprehensive options to choose from!


Share