Are you struggling with choppy video playback while editing high-resolution videos? You’re not alone. Few things can be more tedious and time-consuming than constantly waiting for your video editor to become unstuck so you can continue editing your content. Fortunately, proxy videos can help alleviate issues surrounding video editing performance.
Proxy files are lightweight, low-resolution copies of your original video designed to help improve the editing experience in your chosen video editor.
Because of their smaller file size, you can edit these proxy videos with fewer hiccups than you might with your larger, high-resolution original recordings.
This guide will give you a greater understanding of proxy videos, including when to use them, how to create them, and some of the considerations to remember when working with them.
What is a proxy video?
Proxy videos improve editing performance because they are low-resolution and lighter copies of your original media; these less cumbersome files should be more suited to an editing environment than the original raw files.
Proxy files are often substitutes for high-resolution files from DSLR cameras, smartphones, and digital cameras, or screen recordings and other video files greater than 1920×1080 (including 2K and 4K videos).
Most video editing software has predetermined settings that ensure your media is the most efficient. This, in turn, will help ensure you don’t suffer from choppy or sluggish editing.
It’s important to note that proxy video files are typically specific to both the editor you’re using and the project it’s associated with.
Some video editing software will have proxy videos that stay with and follow the original media; this means you can load the raw files into a new project and shouldn’t need to go through the steps to proxy your video. TechSmith Camtasia allows you to use the same proxy media in multiple projects (so long as you don’t empty your Proxy Videos folder).
Why use proxy videos?
Proxy files being lower in resolution than the original files help ensure the smoothest editing experience in your video editor by temporarily sacrificing quality for speed.
Heavy video files, such as those from digital camcorders, DSLRs, HDR-enabled media, and 4K media, to name a few, aren’t well-suited to editing on their own, and that’s where proxy videos come into play.
Even media files loaded from cloud and/or network locations, while not recommended when you’re actively editing, are subject to being proxied (which means a duplicate version is created). In doing so, the performance will be improved while editing files from those locations.
Once your media has been proxied, most editors with proxy video features will temporarily substitute the proxy file for the original media, and your editing should be smoother.
With a smoother editing experience, you’ll be able to be a more efficient editor. You’ll spend more time editing and less time waiting on your computer while it works with the heavier video files.
What are some downsides to using proxied videos?
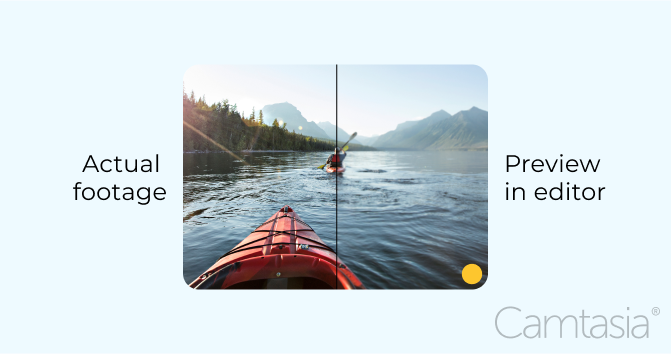
The benefits of proxied media outweigh the negatives, but there are a few things to keep in mind. A proxy video may appear blurry in your editor’s preview window, making it difficult to discern fine details.

Reading text is another example of something that may become difficult with proxied videos. In addition, you may not be able to see fine details on a person’s face, see colors as vibrant as the raw files, or, in some cases, the motion could become slightly blurred due to the lower resolution of the proxied video.
Additionally, proxy files take up a small amount of hard drive space. This can be a concern when using proxy files on systems with small primary hard drives or with projects stored in external locations. Because of this, most video editing software can manage the size of the Proxy Videos folder. Even though files are relatively small compared to the original videos, proxy files can still take up space, so space should be considered.
How do I know if my media has been proxied?
The telltale sign that your media has been proxied will most notably be seen in the preview window.
The heavier, more complex original media will be transcoded into a smaller, lower-resolution video that is far easier for most editors to work with. The tradeoff for the speed and efficiency of a proxy video is a temporary drop in visual quality.
It’s important to remember that proxied files are only low-resolution in your editor and should not affect the overall quality of your finalized video.
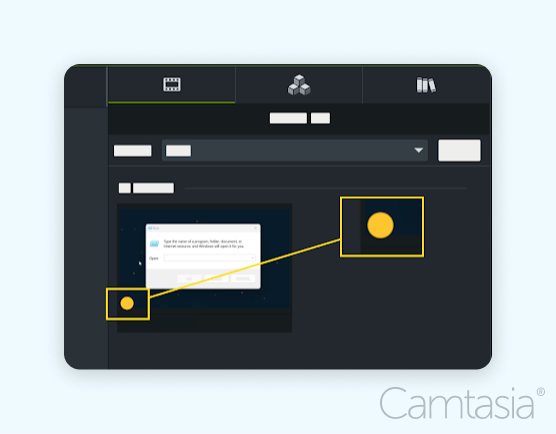
Some editors, such as TechSmith’s Camtasia, have an indicator icon on the video thumbnail. In Camtasia, a yellow dot is in the bottom right corner of your media’s thumbnail in the Media bin. This helps you quickly identify whether there is a problem with your source files or if it’s simply the side effect of being a proxy video.

How do I create a proxy video?
The creation of proxy videos will depend greatly on your chosen editing application.
Some editors, such as Adobe’s Premiere Pro, can create proxy files when you load them into your project. As soon as you import your media into the project, Adobe will start transcoding the original media into the lighter-weight proxy media format.
TechSmith’s Camtasia is similar in that it will detect whether your original media is high resolution, such as 2K, 4K. The process also begins whether it is a heavy video codec such as AVCHD or HEVC, or if it’s stored in a location that’s not recommended to edit from, such as external hard drives or cloud storage.
This method is called “ingesting” or “autoproxy” and can be helpful in streamlining the editing process. There are other methods of creating proxy files, though most will be unique to your preferred video editor.
Some tools, like Apple’s Final Cut Pro and TechSmith Camtasia, have right-click menu options that allow you to quickly select the option to create (or delete) a proxy file if one wasn’t already created.
The easiest way to edit videos
Stop wasting time and discover how Camtasia Editor makes creating incredible videos easier than ever.
Free Download
FAQs
The only types of files you might consider proxying are video files (such as the MP4 and MOV extensions).
Proxy files are typically unique or specific to the project with an editor; for example, TechSmith’s Camtasia proxy files are stored locally in a hidden system folder. They are not part of the project and can only be utilized properly within Camtasia.
Advanced Tip: Some editors may allow you to edit with a placeholder instead of the original media; if your editor supports this method, you can use a third-party utility like Handbrake to manually transcode a lighter, easier-to-work-with file and use that in place of your raw files.
No, it should not. Video editing software that uses proxy videos will do so only in the context of editing. Once you have finished editing and are ready to produce/render your final video, the software will use the original raw files instead of the proxy videos.
Advanced Tip: After you have produced your final version of your video and you no longer need to make changes to your project, you may want to delete the proxy file(s).
The video in the project’s preview window should then appear crisp, clean, and without any blurring; this should be a near-identical approximation of the quality you should receive in your final video (though results may vary depending on your production settings).
Proxy videos make your video editing experience smoother and less prone to performance issues. Proxy files are beneficial for projects containing high-resolution videos (such as 2K, 4K, and 8k resolutions), HDR-enabled videos, DSLR and smartphone movies, or large screen recordings. They are created by importing large videos into a project or created through options found in your video editing tool.
Finally, proxy files have a few inherent elements that may trip unsuspecting editors up: They are blurrier than the original media and take up additional space on the hard drive.


Share