Need to quickly capture a video of your screen? If you’re on a Mac, then you’re in luck.
QuickTime is Apple’s built-in screen recording tool for Mac users, designed for capturing tutorials, presentations, and meetings with ease.
While it’s straightforward, new users often find it confusing, particularly when it comes time to stop the recording. The lack of clear controls can lead to frustration, especially if you’re not familiar with the menu bar options. Understanding how to navigate QuickTime can help streamline the recording process and make it more enjoyable.
In this guide, we will break down the entire process of recording a video using the app.
Step-by-step guide: How to stop QuickTime screen recording
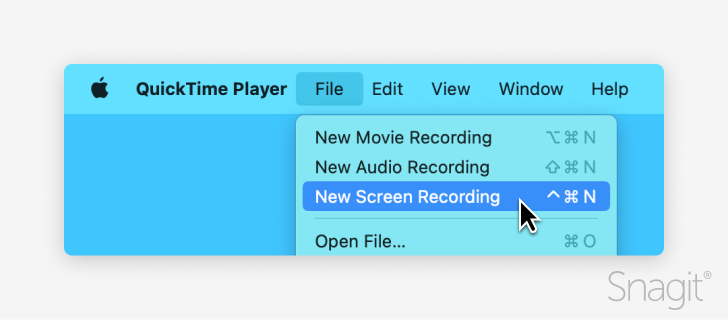
Step 1: Start a QuickTime screen recording on Mac with File: New Screen Recording
First, select QuickTime Player from your Applications folder or the dock. Once you open QuickTime Player, start by clicking on “File” in the top menu. Then, select “New Screen Recording” from the drop-down menu to start a new recording in QuickTime. From there, you can choose to record your entire screen or just a specific portion of it.
The red recording button will appear on the right side of the options tray. In addition, there is a small arrow that opens up access to the recording settings. Once you have selected the best recording option to suit your needs, you will click the record button.
As another option, you can also click on the screen when a camera icon appears, and it will start the recording for you.
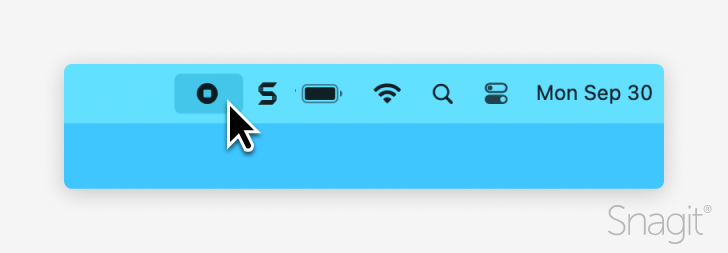
Step 2: Stop the recording with Control + Command + Esc
To stop the recording, locate the stop button in the menu bar at the top of the screen after the recording begins. Click the square stop button whenever you are ready to end the recording. It appears as a small square icon and will only be visible while you’re recording.
You can also use the keyboard shortcut Command + Control + Esc to end the recording.
Tip: If QuickTime Player becomes unresponsive, you can use the Activity Monitor to force quit. Select QuickTime player and click the “Quit” button. However, this will not save your recording.
Step 3: Save the recording
Once you hit the stop button, QuickTime Player will automatically open to show you your screen recording. But it has not been saved just yet!
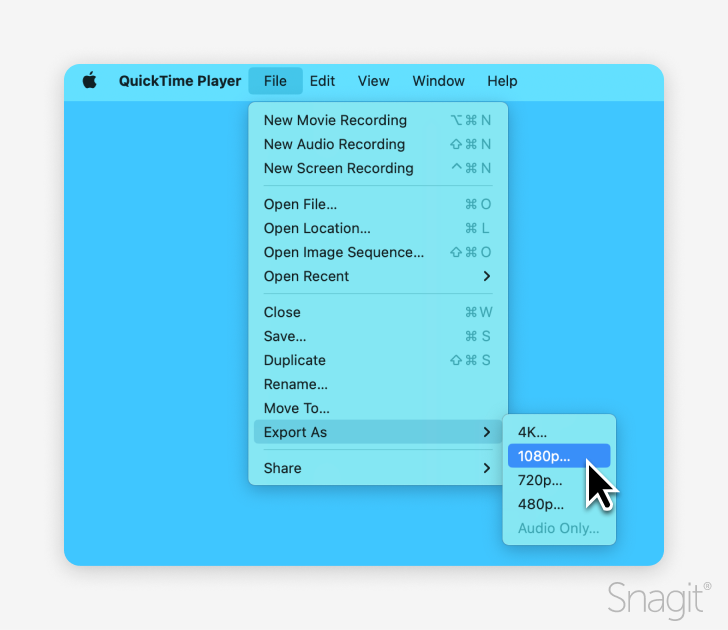
Click on File in the menu bar at the top of your screen, then select Save or Export As if you want to choose a specific format or resolution. A dialog box will appear, allowing you to enter a name for your file and select a location on your computer where you want to save it. After you’ve chosen your file name and location, click Save. Your recording will now be saved and ready for you to access whenever you need it.
Tips for editing your QuickTime screen recording
While QuickTime Player is a versatile tool for media playback and screen recording, its video editing capabilities are quite limited. For users looking to make substantial edits to their videos, QuickTime’s basic features might not be enough. For anything beyond the most straightforward edits, users will need to turn to more powerful video editing software like Camtasia.
Using Camtasia for quick and advanced editing
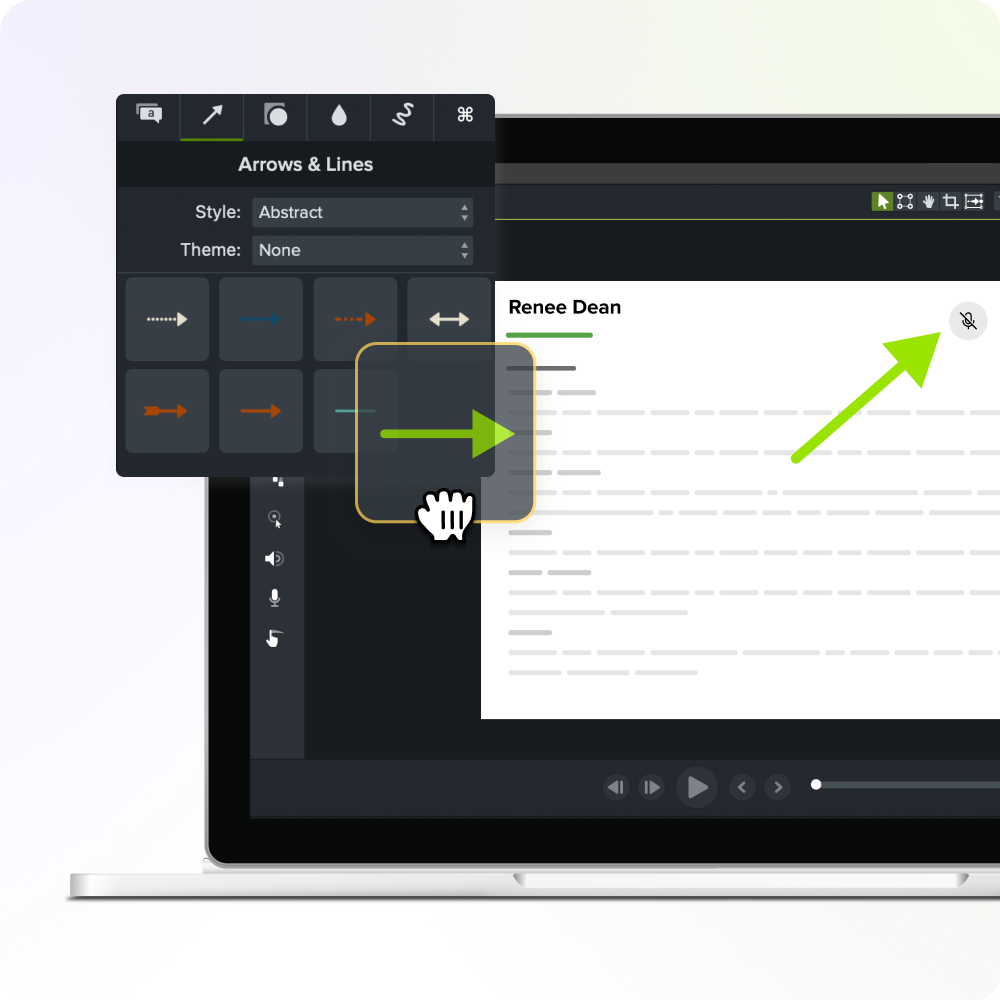
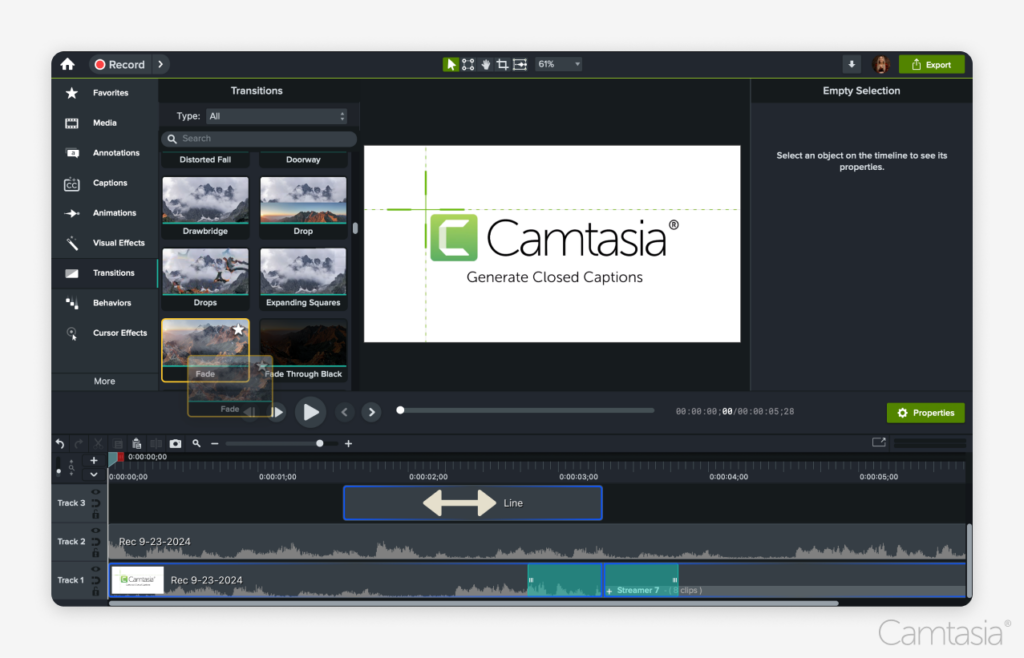
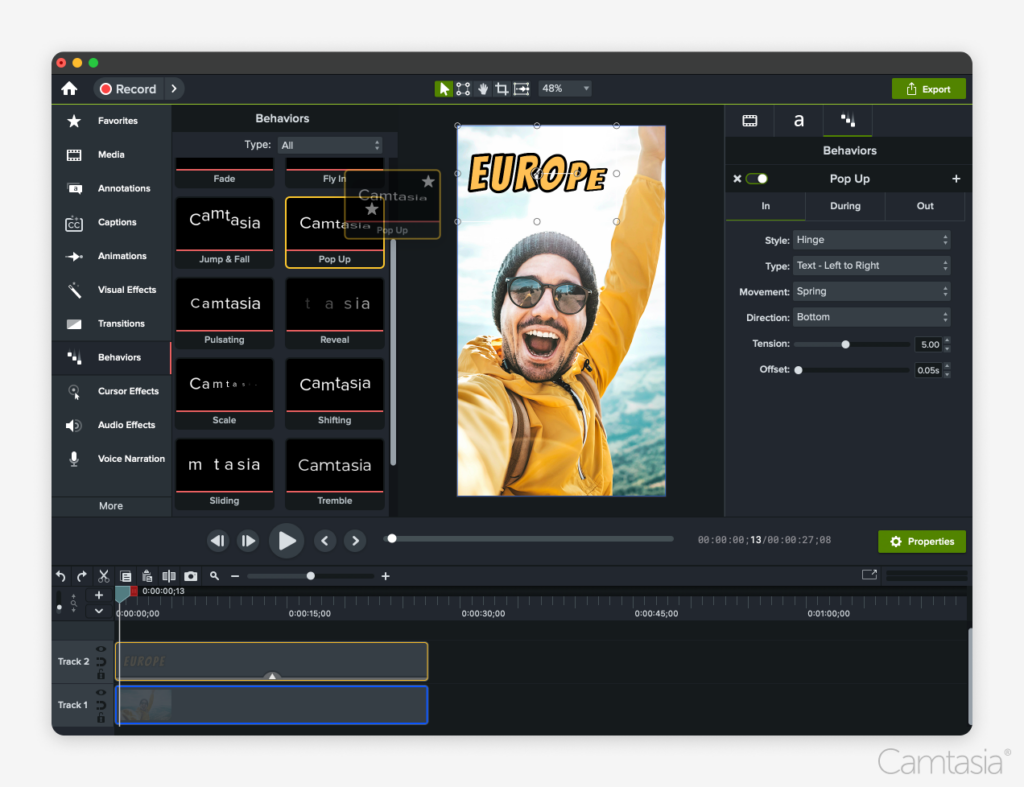
Need to go a little more in-depth and add some pizzazz to your screen recording? Camtasia is what you’re looking for! With Camtasia, you can add transitions, captions, and visual effects to your recorded video. These features go far beyond what QuickTime can offer.
Camtasia’s extensive library of transitions enables you to create smooth, professional transitions between scenes or clips, whether you want a simple fade or a more dynamic swipe or zoom effect. For clarity, you can easily insert captions or subtitles to improve comprehension, especially in instructional videos or presentations.
Additionally, Camtasia offers a range of visual effects, such as highlighting key areas of the screen, adding shadows or reflections, and even applying animations or zoom effects to focus attention on important elements. These tools make it easy to turn a basic QuickTime recording into a polished, engaging video with just a few clicks.
The easiest way to edit videos
Stop wasting time and discover how Camtasia makes creating incredible videos easier than ever.
With Apple’s QuickTime Player, it is easy to start and stop a screen recording. Whether you are recording a tutorial, presentation, or meeting, having a powerful screen recorder is great for virtual communication.
If you’re looking to edit together a video, screen recordings are a great place to start. With Camtasia, you can bring your screen recordings to life with full effect.
TechSmith is the market leader in screen capture software and productivity solutions for daily in-person, remote, or hybrid workplace communication and customer-facing image and video content. Our award-winning flagship products, Snagit, Camtasia, and Audiate, empower anyone to create remarkable videos and images that share knowledge for better training, tutorials, and everyday communication.
A picture—or a screenshot—may be worth a thousand words. But a great screenshot is even more valuable.
Sending a screenshot is one of the most effective ways to communicate because it provides a clear, visual representation of what you want to convey, removing confusion. It allows the recipient to see exactly what you’re referring to, whether it’s an error message, a website layout, or detailed instructions.
Screenshots save time by eliminating the need for lengthy descriptions and making complex concepts easier to understand. They also help reduce back-and-forth communication, as the visual context often answers questions immediately, making problem-solving quicker and more efficient.
Whether you’re providing feedback on a design mockup or documenting an issue for tech support, Snagit is the best way to take and send a screenshot.
Step 1: Quickly capture what’s on your screen.
Step 2: Annotate it to ensure your message is clearly communicated.
Step 3: Send the screenshot in a way that works with your existing workflow.
No confusion or intimidating walls of text for your coworker, and no jumping through hoops for you. It’s a win-win.
How to send a screenshot on a PC
There’s more than one way to take a screenshot – and some options are clearly better than others.
If you use Windows, you already have a built-in tool for taking a basic screenshot. Press print screen (PrtScn) to capture your entire screen and copy it to the clipboard, or Alt+PrtScn to copy a screenshot of the window that is currently open. From there, you can paste the copied screenshot into another app.
You can also open the Windows Snipping Tool to access free-form and rectangle screenshot modes, plus a pen and highlighter for basic, hand-drawn annotations.
Snipping Tool doesn’t offer much control over what you capture in your screenshot, as it lacks advanced features like precise cropping, annotations, or the ability to capture scrolling windows.
For users who need more flexibility and customization options, Snipping Tool’s limitations can be frustrating, particularly for professional or detailed communication. For a more comprehensive, professional solution, that’s still easy to use, there’s Snagit.
Snagit offers flexible, powerful screen capture options such as:
Scrolling capture (both automatic and manual)
Text capture
Specified region capture
Specific pixel width and height capture
Repeat capture
Menu capture
Multiple region capture
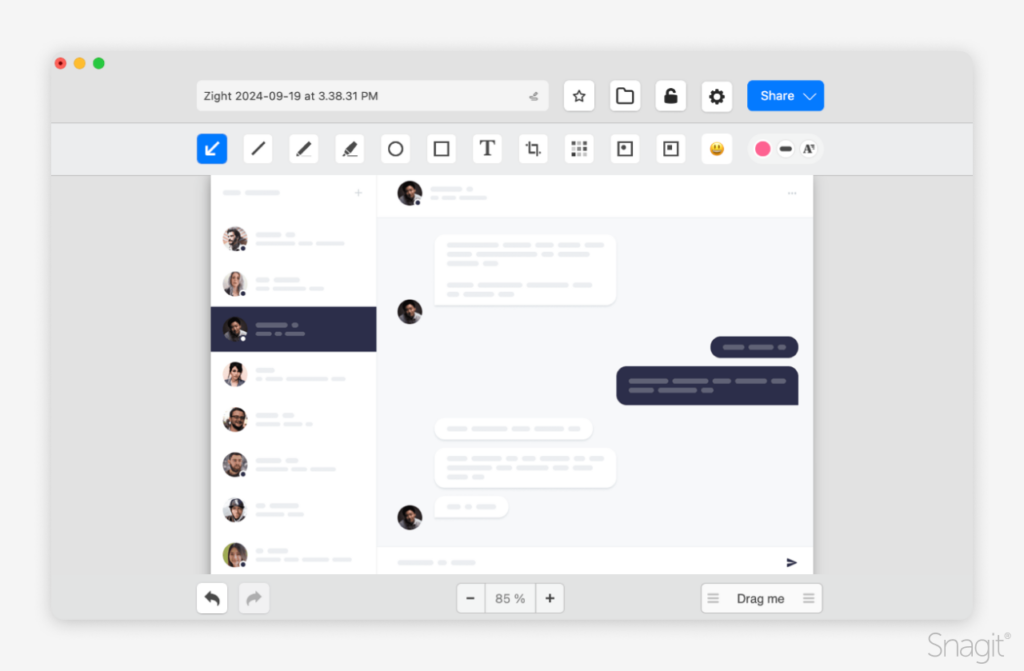
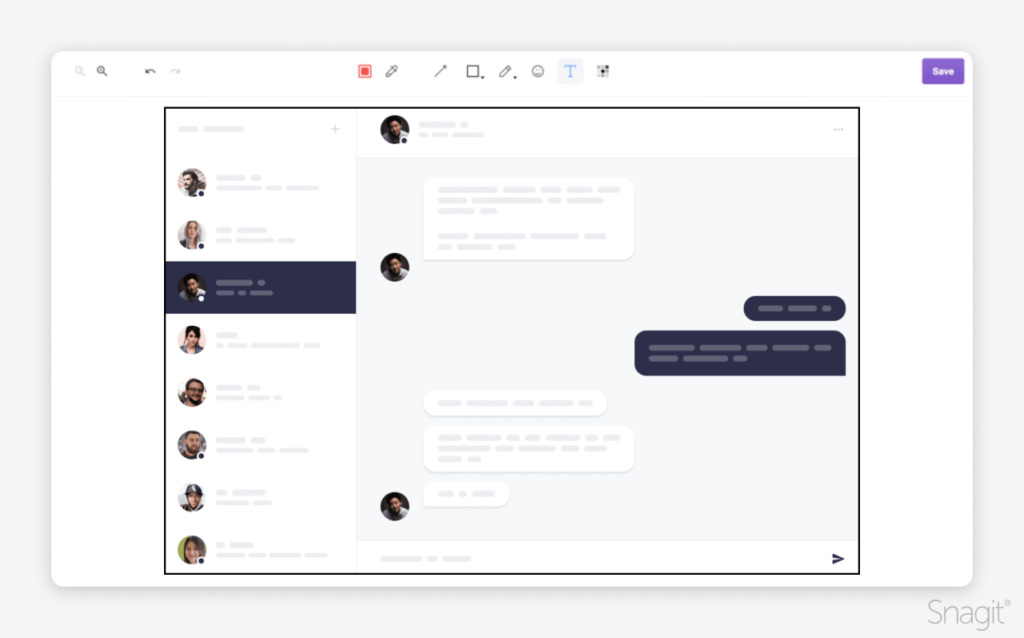
Screenshotting a webpage with Snipping Tool vs Snagit:
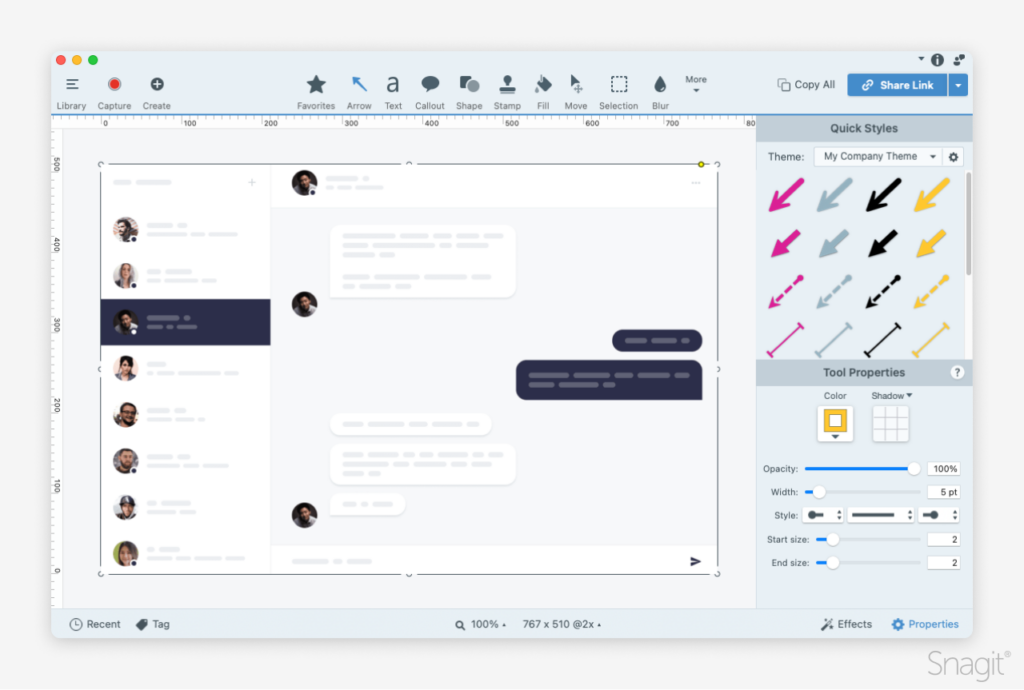
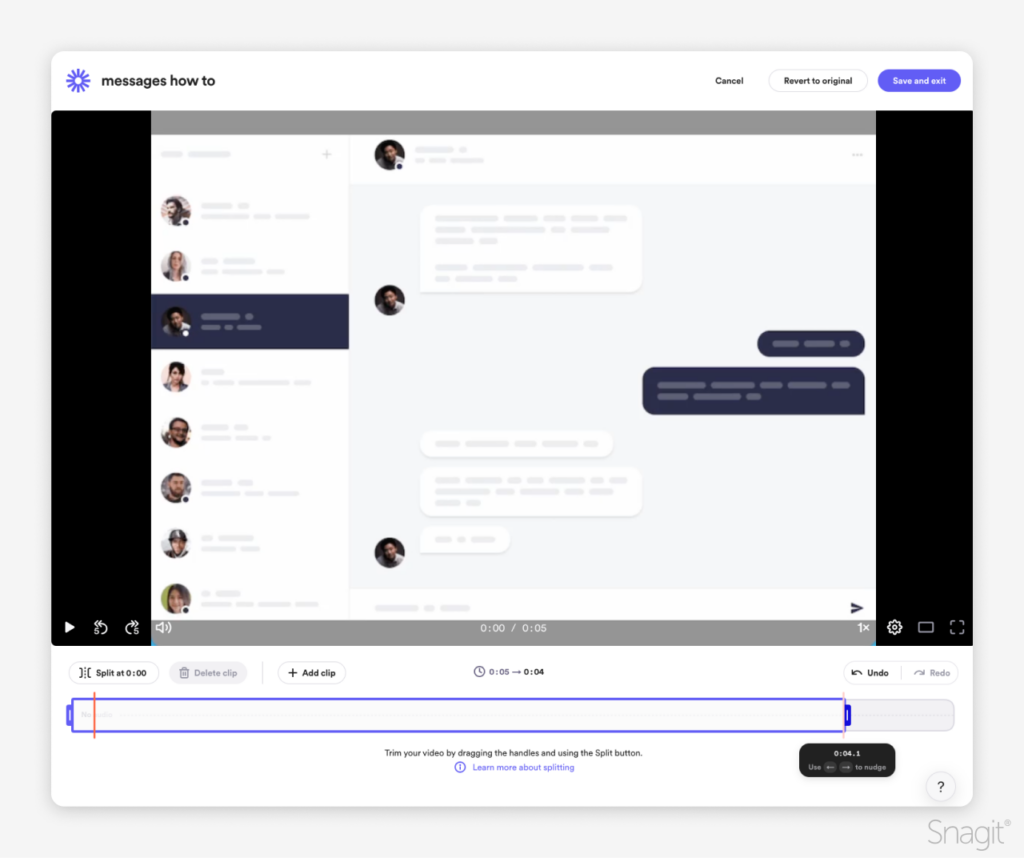
Snipping Tool’s hand-drawn annotation options are limited and far from professional, while Snagit’s Editor contains a whole toolbox full of easy-to-use editing and annotation tools and effects that go beyond hand-written text and highlighting.
Try Snagit’s callouts, arrows with multiple custom colors, font properties, automatically sequenced steps and labels, professionally designed stamps, and even options to edit text captured in your screenshot.
Snipping Tool’s editing options vs Snagit’s editing options:
Your step-by-step guide to sending screenshots using Snagit
Step 1: Capture your screenshot
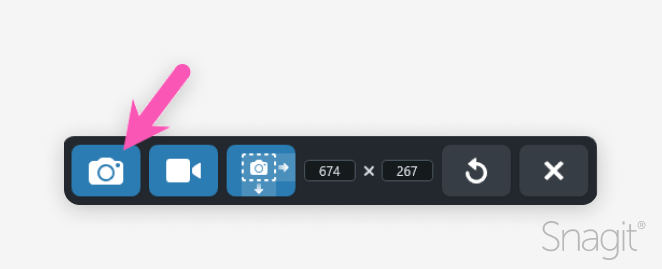
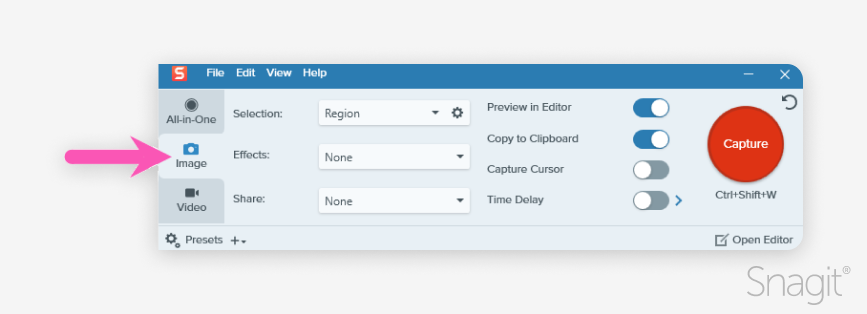
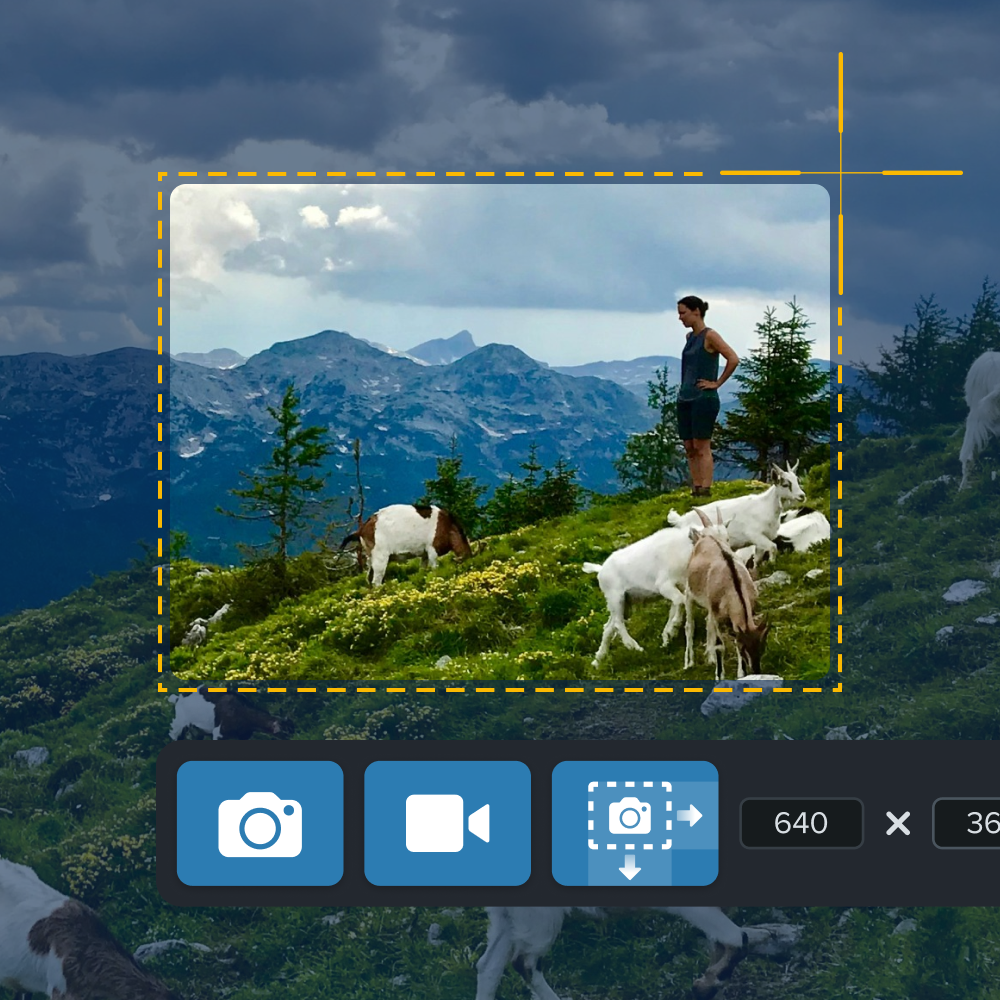
With Snagit installed, press the capture hotkey: PrtScn on Windows or Control+Shift+C on Mac. Click and drag on the screen to select a specific area to screenshot, or click fullscreen. Then click the camera icon to snap your screenshot.
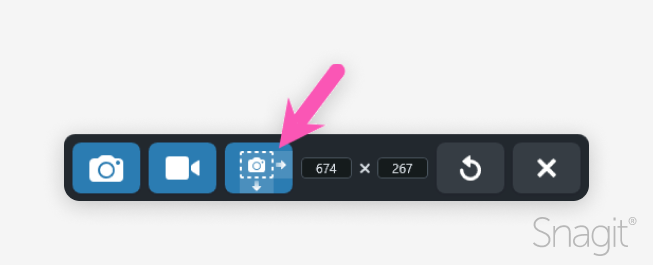
To take a scrolling capture instead, click the Scrolling Capture icon, then use the window scroll bars or mouse wheel to scroll the content you want to capture, either vertically or horizontally. Snagit captures anything shown within the selected area.
Tip: For even more powerful and flexible capture options, open Snagit’s Capture window and explore the different settings on the Image capture tab.
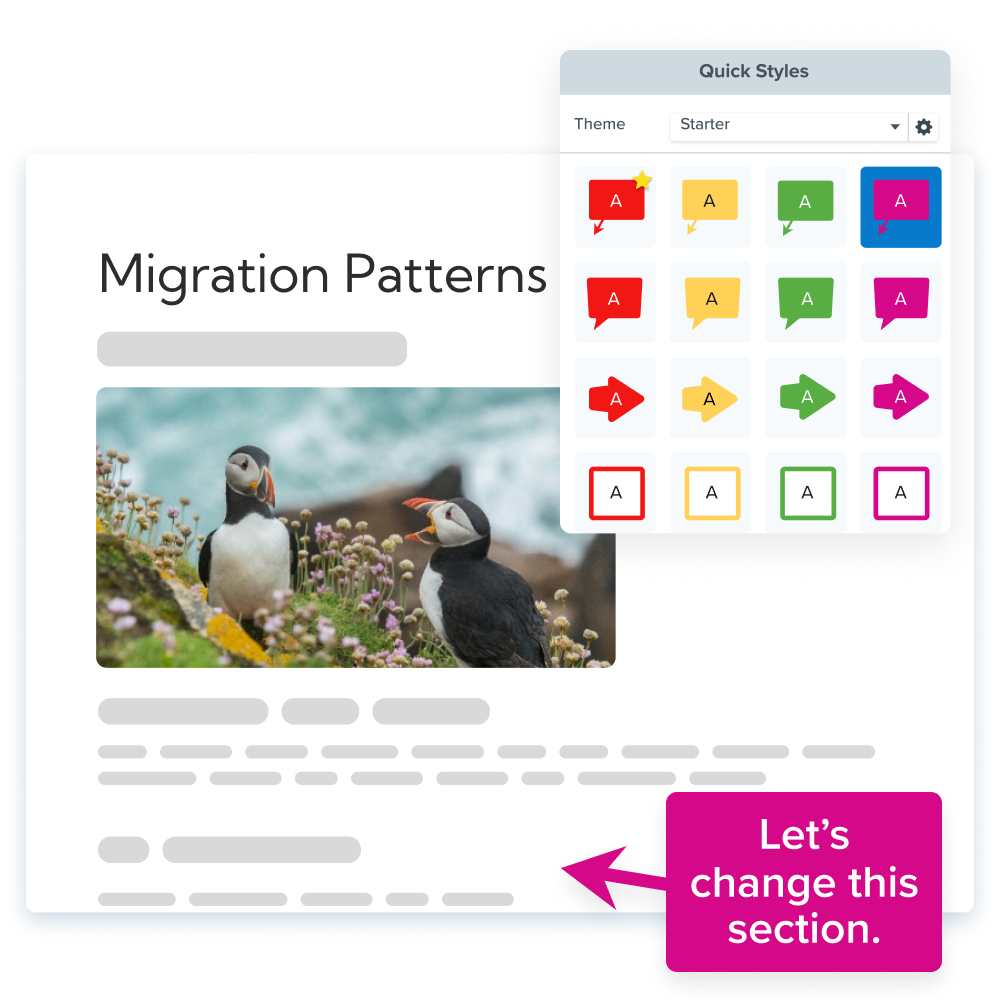
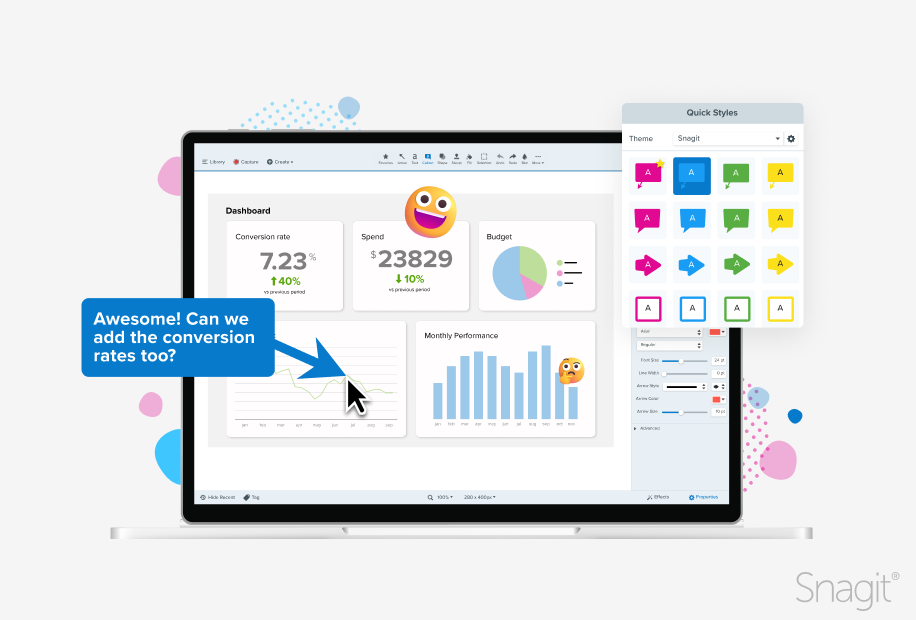
Step 2: Edit and annotate
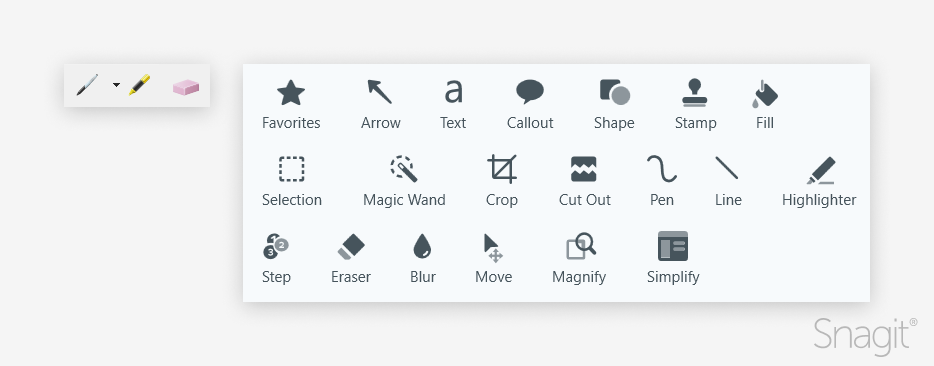
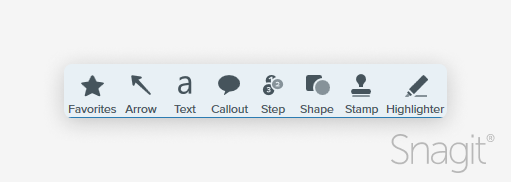
Your screenshot opens automatically in the Snagit Editor. Select from a wide variety of annotation and editing tools and effects.
Add annotations like arrows, callouts, labels, and shapes to help communicate your message. Customize the annotation colors, sizes, fonts, and more to ensure your message stands out or to match your brand or product colors.
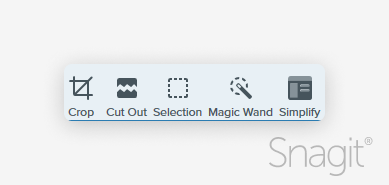
Remove unnecessary parts of the image with the crop, cut out, selection, or simplify tools, to help focus your viewer’s attention on what’s important.
Finally, add effects like borders, color filters, or capture information about the screenshot to add polish or context.
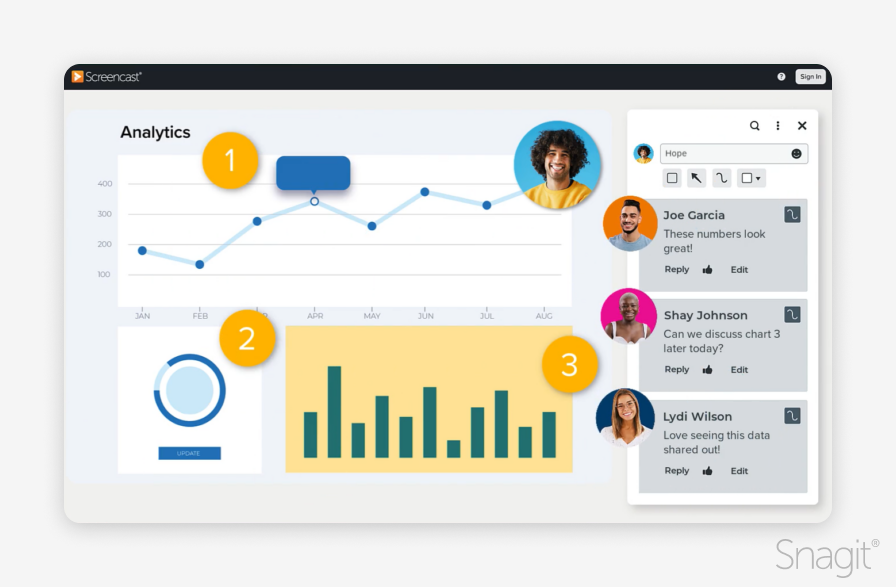
Step 3: Share via Screencast
When you’re ready to share your screenshot, make sure that anyone you send it to can view it. No worrying about file size, format, or account access.
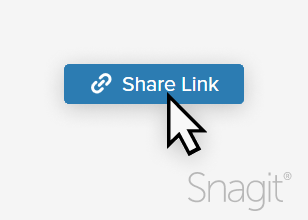
Click share link to instantly upload your screenshot to Screencast, TechSmith’s cloud-based solution for content hosting.
Snagit automatically copies a shareable link to your clipboard to paste wherever you get work done – email, Microsoft Teams, Slack, Zoom Chat, and more. Recipients can open and view your link – no account needed.
Even better, Screencast’s built-in collaboration and feedback tools help you to keep your work moving forward, even after you’ve sent the screenshot link. Add comments to solicit feedback, ask specific questions, and more.
Your recipients can reply and add new comments (still no account needed!) to keep the conversation going.
Why use Snagit for screenshots?
Unlike the Windows Snipping Tool, which offers limited screenshot capabilities and basic, amateurish annotations, Snagit is an all-in-one Swiss Army knife that does so much more than just screenshotting. It captures, annotates, shares, and even stores all your screenshots for further editing and reuse, all in one streamlined, easy-to-use package.
Don’t waste your time trying to figure out how to get what you need from Snipping Tool. Take the screenshots you actually want with Snagit.
The best snipping tool for Windows and Mac
Don’t let clumsy built-in tools hold you back. Take and edit screenshots with Snagit!
Experience streamlined, professional screenshot sharing for yourself, and discover how easy it is to capture, edit, and send high-quality visuals. Improve communication, enhance productivity, and save time with Snagit’s powerful tools designed for effortless collaboration and clarity.
TechSmith is the market leader in screen capture software and productivity solutions for daily in-person, remote, or hybrid workplace communication and customer-facing image and video content. Our award-winning flagship products, Snagit, Camtasia, and Audiate, empower anyone to create remarkable videos and images that share knowledge for better training, tutorials, and everyday communication.
Did you know that 46% of workers are interrupted more than six times a day? In our study of workplace flexibility, these employees reported decreased productivity or higher stress.
Improve everyone’s quality of life with a little documentation. Here is everything you need to create step-by-step how-to instructions comfortably and confidently.
The opportunities to share procedures, explanations, and methods are everywhere.
Do you train team members on a new process?
Onboard customers to your commercial product or service?
Facilitate open enrollment on the new HR software?
Instruct how to empty the coffee grounds?
Contribute to the customer knowledge base?
Let’s learn how to make a how-to guide.
Stop repeat questions
Create clear videos and guides with Snagit so you only have to explain tasks once.
Step-by-step instructions are one part of an internal knowledge base
A quick tutorial is a step-by-step guide for completing a specific task.
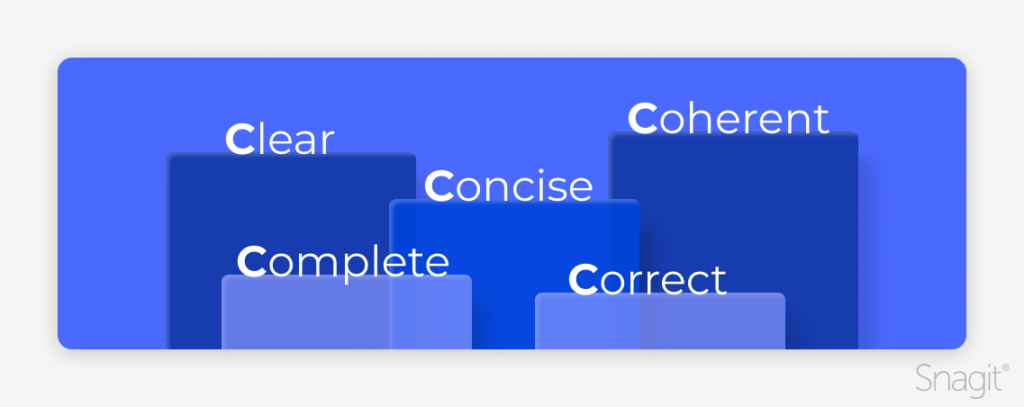
Clear – Readers should be able to follow the steps. Often, this means combining text with pictures or videos.
Engaging – Organize the guide to hold readers’ attention and help them save time.
Relevant Information – Provide context and use cases that help the reader understand why it’s valuable to them.
Other important parts of a knowledge base differ
Training manual – Don’t try to replace in-depth training or a certification course.
Reference guide – Focus on one specific goal your audience can accomplish.
User manual – Include a few tips, caveats, or good-to-knows, not every edge-case scenario.
Blog Posts – Simplify content for customer-facing marketing strategies and marketing campaigns. Or replace with case studies or bulleted lists to help with purchasing decisions.
Step 1: Understand your target audience’s pain points
Before you begin, identify your target audience, their goals, and their pain points or knowledge gaps to be addressed with your guide. It may be helpful to:
Conduct surveys
Peruse online forums
Solicit customer feedback
Tailor your guide to your audience’s skill level and point of view
You’ll also want to know your readers’ comfort with the topic. Different audiences have different skill levels. An excellent how-to guide is suited to the technical abilities of the target audience, whether beginners or experts.
Review search terms and feedback on existing training or educational materials. Talk to your customer support team for insight into the customer experience. Understand the keywords your audience uses—for example, in internet searches. What language do they use to describe the topic, their trouble, or points of confusion?
Step 2: Structure your guide
Create step-by-step numbered lists and bullet points
Unsurprisingly, numbered lists are more accessible to follow than a dense wall of text. Break down your guide into discrete steps or manageable chunks.
Remember that your audience may switch back and forth between your guide and the task as they read. Numbering or lettering the steps helps the audience follow along.
Wall of text? Next!
Snagit makes it easy to communicate more effectively with visuals.
If your organization creates multiple guides or a series, consider using a guide template. Consistent guides built from the same template help your readers know what to expect. It also makes writing instructions and creating guides much faster and easier for others in your organization!
For example, consider including in your template an introduction to identify:
The intended audience for the guide.
The guide’s goal, or what a reader can expect to accomplish.
Software, tools, or resources needed to complete the process.
Contact information or help resources in case the reader gets into trouble.
Consider a conclusion in your template:
To recap the purpose or goal of the guide, what should your reader be able to do now?
Next steps or follow-on guides in the series
Contact information or help resources
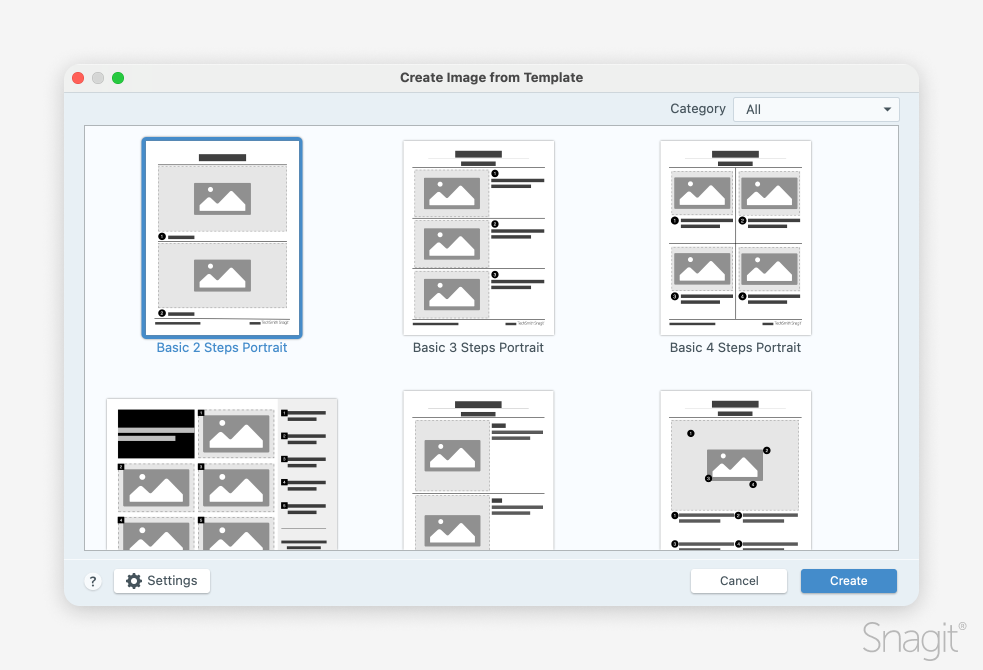
Be sure to check out Snagit’s ready-made, professionally designed templates. We even have a category of “Steps” templates designed to fit 2-6 steps on a single page. These templates can also be modified to add additional steps on more pages as needed!
Step 3: Write step-by-step instructions
Create clear and concise steps
Now it’s time to write!
Rather than relying on my memory (admittedly poor), I first walk through the task myself, taking note of each step as I go. Especially for familiar tasks I do regularly, it’s important to observe potential stumbling blocks for new users.
Ensure that the language and terms used in your guide are consistent with what the user sees on their screen.
Watch out! Ask yourself if there are points where what you see may differ from what your audience sees, or where steps may vary. For instance, is it possible that your reader is using a different software version, operating system, or browser?
Add images
I take screenshots or photos in real-time while walking through the task.
Images help to illustrate a step or provide context. They help ensure that your guide is easy to understand and that your audience can follow regardless of their skill level.
Annotate the images with arrows, comments, or labels. These types of visuals ensure your reader connects the text and the image.
Be sure to remove extraneous details from the images that could confuse or distract your reader from the focal point.
Remember the audience you identified in Step 1 and their level of familiarity? Do you need to explain where you can find each item on the screen?
For example, it may be helpful when you tell someone to click the “Settings” button to explain that it looks like a gear. You may also need to emphasize the locations of easily-missed icons or duplicate elements on the screen.
Step 4: Add additional information and resources
Include relevant links and resources
If the task documented in your guide requires or can be supplemented with additional resources, be sure to include them. These might be project source files or links to related or more in-depth tutorials.
This may include download links for other products. Your how-to guide shouldn’t be a sales or marketing page in disguise. If another software suits your audience’s needs better, offer guidance, especially if free options exist.
Provide context and background
Help your readers understand why your guide is of use to them. Include relevant examples or what they should be able to do once they’ve followed the guide.
In a complex process, providing background information in the guide can justify the necessity of specific steps. This extra context can help users grasp the reason behind the process, especially if it is unfamiliar.
Annotate and edit screenshots with Snagit
Professional mark-up tools and powerful features make it easy to create helpful images.
Once the written list of steps with supporting visuals is assembled, review your guide for accuracy:
Did you miss any steps?
Is the language consistent with what readers will see?
For software guides, ensure that the instructions are accurate for all versions your readers might be using. Alternatively, specify the particular version covered and provide information on where to get help for other versions.
Having another person review your guide—especially someone unfamiliar with the process—is always a good idea. This person can test it for you as an actual new user might. If there are areas you are unsure are clear, highlight those for special attention from your reviewer.
This person can help ensure your documentation is not only accurate but easy to follow:
Is the language clear and easy to follow?
Are there overly complex steps that should be broken down further?
Are the right images included to provide clarity and context?
Knowing someone might find mistakes or suggest improvements to your documentation can be uncomfortable. However, your readers are more likely to be successful if you fully leverage your team to spot potential problems.
If no one else can review the guide, go through it yourself for accuracy and usability. Wait a day or two from when you finish writing a how-to guide before you review it, assuming you aren’t on a deadline. This will help you approach the guide with a fresh perspective, as if you were a new user.
Make revisions based on feedback
And, of course, revise the guide as needed based on reviews. Be prepared to receive feedback from your audience and be open to iterating on your guide as needed.
Step 6: Publish and distribute your guide
Choose the right platform
When it’s time to publish your guide, consider the best location and method of distribution. Some things to consider:
If public-facing, does your guide need to be distributed? For example, emailed by sales teams or Customer Success Managers to new customers?
Or, if placed on your website, how will your intended audiences find it?
If you plan to share your guide widely, it’s better to send online links rather than using PDFs or posting in various places. Manage guides in a single location to facilitate updates and prevent outdated versions from circulating.
Will some of your readers have questions, comments, or tips that are helpful to others? Consider posting your guide to a platform with built-in conversations, like Screencast.
Optimize for SEO
If posted publicly, how will your intended audience find your guide?
Ensure your instructions match the on-screen content. Your guide’s descriptive sections should mirror your readers’ language where feasible.
Researching your audience in Step 1 will give you insight into their language. Incorporate this into your guide to help people find it.
Consider using SEO optimization tools such as SEMrush or the Yoast plugin for WordPress. Improving SEO improves the ability to find your content when needed.
Best practices for writing a practical how-to guide
Use simple, direct language
The most crucial part of evaluating a practical how-to guide is determining if it is easy to follow. Use simple, direct language that your users can follow, no matter their skill level.
Include images to clarify each step
Help avoid confusion for your readers. Show what you mean with an annotated screenshot or photo for each step.
Update your guide regularly
Ensure your guide remains accurate by reviewing and updating it regularly. If available online, updates also help improve SEO and ranking.
The important part: Make it easy on yourself
Don’t let creating a how-to guide take longer than the training itself!
TechSmith is the market leader in screen capture software and productivity solutions for daily in-person, remote, or hybrid workplace communication and customer-facing image and video content. Our award-winning flagship products, Snagit, Camtasia, and Audiate, empower anyone to create remarkable videos and images that share knowledge for better training, tutorials, and everyday communication.
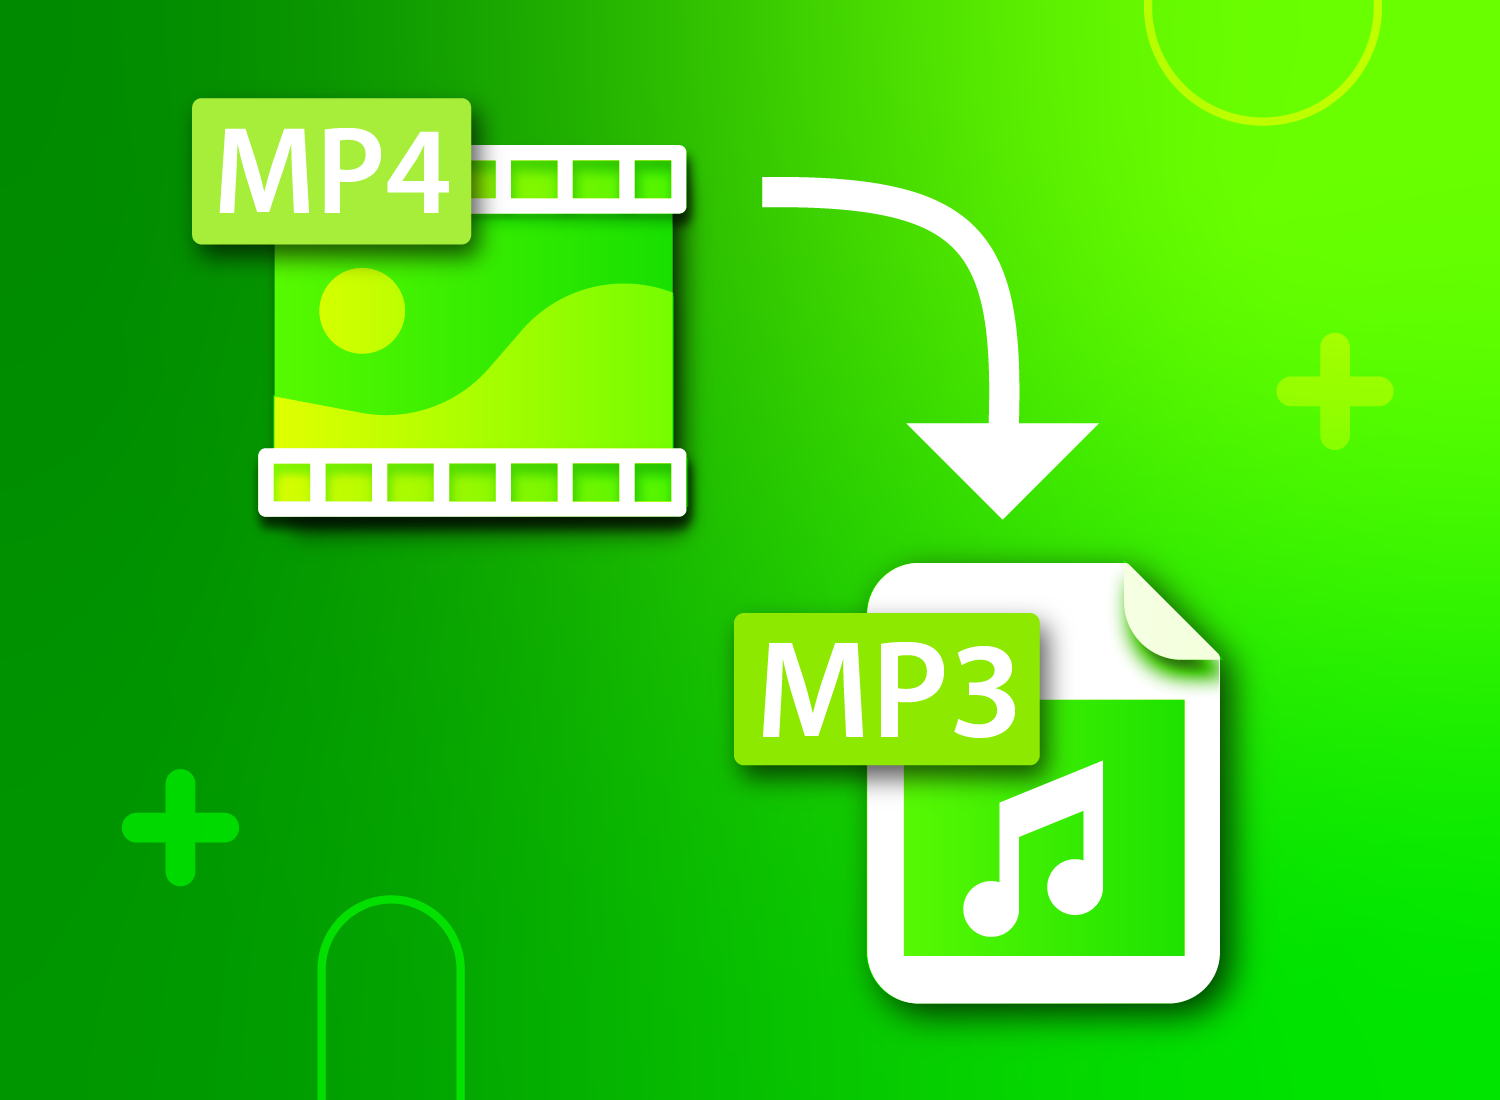
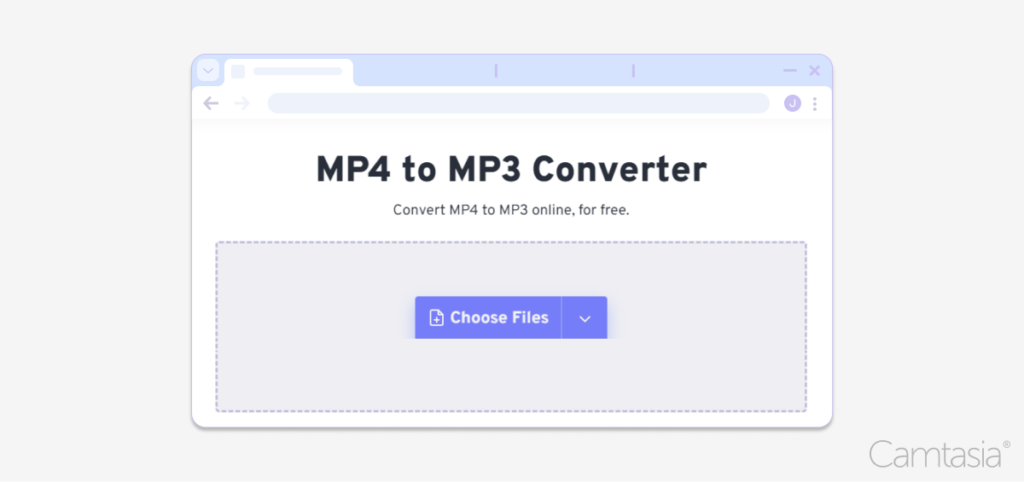
Audio is an efficient and effective way to consume media. The MP3 format is ideal for audio files. It retains a great sound quality, but offers tremendous file compression for smaller file sizes. Converting your MP4 to a MP3 file can save space on your device, extend battery life, and simply offer listening on the go.
Tools to convert MP4 to MP3
Online converters
There are many web-based file conversion tools. These can be a good option for quick conversion, when there is less concern about smaller file sizes or audio quality.
Step by step:
Step 1: Upload your mp4 to the converter site (some services also let you paste a URL to the mp4).
Step 2: Click Convert.
Step 3: Click Download to obtain an audio only mp3 file.
A word of caution: Make sure you trust the service when using an online converter – while there are reputable sites available, proceed with caution when uploading and downloading from unsafe websites.
Here are some security tips to keep in mind:
Data privacy concerns
Sensitive information exposure: Consumers may be wary of uploading files containing confidential, personal, or sensitive information (e.g., financial records, legal documents, or intellectual property). They might fear that their data could be accessed or stored without their consent.
Lack of control: Once a file is uploaded to an online platform, the consumer might feel a loss of control over where the data is stored, who has access to it, and how long it remains on the service’s servers.
Data security risks
Potential for breaches: Consumers may be concerned about the service’s vulnerability to hacking or data breaches, especially if the platform does not clearly communicate its security protocols.
Encryption standards: Users might doubt whether their files are properly encrypted during transmission and while stored on the platform, which could leave their data vulnerable to interception.
Trust in the service provider
Unclear terms of service: Many consumers are wary of services with vague or overly complex terms of service, especially if it’s not clear what will happen to their files after conversion (e.g., if they’re stored or sold).
No brand recognition: If the file conversion tool is provided by an unknown or lesser-known company, users may hesitate to trust it compared to established brands that have a proven track record.
Data retention policies
Unclear deletion policies: Users might avoid services that don’t specify how long files are stored post-conversion or whether they’re permanently deleted. Consumers want assurance that their data won’t be accessible after use.
Fear of misuse: Without clear data retention and usage policies, users may fear their files could be exploited for marketing, analytics, or sold to third parties.
Lack of compliance with regulations
GDPR and other legal concerns: For users in regions with strict data protection laws (e.g., GDPR in the EU), concerns about whether the tool complies with relevant regulations can be a significant deterrent. If the service lacks compliance information, users may avoid it entirely.
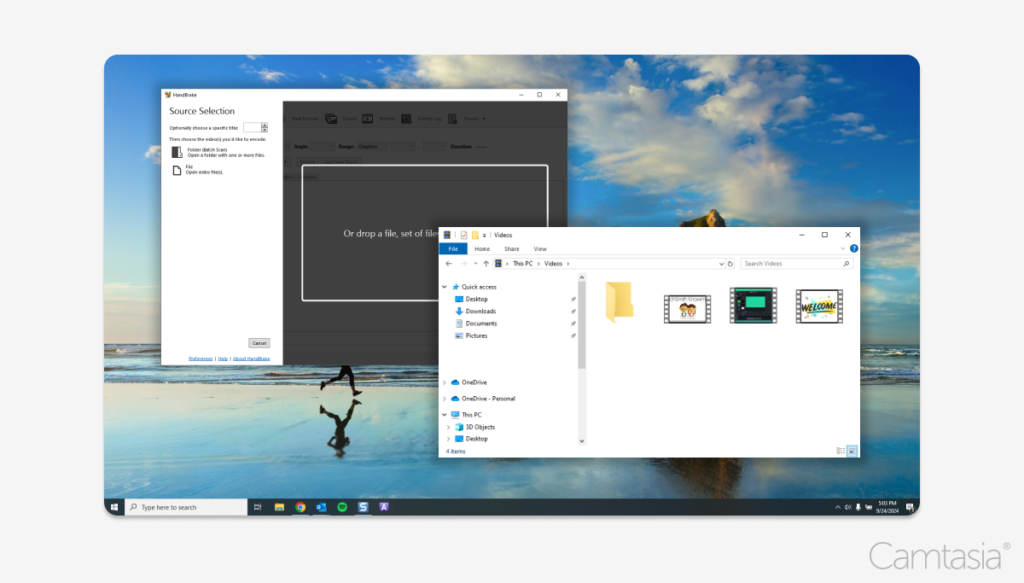
Desktop apps
Using a desktop application for file conversion offers several advantages over online tools, particularly for users concerned with security, performance, and reliability. Here are the key benefits:
Enhanced privacy and security
No need to upload files: Since the conversion happens locally, there’s no need to upload files to external servers, eliminating concerns about data breaches, third-party access, or sensitive information being exposed online.
Full data control: Users retain complete control over their files without worrying about how long their data is stored or who has access to it. This is especially important for converting confidential documents.
Offline use: Desktop apps typically do not require an internet connection, meaning that files never leave the user’s computer, ensuring complete privacy.
Faster conversion speeds
No Internet dependency: Conversion happens directly on the device, which is often much faster than waiting for files to be uploaded, processed on a server, and downloaded again. This is particularly advantageous for large files.
Optimized for system resources: Desktop apps can use the full processing power and resources of a user’s computer, often resulting in quicker and more efficient file conversions.
Better performance for large files
Handling large or multiple files: Desktop applications are typically more robust when handling large file sizes or batch processing multiple files simultaneously. Online tools may have file size limits or slower performance for large tasks.
No file size restrictions: Many online tools limit the size of files that can be uploaded for conversion. Desktop apps usually don’t impose such restrictions, making them ideal for converting large media files or high-resolution images.
Offline access and reliability
Work without Internet: A desktop app can be used anytime, anywhere, without the need for a reliable internet connection. This is useful in areas with poor connectivity or for users who prefer to work offline.
No downtime or server issues: Online tools depend on external servers, which can sometimes experience downtime or slow performance due to high traffic. A desktop app eliminates this risk since it runs locally.
Advanced features and customization
More feature-rich: Desktop apps often come with more advanced features and greater customization options, such as enhanced file format support, compression settings, and batch processing capabilities that aren’t always available in free or web-based tools.
Integration with other software: Desktop apps can integrate more easily with other installed software on the same computer, allowing for seamless workflows (e.g., converting files directly from document editors or media players).
No ads or privacy intrusions
Ad-free environment: Many online tools are ad-supported, which can be distracting and create a less professional user experience. Desktop apps, particularly paid ones, are typically free of ads.
No data tracking: Some online tools may collect user data for marketing purposes. Desktop apps generally don’t track usage data, offering more privacy for the user.
One-time purchase or lifetime access
Cost-effective: Many desktop applications are available as a one-time purchase, allowing users to access the tool indefinitely, unlike subscription-based online services that may require recurring payments for premium features.
No file retention concerns
Local file storage: With a desktop app, files remain on the user’s device, and there’s no risk of files being retained or misused by an external service provider.
Overall, desktop apps provide a more secure, reliable, and versatile solution for file conversion, particularly for users dealing with sensitive information or large-scale conversions.
Step-by-step directions when using desktop video to audio conversion software
Step 1: Install desktop conversion software.
Step 2: Locate the import option and choose your local mp4 file.
When you are working with different video formats, like MOV, or desire alternate audio formats like M4A, the majority of the tools and steps above will apply in the same way, if the tool or service supports the formats you are working with.
Tips for converting video to audio
Tip 1: Check your goal Identify the main reason for the file conversion – File size, audio quality, or speed can all be factors that will be better or worse depending on the tool you select.
Tip 2: Check your file size Once you have completed an audio extraction, check the quality and file size of the result. You’ll be aiming for the highest quality result with lossless compression. Depending on the tool and export settings selected, you may want to consider another tool or set of export options that is optimized for your goal.
Tip 3: Check your channels If your source video is stereo or mono, ensure the number of channels you select (or the tool supports) is maintained.
Converting MP4 to MP3 is a straightforward process. With the right tools, you can achieve high-quality results. By understanding your specific needs and exploring the available options, you can find the best method to suit your requirements.
Whether using online converters or desktop applications, the process of extracting audio from video is generally similar. Remember to consider factors like file size, audio quality, security, trust of the product, and supported formats when selecting a tool that best suits your desired web browser or operating system. With a little experimentation, you can effortlessly convert your MP4 files to MP3 and enjoy your audio content as desired.
TechSmith is the market leader in screen capture software and productivity solutions for daily in-person, remote, or hybrid workplace communication and customer-facing image and video content. Our award-winning flagship products, Snagit, Camtasia, and Audiate, empower anyone to create remarkable videos and images that share knowledge for better training, tutorials, and everyday communication.
Are you concerned that your PowerPoint presentations might be boring?
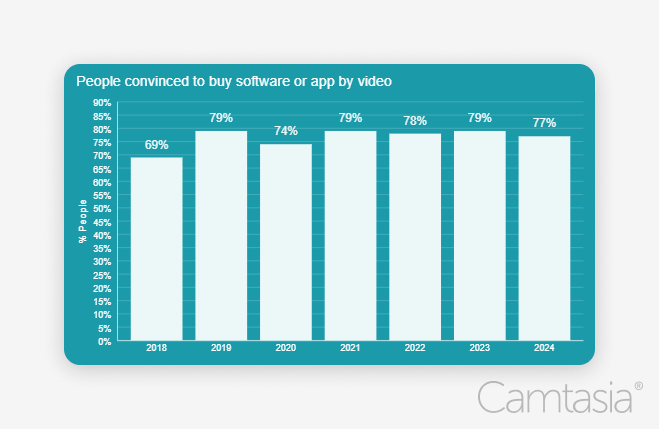
According to a recent trends report, 50% of workers favor content containing images or videos over plain text. You can make your content more dynamic by using videos in your emails and presentations.
This step-by-step guide on how to embed videos in PowerPoint will teach you everything you need to know.
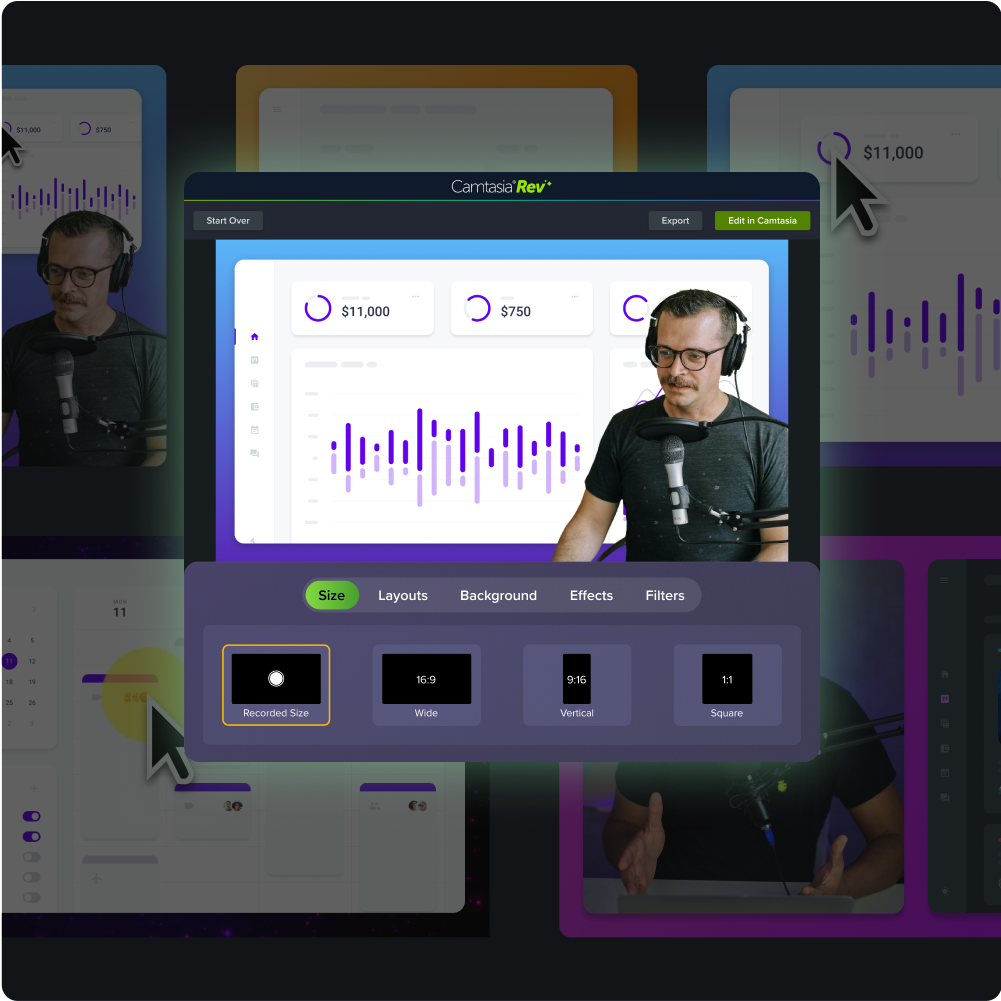
Faster video creation with Rev
Make videos as easy as click, click, done! Camtasia Rev is so fast it’s like magic!
Text-heavy presentations fail to inspire and engage. Embedding a video in your presentation can significantly improve the overall impact and effectiveness of your message.
By using videos you can capture attention and break the monotony of text-heavy slides. They engage your audience emotionally, making your presentation more memorable.
Plus, visual storytelling can make complex ideas or processes more easily understood. A video can explain your points in a way that words alone may not convey.
Video adds variety to your presentation, catering to different learning styles—visual, auditory, and kinesthetic—thus reaching a broader audience. By using a well-produced video, you can enhance your credibility and demonstrate thorough preparation, reflecting positively on you and your message.
Understand media files
Audio and visual data need to be compressed and stored. Different video formats choose different approaches to encode and package content. Common video formats include:
MP4: A widely used format known for its balance of quality and file size
AVI: An older format that offers high quality but with larger file sizes
MOV: A high-quality format developed by Apple that may have compatibility issues on non-Apple devices.
WMV: A Windows Media format that provides good quality at smaller file sizes, though it may not work well on non-Windows platforms.
MKV: A flexible format that supports multiple audio and subtitle tracks. While it offers excellent quality, compatibility can be limited.
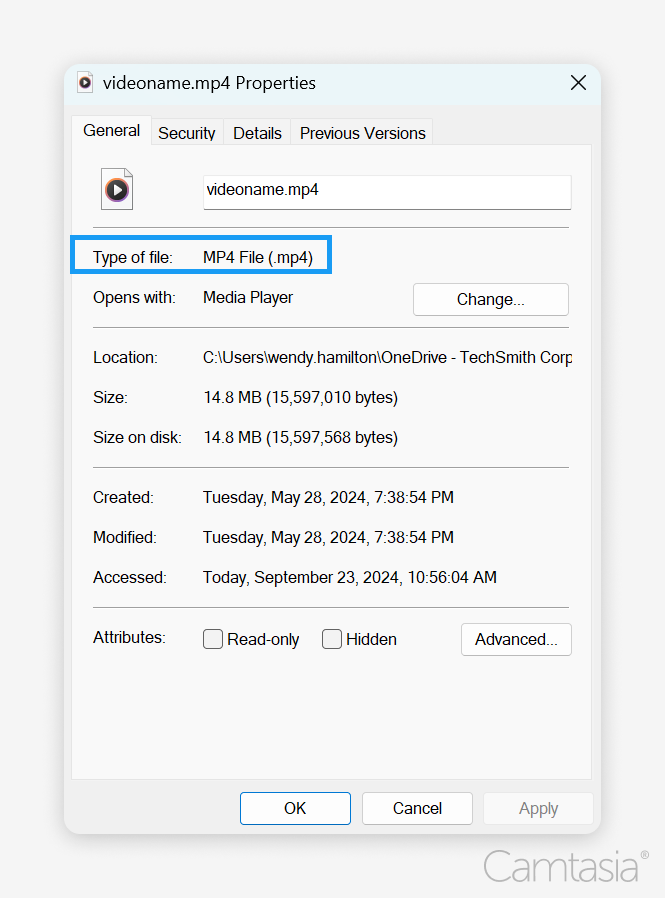
Check the video format
The easiest way to find the format is to look at the file extension after the dot in the filename (e.g., .mp4, .avi, .mov, .wmv, and .mkv).
Or, you can check the file properties:
On Windows R:ight-click the video file and select “Properties.” You will see the format under the “Type of file” section on the video format tab.
On Mac: Right-click (or Control-click) the file, select “Get Info,” and check the “Name & Extension” section.
Another method is to open the video in a media player (like VLC or Windows Media Player). Many players display the format information in their “File” or “Properties” menu.
Choose the right format
Different video formats have pros and cons, affecting your PowerPoint presentation in various ways.
Compatibility is the most important because if your file is not compatible, it will not play. Whenever possible, try to use MP4 which is the universal format. It works across Windows and Mac systems so you don’t have to worry about any issues in compatibility.
Larger file sizes consume storage space and may reach upload limits. Formats like AVI fall into this category but can also provide higher quality. Be mindful of the quality-to-size ratio. A high-quality video file may look great but not be possible to upload because of the large file size.
Again, MOV and MKV formats can provide superior quality but may encounter playback issues. We recommend you stick to MP4 to avoid any size issues, but double-check that your file format is compatible with the version of PowerPoint you are using.
Microsoft recommends using MP4 files encoded with H.264 video and AAC audio. Other supported video formats also work, including .asf, .avi, .mp4, .m4v, .mov, .mpg or mpeg, and .wmv.
Edit your video before you embed
Before you add your video to PPT, you need to make sure that it is edited properly. By editing your video you can add professionalism to your presentation and clarity to the information you’re sharing. Let’s dive into how to quickly edit a video.
Start by importing your video file into Camtasia. Simply drag and drop the file into the media bin or use the import option. Drag the video to the timeline to start the editing process.
Use the timeline to trim unwanted sections. Dragging out the edges to remove parts you don’t need ensures a polished final product. Remember to keep your video concise and intentional. Don’t drag it on and overshare on unnecessary details.
To add more emphasis to key points in your video, add text, shapes, or arrows. Use the annotation tools to create engaging visuals that guide your audience and transitions to smooth out the flow between clips. This will improve clarity and understanding in your presentation.
Now video isn’t only visual, and if there is audio playing you need to ensure it is clear and understandable. Nothing ruins a good video more than unintelligible audio. Improve audio quality by adjusting volume levels, removing background noise, or adding music and sound effects.
Lastly, add captions. By adding captions you can create a bridge to people who may have issues understanding video content in the first place. PCamtasia allows you to create and edit captions easily, helping to connect with more people.
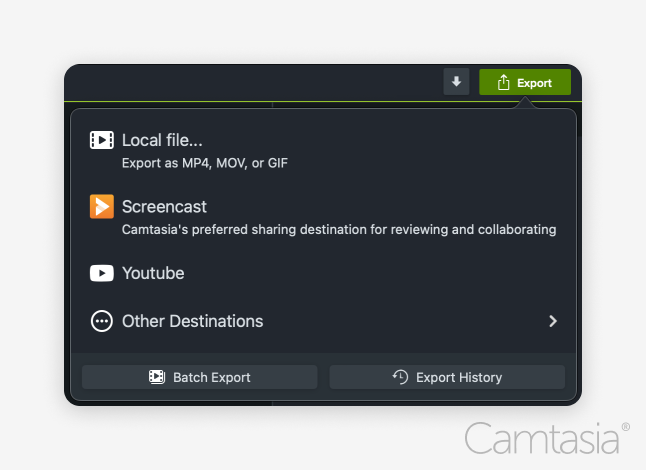
Once you’re done, find the video file format that works for you and export your files.
The easiest way to edit videos
Stop wasting time and discover how Camtasia makes creating incredible videos easier than ever.
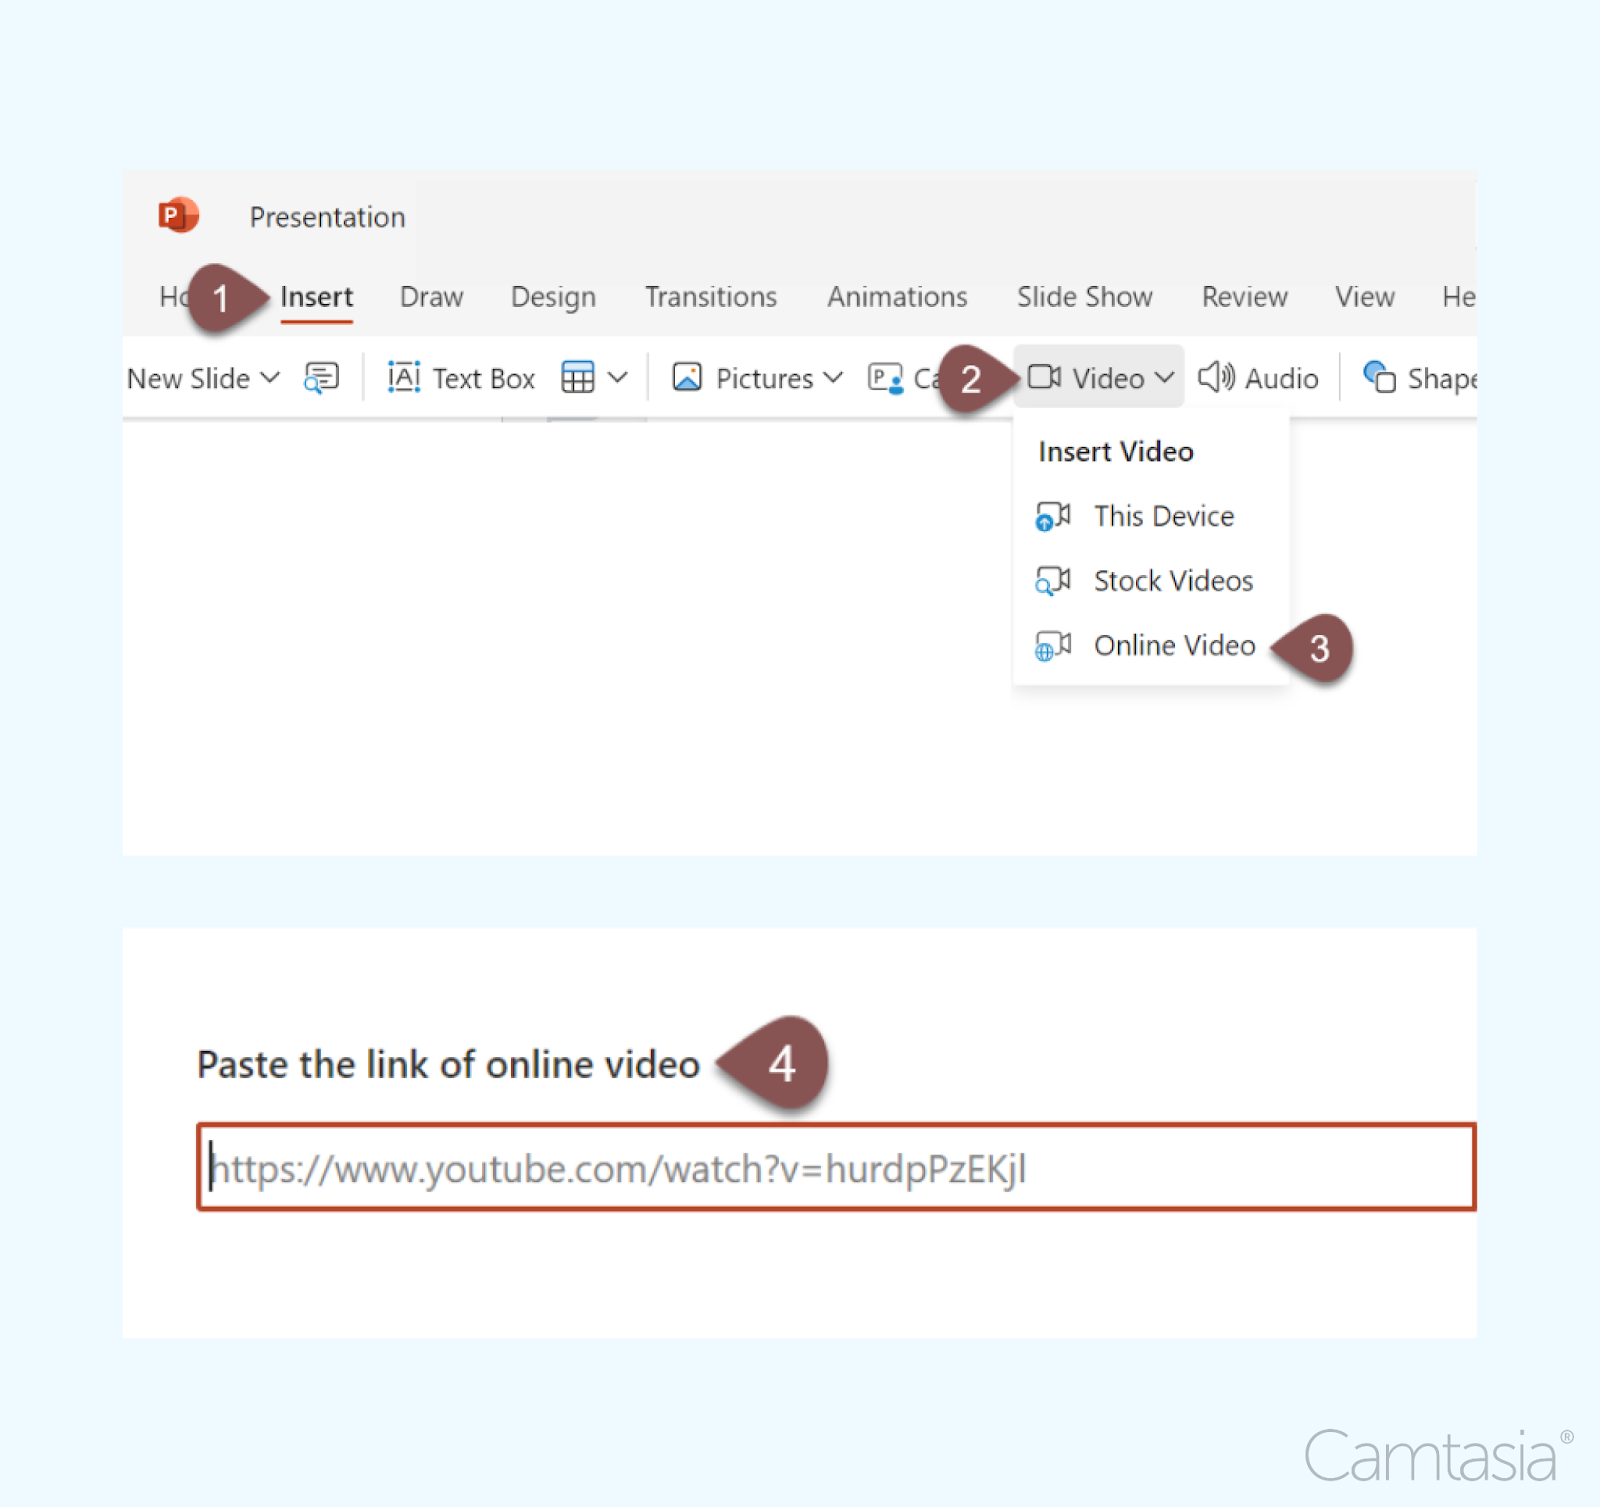
After opening the presentation and navigating to the desired slide, find the Insert tab. Click “Insert,” then “Video.”
Depending on your device, the next tab may look different. Try to find a variation of ”Video on My PC,” “This Device,” or “Movie from File” on Mac, then select your video from your computer.
To insert a video from YouTube into your PowerPoint slide follow these steps:
After selecting the slide, click “Insert”, “Video”, and “Online Video,” then paste the video URL.
Customize the size and position of the video on the slide until it’s just right.
Options to play a video
When embedding videos in PowerPoint, selecting the right playback tab settings is crucial for maintaining audience engagement. Here are some key options to consider:
Pick the automatic option from the drop-down menu, and it will play the video as soon as the slide appears. This maintains momentum in your presentation.
“In Click Sequence” or “When Clicked On,” allows you to control when the video starts. Use this to pause to set up context or ask questions before the video plays.
Either way, you’ll be able to play the video on your terms!
The last detail is to add playback controls. You can choose between showing or hiding the controls during playback. This one is fully up to personal preference.
TechSmith is the market leader in screen capture software and productivity solutions for daily in-person, remote, or hybrid workplace communication and customer-facing image and video content. Our award-winning flagship products, Snagit, Camtasia, and Audiate, empower anyone to create remarkable videos and images that share knowledge for better training, tutorials, and everyday communication.
It has been said that it is cheaper to keep a current customer than obtain a new one. It might seem strange to spend time and money on existing customers who have already bought your products or services. However, retaining loyal, long-term customers can have a significant impact on your business success. A loyal customer will buy from you, support you, and get you more customers!
What is customer loyalty?
Customer loyaltyrefers to the emotional and behavioral commitment a customer has toward a brand, company, or product. Loyal customers consistently choose a brand’s offerings over competitors, even when other options are available. They will also tend to make repeat purchases, recommend the brand to others, and exhibit trust in the brand.
Understanding the direct causes of customer loyalty will provide the mechanisms for measuring progress and customer satisfaction. These main factors are:
Delivering consistent quality
Providing excellent customer service
Engaging with customers regularly
A business needs consistent communication with customers regarding the benefits their company delivers. Snagit, a tool from TechSmith, can help your business build and maintain customer loyalty by improving communication and engagement. Capturing and sharing data, simple updates via video, and personalized customer communications are just a few easy ways Snagit can help in the pursuit of repeat business.
Video messages > meetings
Record your screen and camera with Snagit for quick updates and feedback.
Understanding customer loyalty does not have to be a daunting proposition. The vast amount of data on this topic can be simplified into three key components. These three steps can then be boiled down to one overarching theme: trust. When a customer trusts, they will be more likely to be loyal through the inevitable ups and downs of a business cycle.
Delivering consistent quality
With so many options available to customers, it is imperative that your product or service is being delivered at a consistent and high level of quality. One of the best ways to gather customer feedback is through a survey. Obtaining information from your customers after an encounter is the best way to get just-in-time data that will help you adjust and improve your customer experience.
Snagit provides a way to gather, compare, and track customer feedback visually. The video component of Snagit allows for communication between teams so the message is received once and understood by all. This allows for all departments to utilize the information and ensure product quality remains high.
Don’t forget to acknowledge and communicate with those customers who may have constructive feedback or concerns. Customers can be forgiving when they know a business cares about their opinions.
Providing excellent customer service
What is excellent customer service? You can apply the golden rule to answer this question. Treat your customers the way you want them to treat your business or products. When you think of the question in this light, what words come to mind? Empathy, understanding, positive experience,clear communication. These are the best ways to reinforce trust and loyalty and secure repeat business.
According to Gartner, if customers receive value during a service interaction, there is:
82% probability of repurchase or renewal when presenting the chance to switch
86% probability of increasing wallet share
97% probability of sharing positive word-of-mouth
Utilizing Snagit, excellent customer service can be facilitated through the creation of tutorials, screen recordings, and clear communication materials that enhance customer support.
Record your screen with Snagit
Snagit makes it easy to share quick updates and how-to’s by capturing exactly what’s happening on your screen.
Customers do not want to be thought of as a number or a dollar sign. Reaching out to customers only when their license is about to expire or there is a new offering to be purchased is a surefire way to lose customer loyalty. Regular and meaningful communication with a customer will keep them sticky with your business and develop an atmosphere of familiarity and trust.
Engaging customers in a variety of ways will allow them to engage in a manner that best fits their needs. Traditional methods, such as only using the written word, have their place. However, tools such as Snagit allow for the capture and sharing of personalized content that enhances the customer experience, keeps customers engaged, and increases the likelihood of them opening future content.
Why customer loyalty is important
Gaining customer loyalty and retaining repeat customers does take time, effort, and a long-term commitment. Understanding the why helps keep a business focused when other priorities may seem more pressing.
Retaining customers is capturing returning business, and Snagit can be used to create and share targeted content that drives repeat purchases. Capturing customer preferences will provide the information that will allow your business to create personalized marketing messages, targeted offers, and tailored recommendations all through the utilization of Snagit.
Customer loyalty increases repeat business and a higher lifetime value
However, a one-time purchase does not equate to a customer for life. To obtain repeat purchases, a business must invest in marketing, customer loyalty programs, and other ways to create a happy customer who is engaged with the product or service.
A loyal customer base results in word-of-mouth
In this day and age of technology and media at our fingertips, word-of-mouth marketing is still vitally important in 2024. This is still one of the most effective ways to build trust in a cost-effective way. Collaborating with social media influencers, creating a referral program for family and friends, and positive reviews are all ways to generate brand advocates, driving new customer acquisitions.
Building customer loyalty is not a one-and-done proposition. Keeping the customer engaged over time is one of the best ways to maintain customer loyalty. There are a variety of elements and practices that can be applied.
As discussed previously, providing exceptional customer service and personalized experiences will lead to the building of trust and appreciation for the care your business provides on an individual basis. This applies to all methods of service: telephone, chat, tickets, and website ease of use.
Proactively asking for feedback is an excellent way to keep your finger on the pulse of the customer base. Just remember, it is not enough to engage with customers through surveys and programs– communication must be reciprocated when there is negative feedback or suggestions.
A customer rewards program will go a long way to keeping customers engaged with your current products and future enhancements. Keep in mind that these programs are not only beneficial to current customers but are a great conduit for capturing family and friends.
Whenever possible, personalize the communication with your customers. Use your database information to acknowledge past purchases, confirm current status, or show gratitude for being a loyal customer. Technology has made it very easy to ‘fake’ personalization—use the knowledge of your customers to let them know they are valuable to your business in a meaningful way.
The ease of using Snagit makes it possible to build and maintain customer loyalty in such a way that the information and insights gained can be leveraged, updated, and modified for years to come. Snagit can be used to capture customer insights and create content that resonates with your customers. In addition, if capturing feedback, improving customer communication, or creating engaging content that fosters loyalty are on your list of to-dos, then Snagit is the right tool for you.
If your business is not currently using Snagit, sign up for a free trial and see how it can transform your customer interactions. There are also numerous videos and tutorials where you can find how to leverage the tool to fit your needs.
If you currently have a Snagit license and are unsure how to start, reach out to us and we will be happy to point you in the right direction.
Small businesses can build customer loyalty by focusing on delivering exceptional experiences, fostering strong relationships, and adding value to their customers. There are several key strategies to help small businesses cultivate and maintain customer loyalty which include: providing outstanding customer service, developing a loyalty program that rewards loyal customers, providing quality products and services, and creating a memorable brand experience that shows appreciation to customers.
What role does customer feedback play in loyalty?
Customer feedback plays a vital role in building customer loyalty by helping businesses understand their needs, resolve issues, and continuously improve products or services. When companies actively seek and act on feedback, customers feel valued and appreciated, fostering trust and engagement. Feedback also allows businesses to identify pain points, tailor personalized solutions, and enhance the overall customer experience, which in turn drives loyalty. By tracking satisfaction metrics like Net Promoter Score (NPS) and Customer Satisfaction (CSAT), companies can measure customer loyalty and identify areas for improvement.
Additionally, feedback helps businesses innovate and create offerings that meet customer desires while resolving complaints effectively can turn dissatisfied customers into loyal ones. Implementing changes based on customer input builds stronger relationships and increases retention. Satisfied customers often become brand advocates, spreading positive word-of-mouth, which strengthens loyalty further. Overall, customer feedback helps businesses create a customer-centric culture that fosters long-term loyalty and repeat business.
What tools can help improve customer loyalty?
There are various tools available that help businesses build customer loyalty by managing relationships, collecting feedback, and rewarding loyal customers. CRM software like Salesforce and HubSpot stores customer data and tracks interactions, enabling personalized communication and customer engagement.
Loyalty program platforms such as LoyaltyLion and Smile.io help create and manage reward systems that encourage repeat purchases and referrals. Customer feedback tools like SurveyMonkey and NPS tools such as Delighted provide valuable insights into customer satisfaction, helping businesses address issues and improve their offerings to enhance loyalty.
In addition, referral program software like ReferralCandy incentivizes word-of-mouth marketing, while analytics tools like Google Analytics help businesses understand customer data and behavior to refine their loyalty strategies. Social media management tools such as Hootsuite and rewards/gamification tools like Bunchball keep customers engaged and foster a sense of community around the brand.
Snagit, a screen-capturing tool, can also play a role in customer loyalty by creating high-quality visuals and tutorials for customer support, marketing materials, or personalized messages, helping businesses deliver clear communication and positive user experiences, which strengthens trust and loyalty.
TechSmith is the market leader in screen capture software and productivity solutions for daily in-person, remote, or hybrid workplace communication and customer-facing image and video content. Our award-winning flagship products, Snagit, Camtasia, and Audiate, empower anyone to create remarkable videos and images that share knowledge for better training, tutorials, and everyday communication.
Bandicam has long been a top contender for users looking for powerful screen recording software—but is it the right choice for the job? It’s always good to know your alternatives—whether you’re looking for higher quality recordings, more video editing options, AI-enablement, or general ease of use. In this blog post, we’ll explore some of the best Bandicam alternatives that are currently available to help you find the right screen capture solution to fit your needs.
What is Bandicam?
Bandicam is screen recording software that caters to gamers and other professionals that need to record their screen at a high frame rate and quality. One of its core selling points is its ability to capture high-quality video with minimal performance impact. Bandicam supports various recording modes, including screen recording, game recording, and external device recording like Xbox, IPTV, and more, making it a versatile choice for users with complex recording needs.
Bandicam creates MP4 or AVI files, but it natively does not come with any video editing options. The created recordings can be edited in their basic Bandicut software (sold separately) or imported into more powerful third-party video editing software such as TechSmith Camtasia.
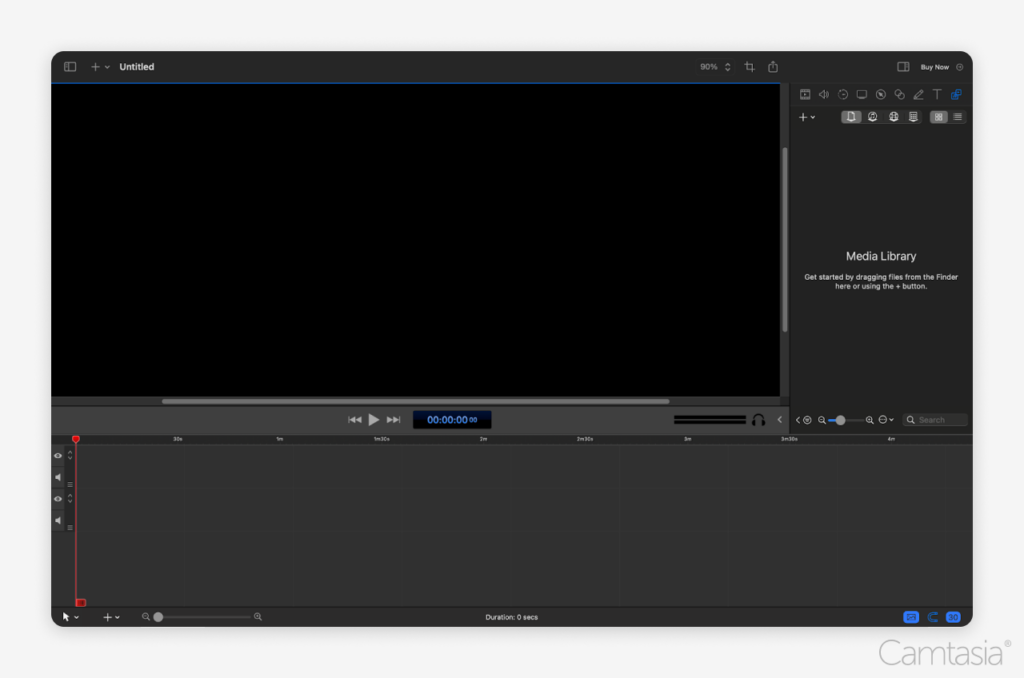
Camtasia is an all-purpose video creation tool that combines high-quality screen recording with comprehensive video editing software. Due to its ease of use and broad collection of features, Camtasia fits well within all different kinds of industries.
The most significant difference between Bandicam and Camtasia is where each tool focuses its strengths. While Bandicam specializes in high-quality screen recording, particularly for gaming and broadcasting use, Camtasia combines advanced screen recordings with a broader range of video editing features that enable users to create polished, professional videos.
Crystal-clear screen recording
Why settle for blurry screen content? Camtasia’s screen recorder captures everything at up to 4K!
Bandicam is known for its ability to capture high-definition video, including 4K UHD, with minimal lag or impact on system performance.
Versatile Recording Modes
Offers game recording, screen recording, and device recording (e.g., from HDMI, cameras, or consoles).
Real-Time Drawing
Allows users to annotate over the screen in real-time during recording.
Bandicam pricing:
As of September 16, 2024
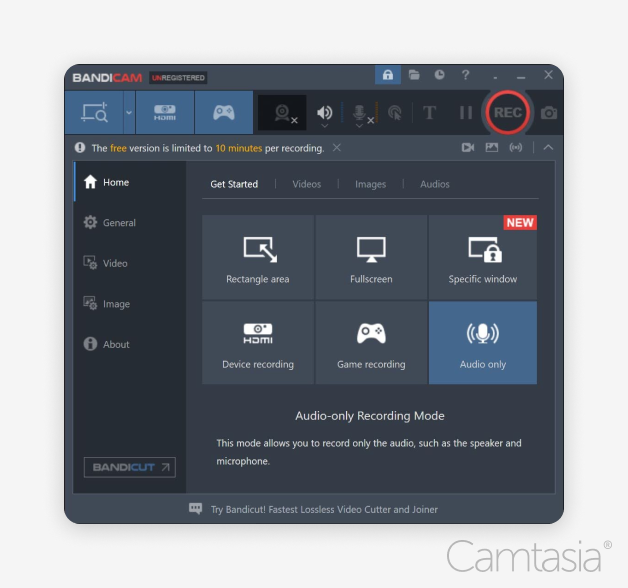
Free: 10 minute recording limit; recordings are watermarked; no commercial use
Personal: $33.26/year
Business: $49.46/year
There are many alternatives on the market, and we picked out five other screen recorders to compare Bandicam to.
Camtasia
Camtasia by TechSmith is a top-notch alternative to Bandicam. Both tools have extensive features that allow for high-quality screen, audio, and webcam recording. While Bandicam stands out with its additional device capture and an impressively high capture framerate, Camtasia appeals to those that are looking for an all-in-one solution for high-quality screen recording and extensive video editing. With its intuitive user interface, Camtasia is easy for beginners to get started and powerful enough to appeal to even seasoned video creators.
Camtasia key features:
High-Quality Recordings
Camtasia’s Screentelligence(™) technology captures screen, audio, webcam, system sound, and cursor data as separate, editable layers.
Multi-Track Video Editor
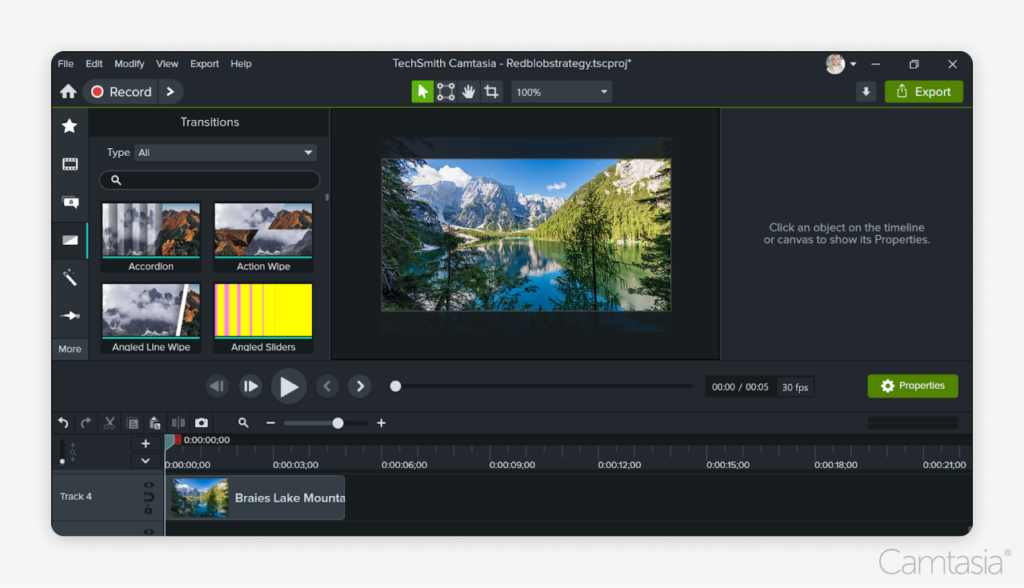
Camtasia’s included video editor gives users all the functionality they need to cut, polish, enhance, and turn their recording into full video productions: transitions, annotations, cursor effects, camera overlays, dynamic animations, captions, background music, and much more.
Multi-Platform Suppor
Unlike Bandicam, which is only available on Windows, Camtasia is available for both Windows and Mac users, and recordings and projects can be shared and edited across both platforms.
Pre-Built Templates, Stock Assets, and Rev-Workflow
Camtasia’s pre-built video templates, elements, and stock footage guide the user through the video editing process and make it easy to turn simple recordings into great-looking and engaging clips.
Artificial Intelligence
Camtasia’s functionality gets selectively enhanced through AI-based features for speech-to-text transcriptions, camera background removal, and more.
Pros:
Screen recording and comprehensive video editing tools
Suitable for both beginners and advanced users
High-quality output with multiple export options
Extensive library of templates and assets
AI and audio-functionality can be expanded further through the Camtasia Audiate add-on
Cons:
Higher price point compared to Bandicam
Larger installation size and higher system requirements
Less ideal for game or external HDMI device capture
Camtasia pricing:
As of September 16th, 2024
Free Trial: Fully functional with watermark; no recording time limit.
Essentials: $ 179.88 per user/year
Create: $249.00 per user / per year (includes Camtasia and Camtasia Audiate for additional AI-based functionality)
Pro: $499.00 / per user per year (includes Camtasia, Camtasia Audiate, Screencast, and Assets for next-level AI features, premium assets, and online collaboration platform)
Enterprise: Get in touch with TechSmith to learn about discounts and offers for entire departments, companies, or institutions.
Snagit
Snagit is another proven product from TechSmith, focusing more on quick and easy screen captures and basic editing rather than full-scale video production. It is an excellent tool for those who need a straightforward way to record their screen and quickly share its content with coworkers, friends, or business partners.
Bandicam and Snagit have a lot in common, such as the ability to record and draw on the screen during video recording and a comprehensive toolset for taking screenshots and editing them.
The biggest difference is in their respective strengths: While Bandicam prioritizes a high recording quality and external device capture options geared towards professional creators, Snagit has made it its mission to empower anyone to create quick yet appealing screen recordings and screenshots to share their thoughts, provide instructions, and give feedback. Snagit’s ease of use, supported by a comprehensive collection of training videos and guides, makes it a staple on many workplace computers.
Record your screen with Snagit
Snagit makes it easy to share quick updates and how-to’s by capturing exactly what’s happening on your screen.
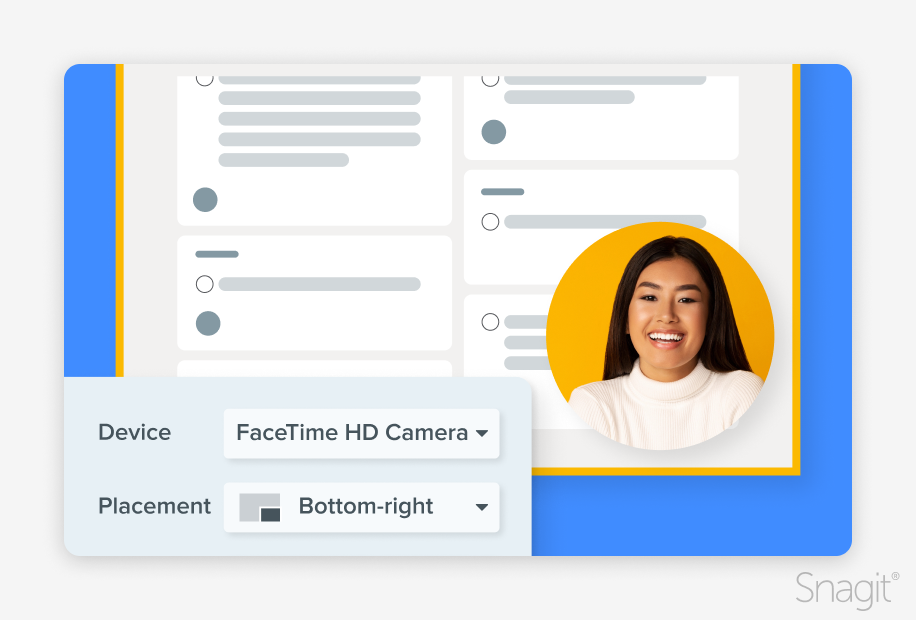
Record screen, audio, webcam, mouse cursor (and clicks), and system audio to an instantly sharable MP4 file.
Share a Link
Created videos and screenshots can be shared via a hidden link where viewers can comment and collaborate. Videos can also be directly uploaded to Microsoft OneDrive, Microsoft Teams, Slack, and other destinations.
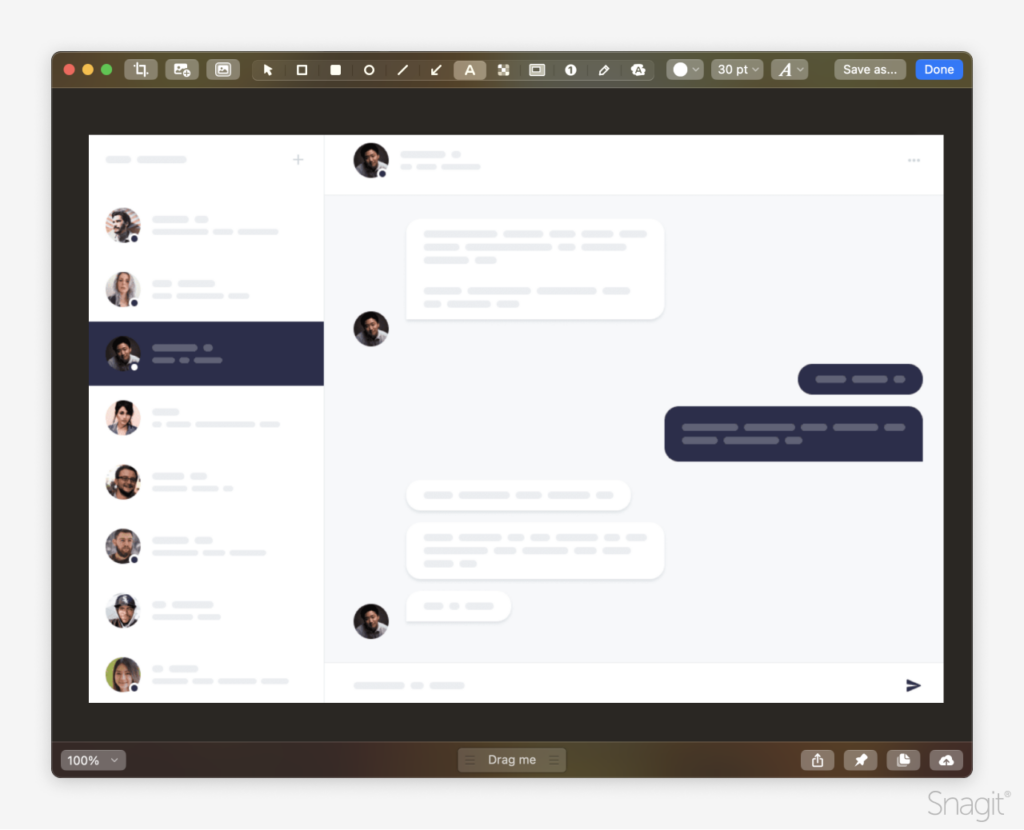
Professional screenshots
More than just a snip! Snagit’s image capture tools are matched by no other, and the captures can be extensively edited, combined, and enhanced using the included Snagit Editor.
Cross-platform compatibility
Unlike Bandicam, Snagit is also available for both Windows and Mac users, enabling entire teams to be on the same standard.
Pros:
User-friendly video capture targeted at beginners and advanced users
Versatile capture options
Basic video editing features for quickly trimming and combining content.
Quick sharing of videos via hidden link or by uploading them to common business platforms.
Beyond video: Snagit excels at capturing, editing, and managing screenshots.
Built for improving documentation, communication, and knowledge transfer.
Includes cloud storage for sharing 25 videos and unlimited images.
30+ years of experience
Cons:
Recording quality is not as extreme as Bandicam.
No external device capture (exceptions: webcam, microphone)
No advanced video editing options
Snagit pricing
As of September 16, 2024
Free Trial: Fully functional trial version for 15 days.
Personal: $ 39.00 per year and user
Business: $ 62,99 per user (unlimited, perpetual license)
Enterprise: Get in touch with TechSmith to learn about discounts and offers for entire departments, companies, or institutions.
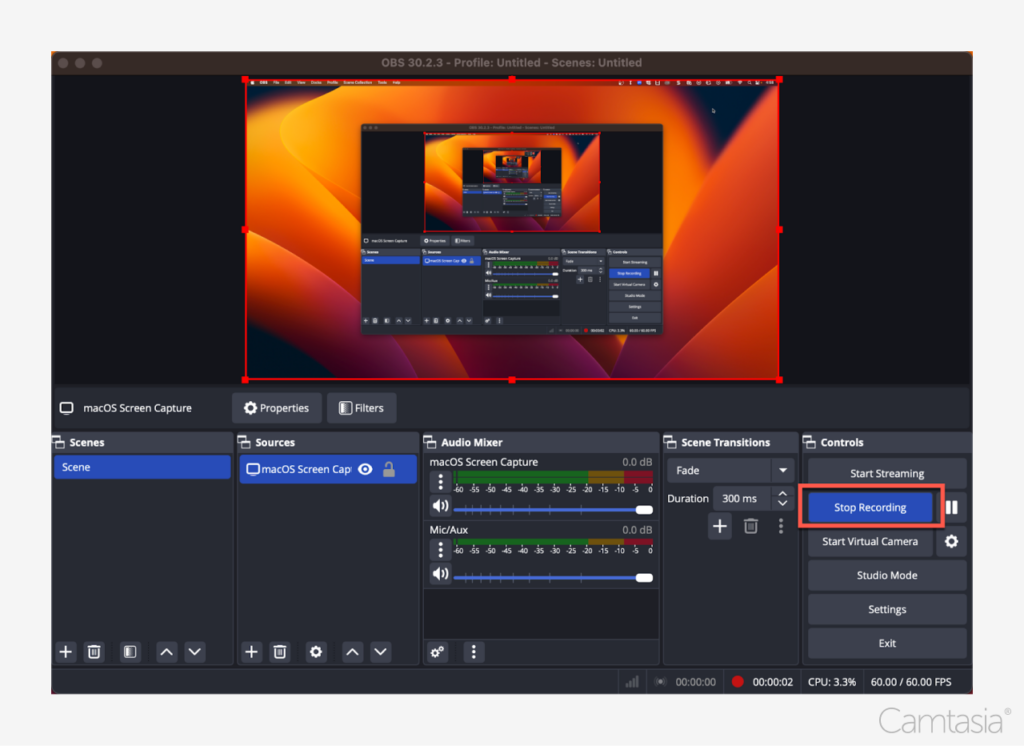
OBS Studio
OBS Studio is an open-source and free alternative to Bandicam that offers advanced screen recording and live streaming capabilities, making it a popular choice for gamers, broadcasters, and streamers.
OBS Studio is completely free, which is a significant advantage over Bandicam and many other alternatives. The software offers robust recording and mixing options for multiple screens, connected devices, and other inputs. The stream customization options, such as live text overlays and scene creation, enable flexibility and professional productions. And unlike Bandicam, OBS Studio supports a wide range of plugins to extend its live streaming functionality, including features like adding custom overlays and chat windows.
OBS features:
High performance real time video/audio capturing and mixing.
Unlimited number of scenes
Modular “Dock” UI
Highly customizable
Pros:
Completely free and open-source
Screen recording and live streaming
Highly customizable with plugin support
Excellent live streaming features, supports multiple source types including webcams, capture cards, and browser windows
Cross-Platform Support: OBS Studio is available for Windows, Mac, and Linux
Cons:
Steep learning curve with a more complex interface
Optimized more for streaming than recording
No built-in video editor
Limited customer support and documentation
OBS pricing:
As of September 16, 2024
Free
ScreenFlow
ScreenFlow by Telestream is a premium screen recording and video editing software that is only available for MacOS. While its screen recording features are not as extensive as Bandicam, they are still powerful enough to meet the needs of most creators or trainers.
ScreenFlow combines these screen recording capabilities with a comprehensive suite of editing tools, and its intuitive interface makes it easy for beginners while providing enough features to satisfy advanced users.
ScreenFlow is an established alternative to Bandicam for Mac- users who are looking for a complete recording and video editing suite.
Pros:
High-quality video and audio recording
User-friendly interface suitable for all skill levels
Comprehensive video editing options
Access to rich templates, motion graphics, and stock media
Direct Publishing Options for Imgur, Wistia, YouTube, Vimeo, and more
Cons:
Higher price point than Bandicam
Available only for macOS
It requires a learning curve for advanced features.
Pricing:
As of September 16, 2024
Free: Free trial available
Personal: $169 for a perpetual license of the current version
Business Premium: $259 (includes premium support and premium stock media library)
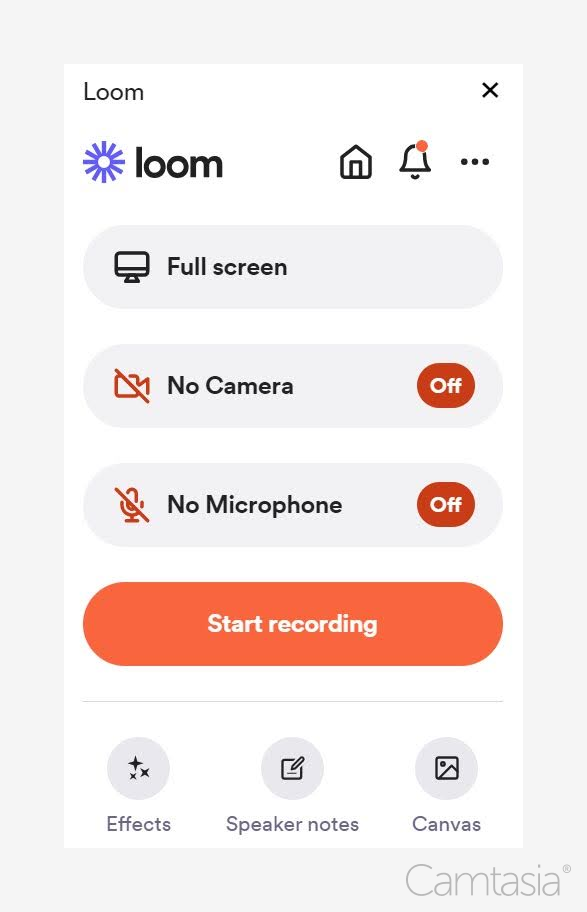
Loom
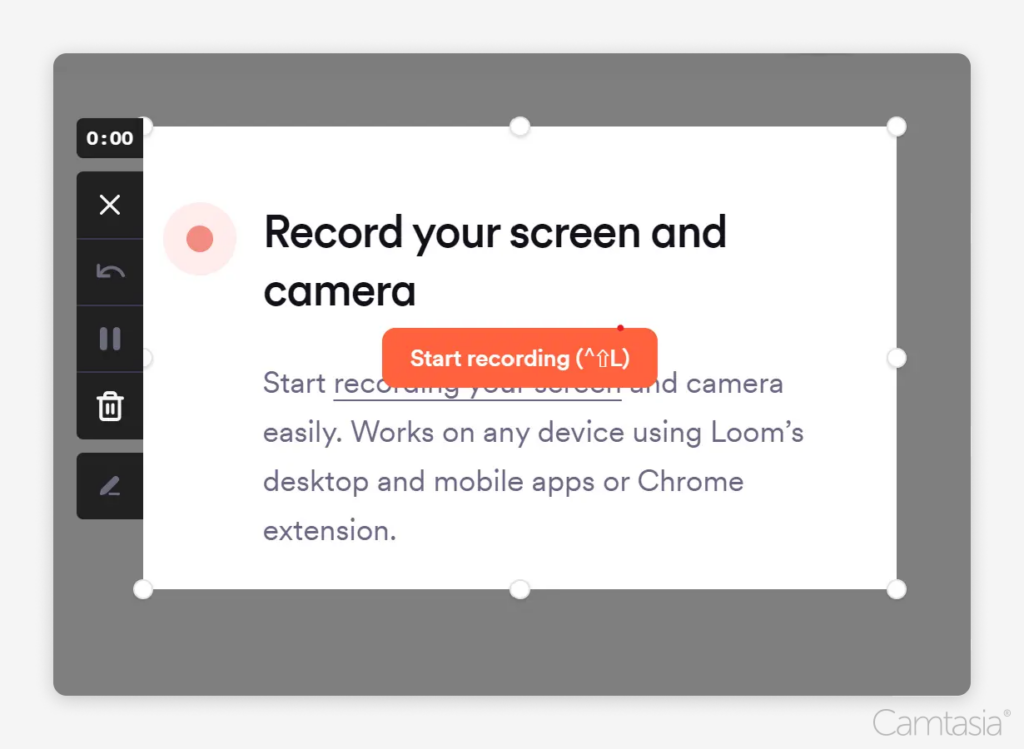
Loom is another emerging screen capture tool, putting a spotlight on effortless screen recordings and enabling better communication patterns. It caters to those who need an uncomplicated method to capture their screens, create engaging video messages, and share content with teams or stakeholders.
Both Loom and Bandicam provide screen recording capabilities, though Bandicam’s recording options are more robust and the quality is significantly higher. Both tools allow users to annotate on-screen during recordings and offer a limited toolset for editing the recorded content.
However, their niches differ: while Bandicam focuses on superior recording quality and external device capture designed for professional creators, streamers, and gamers, Loom emphasizes immediate screen recordings tailored for direct communication, feedback, and informational purposes.
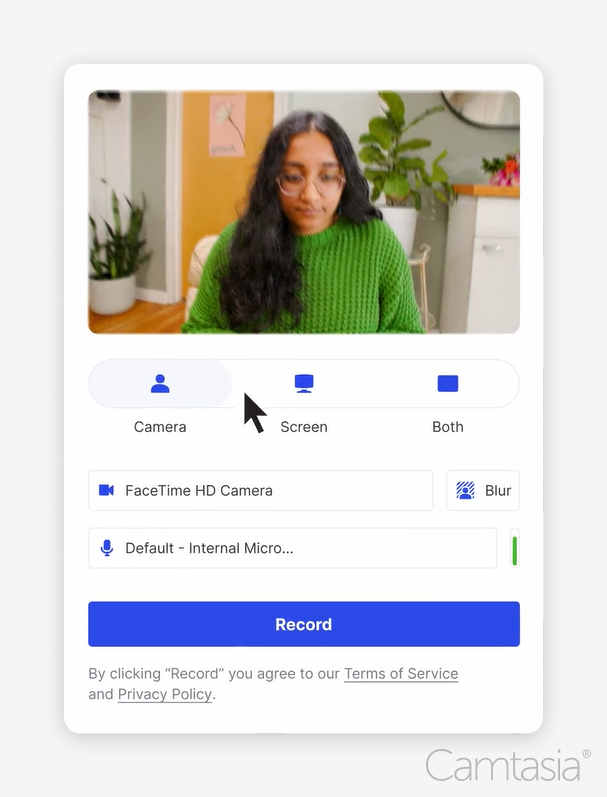
Loom key features:
Instant Recordings: Capture screen, webcam, and microphone to create instantly shareable videos.
Videos can be shared effortlessly using a unique link, facilitating viewer comments, easy collaboration, and team interactions.
Loom is a cloud-based tool available as a desktop and browser application, ensuring compatibility with both Windows and Mac.
Pros:
User-friendly interface designed for all skill levels
Rapid recording and sharing capabilities
Annotation tools for real-time feedback during recordings
Built-in sharing options
Workspace management for team collaboration
Cons:
Video recording quality may not match the high standards of Bandicam.
Basic video editing features compared to more advanced editors
Cloud-based nature might require continuous internet connection and tougher security compliance.
Pricing of Loom:
September 16, 2024
Free Starter: 5 minute recording limit and 25 video limit storage
Business: Starting at $12.50 per user year, this plan offers unlimited recordings and sharing.
Enterprise: Custom Loom pricing and functionality are available to large teams.
The best Bandicam alternatives? Camtasia and Snagit
While Bandicam is tailored specifically towards those who need to capture their screen at the highest quality and fidelity, the alternative solutions are often more versatile in terms of editing and sharing options.
Camtasia and Snagit from TechSmith are both excellent alternatives, one leaning towards professional creators while the other enables quick captures for improved communication and documentation.
At the end of the day, it is important to evaluate your requirements, budget, and technical expertise to choose the most suitable screen recording software for your needs in 2024.
The easiest way to edit videos
Stop wasting time and discover how Camtasia makes creating incredible videos easier than ever.
TechSmith is the market leader in screen capture software and productivity solutions for daily in-person, remote, or hybrid workplace communication and customer-facing image and video content. Our award-winning flagship products, Snagit, Camtasia, and Audiate, empower anyone to create remarkable videos and images that share knowledge for better training, tutorials, and everyday communication.
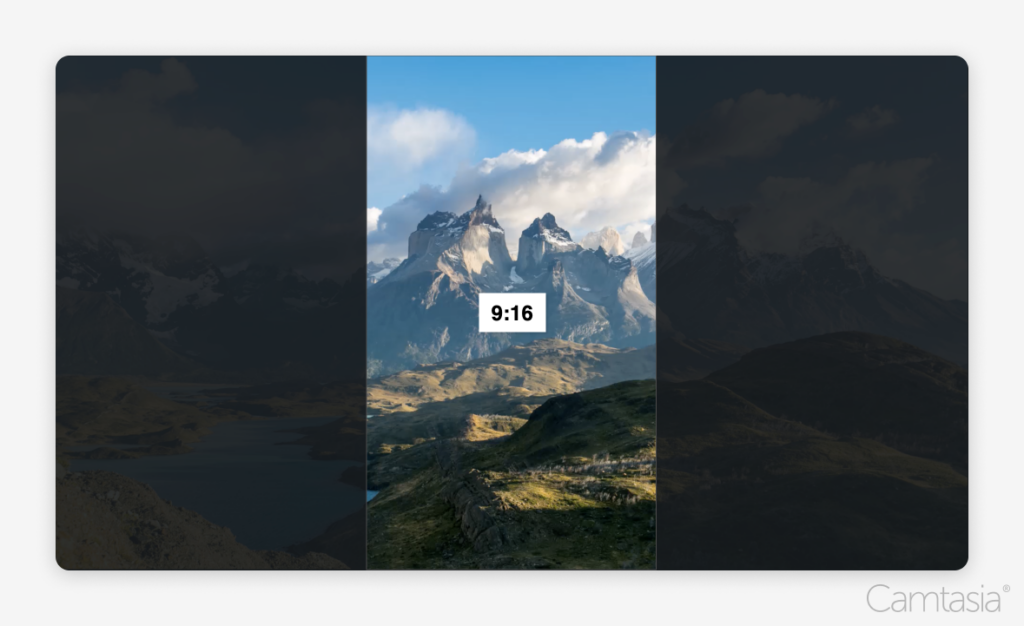
Vertical video is becoming the standard format for platforms like Instagram, TikTok, and YouTube Shorts, where mobile devices dominate. To make the most of this trend, it’s important to know how to position yourself properly in the vertical format. In this guide, we’ll explore the key tips for positioning yourself, creating engaging content, and using the right tools to edit vertical videos for social media platforms like Instagram.
Why positioning matters in vertical video
Viewers’ attention is fleeting, so it is important to do everything in your power to grab it while you can. In vertical format, the aspect ratios are different from traditional widescreen formats. Typically, videos are shot in a 9:16 aspect ratio, which means the vertical space becomes crucial.
The easiest way to edit videos
Stop wasting time and discover how Camtasia makes creating incredible videos easier than ever.
Most people watch videos on mobile devices, so positioning via vertical format ensures your content is engaging and professional-looking. If you’re not centered or framed correctly, it can distract from the message you’re trying to convey.
Positioning tips for shooting vertical videos
Center yourself
Position yourself in the middle of the frame to avoid being cut off, especially if you’re planning to add text and graphics in post-production. Keep the camera at eye level for a natural look. Filming a vertical video too high or too low can distort your face or body and appear unprofessional.
Good lighting = engaging content
Natural light is always preferable, but if you’re indoors, position yourself near a window or use soft lighting to avoid harsh shadows. Proper lighting not only makes you look more professional but also ensures that your audience can see you clearly.
Hold the camera steady
If you’re shooting with a smartphone, hold the camera on its side for landscape content, or rotate it vertically for shooting vertical videos. Try finding a spot where you can stabilize your arm to avoid shaking. Consider using a tripod or stabilizer to keep the shot steady. If you don’t have a tripod, create a makeshift one by resting your phone on a stable object, like a book.
Editing your vertical video in post-production
Aspect ratios and cropping
When editing vertical videos, make sure to maintain a 9:16 aspect ratio. Using editing software like Camtasia can help you crop, resize, and adjust the framing as needed. Aspect ratios are important to the health of your social media content, so make sure to choose the right one for the occasion.
Adding text and graphics
Vertical videos allow you to add text and graphics that fit the vertical format, making them perfect for platforms like Instagram Stories. Keep text simple and centered so that it’s easily readable on mobile devices. If you want to take your video to the next level, Camtasia makes it easy to add text overlays, animations, and callouts, enhancing your post-production process.
Making your vertical video more engaging
Create content that fits the platform
When creating vertical videos for social media platforms, think about the content that resonates best in a vertical format. Short, snappy videos with eye-catching visuals are perfect for platforms like Instagram Stories or TikTok. Use Camtasia to experiment with different cuts, transitions, and effects to keep engaging content at the forefront of your audience.
Focus on your audience’s viewing habits
Keep in mind that people watch vertical videos in quick bursts on their mobile devices. Ensure your message is clear and easy to understand, even in short formats. Use captions or graphics to support your content, as many users watch videos without sound on social media.
Try it for yourself
Positioning yourself correctly in the vertical format can dramatically improve your content’s performance on social media platforms. Center your frame, use good lighting, and don’t forget to edit postproduction with tools like Camtasia. With these tips, you’ll be able to create vertical videos that engage your audience and look professional, whether you’re creating Instagram Stories or sharing content across platforms. Now go give it a try for yourself!
The easiest way to edit videos
Stop wasting time and discover how Camtasia makes creating incredible videos easier than ever.
TechSmith is the market leader in screen capture software and productivity solutions for daily in-person, remote, or hybrid workplace communication and customer-facing image and video content. Our award-winning flagship products, Snagit, Camtasia, and Audiate, empower anyone to create remarkable videos and images that share knowledge for better training, tutorials, and everyday communication.
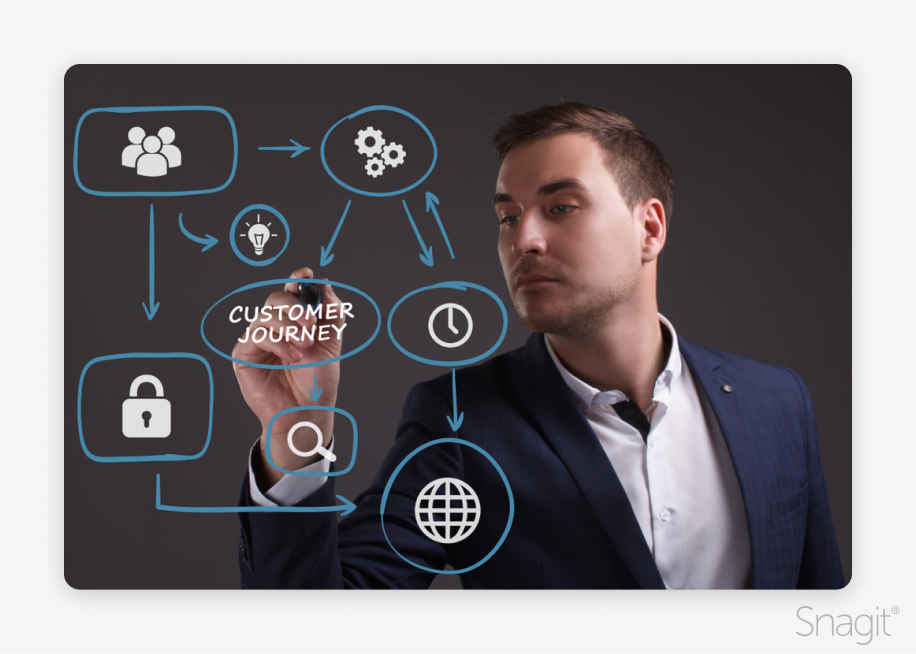
For organizations that wish to grow their businesses– which is most– there needs to be a shared understanding of the current customer journey. A customer journey is the series of steps that an individual prospect may take that ultimately lead them to purchase.
It’s essential for organizations to have an understanding of their customers’ experiences, as that is going to be key to empowering prioritization and continued execution of optimization efforts, which should in turn help to facilitate growth.
A well-crafted customer journey map provides a visual narrative of every interaction a customer has with your brand, helping businesses align their strategies with customer needs. The journey encompasses all stages, from initial awareness to post-purchase engagement. For organizations that aim to grow, mapping the customer journey ensures alignment across departments, allowing teams to make data-driven decisions, optimize touchpoints, and ultimately enhance the customer experience.
A clear understanding of your customer’s journey allows for better prioritization of efforts that directly affect conversion rates and customer satisfaction. Without it, even the best optimization strategies may fall short, as they fail to address pain points or opportunities at critical touchpoints. By mapping the journey, organizations are better equipped to identify these areas and execute targeted improvements that resonate with their customers.
Annotate and edit screenshots with Snagit
Professional mark-up tools and powerful features make it easy to create helpful images.
While your team may have a general understanding of the various customer interactions that may occur, customer experience journey mapping is an incredibly useful exercise to align understanding around the specifics. Getting started can be daunting if you aren’t sure where to begin, but a tool like Snagit can help. With Snagit, you can capture screenshots of the different stages of the customer journey and add context and explanations with annotations, stamps, and more.
What is the customer journey?
The customer journey aligns with what most organizations would refer to as their sales funnel. At the top of the funnel, you’ll be mapping the activity which is your potential customer’s first interaction(s) with your brand. Typically, there is always a desired next step for them to take. If they do, they will move on to the next interaction and the subsequent step in the customer journey, and so forth.
Understanding the customer journey helps businesses deliver personalized experiences, increase customer satisfaction both pre-sale and post-sale, boost sales, enhance retention rates, and foster customer advocacy.
What is customer journey mapping?
Customer journey mapping is the process of creating an accurate and actionable visual representation of the customer’s interactions with a brand across various touchpoints. A good customer journey map provides an overview of a customer’s experience. This should include the funnel stages and touchpoints for each, along with the emotions individuals may be experiencing and their pain points. This is going to help you optimize your marketing messaging in a way that addresses and solves those pain points.
Conversely, if you didn’t have this granular understanding, your messaging may miss the mark, as it would potentially lack relevance and be easier to ignore.
One of the benefits of customer journey mapping is that it allows you to identify gaps in the customer experience. Are there things you may have missed addressing outright? This can involve your messaging or the user experience, such as friction in a process or a clunky transition to the desired next action.
Another key benefit of customer journey mapping exercises is the improvement of customer engagement and retention by identifying various ways to optimize the experience. This might involve prioritizing efforts in areas where things are going particularly well and you wish to amplify that impact. Sometimes, this may involve identifying suboptimal experiences and brainstorming experimental ways to course-correct.
Thirdly, another significant benefit of customer experience journey mapping is creating better alignment between marketing, sales, and customer support teams. Typically, these different departments are all interacting with prospective and existing customers at unique points throughout that purchase path. Having a visual representation of the customer journey allows everyone to step back and view the big picture holistically, adding context and providing a shared understanding that can be applied to achieve business goals.
A screen capture tool like Snagit can be incredibly useful throughout this customer journey mapping process, as it democratizes the image creation process. You don’t have to be an expert to create professional-looking images. The markup tools in the program allow for annotating your screenshots with relevant data and visuals.
How to map the customer journey: A step-by-step guide
Follow this step-by-step guide to create a comprehensive customer journey map that leads to actionable insights.
Step 1: Define customer personas
Customer personas are fictional representations of your ideal customers, based on real data and research. They help you identify key characteristics like demographics, behavior patterns, motivations, goals, and challenges. Developing accurate personas is the foundation of an effective customer journey map, as they allow you to focus on the customer’s unique needs.
Understanding your customers’ motivations helps you align your messaging and offerings, while knowing their goals ensures you are solving the right problems. You should also consider the challenges they face throughout their journey with your brand.
To assist in this process, use Snagit to capture and organize data from user research, interviews, surveys, and analytics. Snagit’s annotation features allow you to highlight key insights, while visuals can help create engaging, easily understandable customer personas. This way, stakeholders across your organization can quickly grasp who your customers are and what they care about.
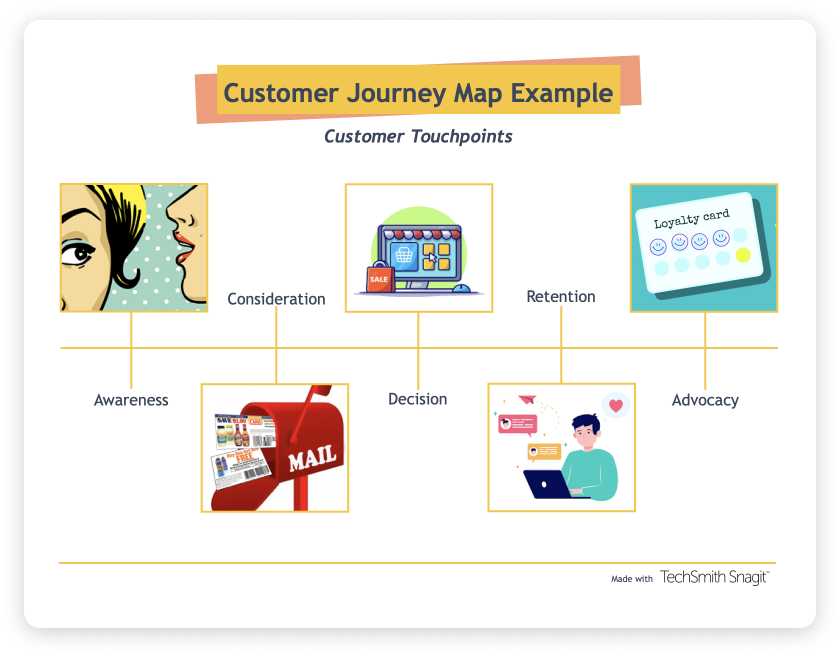
Step 2: Identify key touchpoints
Next, identify the key touchpoints where customers interact with your brand, both online and offline. These touchpoints could include your website, social media, email, or interactions with customer support. Understanding where customers engage with your brand helps ensure your journey map covers all critical areas of interaction.
To create a more accurate and detailed customer journey map, use Snagit to visually capture these touchpoints. You can record screenshots of different customer interactions, highlight important steps in the customer experience, and annotate these touchpoints to give context. By creating a visual representation of these touchpoints, you’ll gain a clearer understanding of how each interaction impacts the overall journey.
Step 3: Outline customer goals and emotions
At every stage of the journey, customers are working towards achieving specific goals—whether it’s gathering information, making a purchase, or resolving an issue. Along the way, they experience a range of emotions, from excitement and satisfaction to frustration or confusion. Mapping these goals and emotions helps you understand what the customer is thinking and feeling at each stage.
Use Snagit to visually capture customer feedback from surveys or interviews, and annotate these visuals with key insights. You can also add emotion-based labels to illustrate how customers are feeling at different touchpoints, or simply use the built-in emoji stamps. This approach brings clarity to the emotional side of the journey, allowing you to address customer needs more effectively.
Step 4: Identify pain points and opportunities
Every customer journey has areas where friction or challenges arise—these are the pain points. Identifying these pain points is critical for understanding where customers struggle and how you can remove obstacles from their experience. At the same time, you’ll uncover opportunities to improve the journey by streamlining processes or enhancing interactions.
Capture customer feedback and data using Snagit to create a visual representation of these problem areas. By annotating screenshots or visuals with specific pain points, you can provide clear and actionable insights for improving the customer experience. This visual approach not only highlights where things are going wrong but also showcases potential opportunities for enhancing customer satisfaction.
Step 5: Visualize the customer journey
Finally, use Snagit to create a visual journey map that outlines each stage of the customer’s interaction with your brand. This map should clearly depict the stages of the journey, key touchpoints, customer goals, emotions, and pain points. Including visuals such as screenshots, diagrams, or feedback annotations will make the map more actionable and easier for stakeholders to understand.
Tips for enhancing your map with visuals:
Use screenshots to show actual customer interactions.
Add annotations to explain what’s happening at each touchpoint.
Include diagrams that outline customer emotions or pain points at specific stages.
Ensure the map is simple, clear, and focused on actionable insights.
By following these steps and using tools like Snagit to visually capture and organize data, you’ll create a customer journey map that is both comprehensive and highly useful for driving improvements in your customer experience.
Why use Snagit for customer journey mapping?
Creating a comprehensive and actionable customer journey map requires the right tools to capture and communicate insights effectively. Snagit offers a range of features that make it an ideal choice for building accurate, insightful customer journey maps. Here are three key benefits of using Snagit in this process:
1. Easy visual captures for better mapping
One of the key benefits of using Snagit is its ability to easily capture visual content, such as screenshots, web pages, emails, and other touchpoints that represent real customer interactions. These visual captures provide a more accurate view of the customer’s journey by showing actual experiences and engagement points. Whether you’re highlighting a website interaction, an email response, or a social media message, Snagit makes it simple to incorporate real-world examples into your map.
By capturing visuals of customer interactions, you ensure that your journey map reflects how customers truly engage with your brand, rather than relying solely on assumptions or theoretical touchpoints.
2. Annotation and editing for clarity
Snagit’s powerful annotation and editing tools make it easy to enhance your customer journey map with clarity and precision. You can add arrows, callouts, text, and other annotations to highlight key insights, identify pain points, and emphasize opportunities for improvement. These annotations bring context to the visuals, making it easier to communicate the significance of different stages and interactions in the customer journey.
For example, you can use arrows to point out areas where customers experience friction or add text callouts to summarize feedback from user research. By visually marking up the journey map, you can ensure stakeholders quickly grasp the most important insights without sifting through raw data.
3. Seamless sharing and collaboration
Effective customer journey mapping requires input and collaboration from cross-functional teams. Snagit’s seamless sharing capabilities allow you to easily share visuals, annotated maps, and customer insights with team members and stakeholders across departments. Whether you’re sending a quick visual update or collaborating on a full journey map, Snagit ensures everyone stays aligned and can contribute to the discussion.
Sharing options make it simple to distribute customer journey maps via email, chat tools like Slack or Microsoft Teams, or through Screencast, enabling continuous feedback and iteration. This fosters better collaboration between marketing, sales, customer support, and other teams, ensuring the map is both comprehensive and actionable.
Best practices for effective customer journey mapping
By following these best practices, you can ensure that your map effectively captures the complexities of customer behavior and helps guide strategic decisions.
1. Involve cross-functional teams
An effective customer journey map isn’t the responsibility of one department alone. It’s essential to involve cross-functional teams—including marketing, sales, and customer support—to gain a comprehensive view of the customer’s journey. Each department interacts with customers in unique ways, contributing valuable insights into different stages of the customer lifecycle.
For example, marketing teams can provide information on how prospects first engage with your brand, while sales teams offer insights into the decision-making process. Customer support teams, on the other hand, understand the post-purchase experience and ongoing service needs. Collaboration between these teams helps ensure that your customer journey map is holistic and reflects real-world experiences rather than siloed assumptions.
Video messages > meetings
Record your screen and camera with Snagit for quick updates and feedback.
Customer behavior is constantly evolving. Preferences, technology, and market trends shift over time, meaning that what was once an accurate representation of the customer’s experience can quickly become outdated. To ensure your customer journey map stays relevant and actionable, it’s crucial to regularly revisit and update it.
By periodically reviewing your map, you can identify changes in customer behavior, uncover new pain points, and adjust your strategies accordingly. Regular updates also help align the map with business changes, such as new product launches, updated marketing tactics, or shifts in customer demographics.
3. Use visuals to enhance your map
Customer journey maps can be complex, often containing a wealth of data and touchpoints. To make this information more accessible and engaging for stakeholders, use visuals to simplify and highlight key aspects of the journey.
Tools like Snagit can help capture visuals, whether you’re annotating charts, illustrating touchpoints, or creating step-by-step guides.
Visuals not only make your map easier to understand, but they also make it more compelling, increasing stakeholder engagement and ensuring the map is actively used as a decision-making tool.
Annotate and edit screenshots with Snagit
Professional mark-up tools and powerful features make it easy to create helpful images.
Ready to improve your customer journey mapping with Snagit?
Hopefully, you’re feeling inspired to start your organization’s customer experience journey mapping. The good news is that you can get Snagit today to begin capturing and visualizing data for your customer journey map. Download the fully functioning, free 14-day trial and get immediate access.
Check out Snagit’s full library of tutorials to browse all of the available help content and get you up and running with the tool. For customer journey mapping specifically, there are some how-to resources we can recommend:
TechSmith is the market leader in screen capture software and productivity solutions for daily in-person, remote, or hybrid workplace communication and customer-facing image and video content. Our award-winning flagship products, Snagit, Camtasia, and Audiate, empower anyone to create remarkable videos and images that share knowledge for better training, tutorials, and everyday communication.
One-on-one meetings are vital for building strong working relationships, providing feedback, and discussing career development particularly if it’s a connection with your direct manager or report. If you’re not feeling like you are leaving one-on-ones, especially with your direct manager, with a lot of value then it’s time to revise your approach.
Adopting these tips will support a more structured approach, that will leave some space for fluidity of conversation while ensuring you get all of the practical bases covered you need to continue successfully within your role before your next connection.
To optimize your one-on-one time and experience, consider the structure of your one-on-one, set an agenda, and be deliberate about the time allocated and the setting for your one-on-one.
This doesn’t mean you have to ditch the personal nature of your one-on-one completely either – this can be a great place for you to get to know your manager, employee, or colleague even better so that you can foster an even healthier working relationship and support one another’s career growth.
These tips will help you turn your one-on-ones from a chore into a chance to connect, collaborate, and maybe even have a little fun.
Create and maintain a running agenda
Effective agenda templates help ensure these meetings are productive and focused. The most effective one-on-one meeting agenda templates share certain qualities: they are structured, flexible, promote open communication, and help both parties prepare.
Here are some of the best one-on-one meeting agenda templates and why they stand out:
The 3 P’s: progress, priorities, problems
Why it’s effective
Structured yet flexible: This template focuses on key areas that matter in any role, making it adaptable for various industries.
Balanced: Encourages discussion on both achievements and challenges, giving a comprehensive overview of performance and upcoming work.
Actionable: Each section can lead to clear next steps, ensuring accountability.
Template example
Progress: What have you accomplished since our last meeting?
Priorities: What are your main goals for the upcoming week/month?
Problems: Are there any challenges you’re facing?
Feedback-centered agenda
Why it’s effective
Focused on growth: This template prioritizes feedback, fostering continuous improvement and development.
Open dialogue: It encourages both the employee and the manager to share feedback, creating a two-way communication channel.
Employee empowerment: It allows the employee to bring up topics they want feedback on, promoting engagement.
Template example
Wins and what went well: What recent achievements should we celebrate?
Challenges: What obstacles have you faced and how can I support you?
Feedback: What feedback do you have for me? Here’s some feedback I have prepared for you.
Growth: What skills or areas would you like to develop further?
Check-in & well-being agenda
Why it’s effective
Holistic approach: It addresses not only work progress but also the employee’s well-being, mental health, and job satisfaction.
Engagement and retention: Showing care for employees’ well-being boosts engagement and reduces turnover.
Builds trust: Regular check-ins on well-being build a culture of trust and support.
Template example
Well-being: How are you feeling overall—both at work and outside of work?
Workload: How manageable is your current workload?
Support: Is there anything you need from me or the team to help balance your workload or stress levels?
Personal/professional development: Are there any personal development goals you’d like to focus on?
Open discussion agenda
Why it’s effective
Flexibility: Provides more freedom for the employee to bring up whatever is on their mind, fostering an open-ended discussion.
Adaptable: Can be tailored based on the priorities of the moment, making it suitable for dynamic work environments.
Engagement-driven: Encourages employees to take ownership of the conversation.
Template example
Topics from the employee: What would you like to discuss today?
Topics from the manager: Items they see as valuable to cover
Next steps: What actions should we take before the next one-on-one?
Why these templates stand out
Clear structure: Each template is designed to keep the meeting focused and efficient, ensuring that important topics are covered without going off track.
Balance of work and personal development: The best templates cover immediate work-related matters and long-term career growth.
Customization: These agendas can be tailored to fit different needs, whether focusing on feedback, well-being, or performance.
Engagement: Employees feel more involved and valued when their input is actively sought and prioritized, fostering a stronger manager-employee relationship.
When you sit down for your one-on-one, start by ranking the items on your agenda from most to least important. This way, if time runs short, you can prioritize the most critical topics. As you discuss each item, cross it off the list and document any decisions or action items. This keeps everyone on the same page and ensures you can refer back to the meeting notes later.
Use your time wisely: Flip the meeting
Synchronous time, whether in-person or remote via a video call, is precious. This should not be a place reserved for status updates that don’t require that one-on-one synchronous time.
This is where you should feel most comfortable asking open-ended questions, having discussions, brainstorming, and debating the best path forward in a safe environment. It’s a space to really understand the perspective of your manager or colleague so that you can go forth and be enabled to do your best work.
To ensure you get to the heart of this as quickly as possible – if you have a status update to provide or background information that’s going to lay the groundwork for a lively discussion with your team member, then you should flip the meeting by sending a personalized video update beforehand.
Sending out a video or presentation beforehand allows the person you’re meeting with to lean into active listening, really digesting the information provided prior to your connection. Preparing them to discuss, not just digest during your valuable time together.
Plus, it’s a game-changer for different learning styles. Some people love to think on their feet, while others need time to process and gather their talking points. Flipping the meeting ensures everyone gets a chance to shine. Check out this quick 2-minute video for how to flip a meeting.
Video messages > meetings
Record your screen and camera with Snagit for quick updates and feedback.
Keep one-on-one meetings short (30 minutes) for maximum effectiveness
Although some meetings are designed for more depth at certain times of the year, such as performance management or performance review conversations, recurring meetings can be shorter while still being a place to receive feedback on an ongoing basis.
One-on-one meetings are an essential part of employee development and communication in any organization. However, keeping these meetings short—preferably around 30 minutes—can make them more effective than longer sessions. Here’s why a 30-minute one-on-one is often more impactful than a full hour.
Increased focus and efficiency
When meetings are capped at 30 minutes, both the manager and the employee are encouraged to be more intentional about their time. A shorter meeting requires participants to prioritize key issues, rather than digress into less important topics.
Why this works
Having a tight schedule forces you to stick to core subjects like progress updates, challenges, and next steps. It discourages unnecessary tangents and keeps the conversation results-oriented.
Both parties are likely to prepare better, ensuring that the limited time is used effectively, leading to a more productive meeting.
The need to make decisions or resolve issues within a limited time promotes clarity and quick action, which helps in keeping projects moving forward.
Prevents meeting fatigue
Longer meetings often suffer from diminishing returns, as participants become mentally fatigued. After about 30 minutes, attention levels tend to drop, reducing engagement and effectiveness. Shorter meetings help maintain high energy and focus throughout the conversation.
Why this works
A 30-minute meeting keeps participants fresh and engaged, making for a more dynamic conversation.
With less time, there’s less opportunity for the discussion to drift into unrelated or lower-priority topics, which often happens in hour-long meetings.
Supports more frequent check-ins
If one-on-one meetings are kept short, it’s easier to schedule them more frequently—whether weekly or bi-weekly. This allows for ongoing communication and quick course corrections, rather than waiting for larger issues to pile up over time.
Why this works
More frequent, shorter meetings provide an opportunity for real-time feedback, addressing issues before they escalate.
Frequent touchpoints keep both the manager and employee aligned on goals, progress, and priorities without the need for extended infrequent meetings.
Boosts productivity across the team
By keeping one-on-ones to 30 minutes, managers have more time to focus on other high-priority tasks. Similarly, employees appreciate that their time is respected, allowing them to get back to their work without losing momentum.
Why this works
Short meetings fit more easily into busy schedules, making it easier for both parties to balance meetings with their daily responsibilities.
For managers with larger teams, shorter meetings allow them to meet more frequently with individual team members without sacrificing time for other tasks.
Encourages concise communication
Shorter one-on-one meetings promote clearer and more concise communication. Both parties are more likely to get to the point and avoid over-explaining or indulging in unnecessary details.
Why this works
Participants are more likely to leave the meeting with clear, actionable takeaways because the conversation is focused on critical matters.
A concise meeting means follow-ups and next steps are more likely to be remembered and acted upon, creating a stronger culture of accountability.
Fits flexibility into busy schedules
In today’s fast-paced work environment, both managers and employees are juggling numerous responsibilities. A 30-minute one-on-one is easier to slot into a busy day and less likely to be canceled or rescheduled due to time conflicts.
Why this works
When meetings are shorter, it helps ensure that both managers and employees have adequate time for other meetings, deep work, and personal tasks.
hort meetings are easier to schedule, making it more likely that they happen consistently, improving overall communication and connection.
Conclusion
Shorter, 30-minute one-on-one meetings are not just a time-saving strategy—they enhance focus, prevent fatigue, and create an environment for more frequent, effective check-ins. By encouraging concise communication and reducing time-wasting tendencies, they help ensure meetings are productive and actionable, benefiting both employees and managers.
For those aiming to optimize their one-on-one meetings, shorter is often better, keeping the conversation sharp, focused, and productive.
Host the occasional in-person meeting
In today’s remote-first world, video calls and messaging platforms have become the default modes of communication. While these virtual meetings are efficient, there are several reasons why holding in-person one-on-ones can still be crucial—particularly in remote or hybrid work environments.
Build stronger relationships
In-person meetings provide a unique opportunity to build deeper, more authentic connections. Human interactions are richer when they take place face-to-face, allowing for more natural communication and rapport-building.
Why this matters
In-person conversations allow for more nuanced understanding of body language, facial expressions, and tone of voice, which are often lost in video calls.
Meeting in person fosters a sense of trust and empathy that is difficult to replicate virtually. This is especially important for remote employees who may feel disconnected from their managers or teams.
Encourage open dialogue
In-person settings create an environment where employees often feel more comfortable expressing concerns, giving feedback, or discussing personal matters. The physical proximity and shared space encourage more open, honest dialogue.
Why this matters
Video calls can feel rigid, with a structured agenda, while an in-person meeting, especially over coffee or in a relaxed setting, can facilitate more organic and casual conversations.
In-person interactions reduce the perceived distance between employees and managers, making employees feel safer sharing their thoughts and feelings.
Enhanced focus and engagement
Remote meetings can suffer from distractions, whether it’s email notifications, technical issues, or household interruptions. In-person one-on-ones eliminate these virtual barriers, allowing both parties to be fully present in the moment.
Why this matters
Being in the same room fosters more focused engagement, leading to a higher-quality conversation. Without screens in the way, you can maintain eye contact and truly listen to each other.
When both parties are fully engaged, problem-solving becomes more collaborative and effective, leading to quicker resolutions.
Fostering company culture
In-person meetings reinforce the cultural connection between employees and the company. Remote workers, especially those who rarely visit the office, may feel detached from the broader organizational culture. Meeting face-to-face helps re-establish that bond.
Why this matters
An in-person meeting can help employees feel more connected to the company’s values, mission, and team dynamics, which is harder to achieve through virtual interactions.
Remote employees often miss out on casual office interactions. In-person meetings can help recreate some of that camaraderie and belonging.
Handle sensitive conversations
Sensitive topics such as performance reviews, personal challenges, or difficult feedback are best handled face-to-face. In-person meetings allow managers to convey empathy and understanding more effectively during challenging discussions.
Why this matters
Delivering difficult news or feedback in person allows for more emotional sensitivity, as both parties can read and respond to each other’s body language and emotions more accurately.
When an employee receives feedback or discusses a personal issue, the presence of their manager in person can offer a sense of comfort and support that a virtual meeting may not.
Create space for brainstorming and creativity
In-person one-on-ones provide a unique space for brainstorming and problem-solving, which can feel more fluid in person than online. Sometimes, the energy of being in the same room sparks creativity that a virtual meeting simply can’t replicate.
Why this matters
In-person discussions often lead to more spontaneous and creative exchanges, which can be harder to achieve in structured virtual meetings.
Being physically together allows for activities like whiteboarding or sketching out ideas in real time, which can speed up creative problem-solving.
Re-establish human connection in a remote-first world
In a remote work environment, employees may go long stretches without interacting with colleagues in person. Occasional face-to-face one-on-one meetings offer an essential opportunity to reconnect on a human level.
Why this matters
Remote work can lead to feelings of isolation. An in-person meeting reminds employees that they are part of a team and that their manager is accessible and approachable.
Meeting in person can reinvigorate employees, renewing their sense of purpose and connection to their work.
Conclusion
While remote work has its advantages, the value of in-person one-on-ones cannot be underestimated. Whether it’s building stronger relationships, encouraging open dialogue, or handling sensitive conversations, there are certain aspects of human connection that can only be fully realized when meeting face-to-face.
In-person one-on-ones create a deeper, more meaningful experience that strengthens trust, enhances communication, and ultimately leads to better employee engagement and satisfaction. Incorporating them into a primarily remote work environment is a powerful way to maintain human connection and foster greater trust.
People work best for people they know, like, trust, and respect. Take the time to create a personal connection with your manager or direct reports. Whether in person or remote – take a few minutes of each one-on-one to discuss non-work-related topics. Here are some conversation starters for the workplace from BetterUp to help break the ice:
What’s your favorite part of your job?
What was your first job?
Do you have any side hustles or projects?
When you work remotely, do you work in a cafe or from home?
What’s one thing you’re passionate about in your career?
If you could describe your ideal work-life balance, what would it look like?
What’s one thing that motivates you at work?
What’s something valuable you’ve learned during your career?
Are there any upcoming projects you’re excited about?
Did you ever think about trying a different career before this one?
What made you want to work for [company]?
Did you go to school to become a [job role]?
Do you have any tips for time management?
By following these tips, you can make your one-on-one meetings more effective and enjoyable for everyone involved. Remember, the goal is to build strong relationships and achieve your goals together.
Now that you’re a rockstar at one-on-ones, want to improve more of your meetings? Download our free guide below.
Stop wasting time in pointless meetings
See how small changes to the way you share information can help you reclaim your time at work.
TechSmith is the market leader in screen capture software and productivity solutions for daily in-person, remote, or hybrid workplace communication and customer-facing image and video content. Our award-winning flagship products, Snagit, Camtasia, and Audiate, empower anyone to create remarkable videos and images that share knowledge for better training, tutorials, and everyday communication.
In the world of video content, the ability to manipulate time can transform a simple shot into a captivating spectacle. Slow-motion video is a powerful tool that allows us to add drama and emphasis to our visuals.
Whether you’re creating content on your computer with a video editor like Camtasia or using an iPhone camera, understanding how to effectively use slow-motion can elevate your videos to new heights. In this blog post, we’ll explore how to make videos slow-motion on different devices and how to convert slow-motion videos back to normal speed, with a special focus on Camtasia for precise control.
The easiest way to edit videos
Stop wasting time and discover how Camtasia makes creating incredible videos easier than ever.
Camtasia, TechSmith’s powerful screen recorder and video editor, provides an array of tools for creating and fine-tuning slow-motion effects.
Here are step-by-step instructions to help you achieve slow-motion video in Camtasia:
Step 1
Import your video into Camtasia’s timeline. Launch Camtasia and drag your video file onto the timeline.
Step 2
Right-click on the video clip and select “Add Clip Speed.” This action will open a menu where you can adjust the speed settings.
Step 3
Adjust the speed slider to slow down the video. Drag the speed slider to the left to decrease the speed of your video. You can preview the changes in real time to ensure you achieve the desired effect.
Customization Options
Camtasia allows for fine-tuning of the speed adjustments. Use the preview feature to see how your changes look and make additional tweaks if necessary. This is ideal for making precise adjustments to match the rhythm and flow of your content.
Benefits of using Camtasia:
High-quality slow-motion effects with precise control.
Easy timeline management for adjusting multiple clips.
Professional-level editing features that allow for a polished final product.
How to make a video slow motion on your iPhone
Creating slow-motion videos on an iPhone is straightforward and integrated into the device’s native camera app. No need to search the app store.
Follow these steps on an iPhone:
Step 1
Open the Camera app and select “Slo-Mo” mode. This mode allows you to capture videos with built-in slow-motion effects.
Step 2
Record your video as usual. The camera will automatically apply slow-motion effects to the footage.
Step 3
Edit the video in the Photos app by selecting the video, then tapping “Edit.” Adjust the speed sliders to fine-tune which sections of the video are in slow motion.
Android devices may vary, but the general process for creating slow-motion videos is similar.
Follow these steps on an Android phone:
Step 1
Open the Camera app and switch to the slow-motion mode. Look for an icon or setting labeled “Slow Motion.”
Step 2
Record your video. Like the iPhone, the camera will apply slow-motion effects automatically during recording.
Step 3
Edit the video using the built-in gallery or video editing app. You can often adjust which parts of the video are slow motion and modify the speed settings to suit your needs.
Tips for Best Results
To make the most of your slow-motion videos, consider the following tips:
Use a steady hand or a tripod to avoid shaky footage, which can be magnified in slow motion.
Ensure optimal lighting conditions. Slow-motion footage captures more detail, so good lighting is essential for clarity and quality.
How to make a slow-motion video return to normal speed
Sometimes you may want to speed up a slow-motion video back to normal speed.
Here’s how you can make a slow motion video normal speed using Camtasia:
Step 1
Import your slow motion clip into Camtasia’s timeline.
Step 2
Right-click on the clip and select “Add Clip Speed” or adjust the speed settings directly in the properties panel.
Step 3
Increase the playback speed to normal. Adjust the “Clip Speed” slider to speed up the video. Using the speed percentage setting can help you achieve precise adjustments.
Tip: Fine-tune your adjustments using Camtasia’s preview feature to ensure smooth playback and synchronization with any audio or effects.
The easiest way to edit videos
Stop wasting time and discover how Camtasia makes creating incredible videos easier than ever.
Camtasia offers precise control over video speed with a simple drag-and-drop interface.
Fine-Tune Segments
Adjust multiple clips or segments within a single project to match your creative vision.
Seamless Export Options
Export your final product in various formats suitable for different platforms and uses.
Conclusion
In summary, mastering slow-motion video can significantly enhance the impact of your content. Whether you’re using an iPhone, Android device, or editing on a computer with Camtasia, you have a range of options for creating and adjusting slow-motion effects. Camtasia stands out for its professional-level speed control and ease of use, making it an excellent choice for detailed video editing.
Ready to take your video editing skills to the next level? Download Camtasia today and discover how you can create stunning slow-motion effects and make precise speed adjustments for your projects.
TechSmith is the market leader in screen capture software and productivity solutions for daily in-person, remote, or hybrid workplace communication and customer-facing image and video content. Our award-winning flagship products, Snagit, Camtasia, and Audiate, empower anyone to create remarkable videos and images that share knowledge for better training, tutorials, and everyday communication.
Scribe is making the rounds as a tool for creating how-to step by step guides.
A how-to guide is a structured, step-by-step document designed to instruct users on how to complete specific tasks or processes.
These guides provide clear instructions on how to navigate software, follow procedures, or complete important job functions.
In the context of creating training and onboarding experiences, a how-to guide serves as an essential tool for educating new hires or trainees. When used for onboarding documents, they streamline the process by breaking down complex workflows into easily digestible steps, helping new employees quickly get up to speed. An effective how-to guide for training or onboarding ensures consistency, reduces learning curves, and improves the overall onboarding experience by offering repeatable, accessible resources for all team members.
However, searching around for Scribe alternatives results in an overwhelming list to wade through.
You need a tool that fits your budget, handles the platforms that matter to your products and services, that your whole team can use, that enables high quality output, meets brand guidelines, and finally a solution that meets your organization’s security and privacy needs.
In this article, we compare Scribe to five other step-by-step documentation tools to help you create efficient, professional, accurate, clear, and engaging help for users inside and outside your company.
Stop repeat questions
Create clear videos and guides with Snagit so you only have to explain tasks once.
Scribe is a tool to help create step-by-step how-to guides. Its core selling point centers on automatically documenting steps as you interact with software. Once it creates the draft how-to guide, you can refine it and then share it through their platform or export it to an industry standard format like PDF.
Scribe is just one of many tools available for creating documentation, offering a streamlined solution for simple, step-by-step guides. However, it’s not the only option. Snagit stands out as a more comprehensive tool, providing enhanced features like precise capture selection, advanced screenshot editing, and powerful video capabilities.
While Scribe may work for teams looking for quick and easy guide creation, Snagit caters to those who need more versatility, including support for multimedia, content reuse, and security features. Each tool serves its purpose, but Snagit offers a broader range of functionality for teams with more complex documentation needs.
The main difference between Scribe and Snagit is the breadth of content they can create. Where Scribe only allows the creation of step-by-step guides, Snagit helps with all types of documentation, such as content for reference guides, learning tutorials, and deeper explanations on top of how-to guides.
The pricing structure for Scribe is competitive with other solutions that only help with step-by-step how-to guides.
Free: No credit card required. The free plan includes 10 free documents, quick customization, web only, and linking/embedding your document.
Pro Personal: $29/month or $276/yr.
Pro Team: 5 seat minimum at $12/seat/month ($75/month or $708/year).
Keep reading for the best Scribe alternatives to make great how-to guides.
5 Scribe alternatives for step-by-step processes
Snagit vs. Scribe
Snagit’s world-renowned capabilities outshine Scribe in many ways. Snagit’s powerful capture selection allows you to capture precisely what you need to show the current step. Additionally, Snagit provides a user-friendly interface and a wealth of screenshot manipulation tools to draw the reader’s attention and focus.
You can use insets for when you want to show an area of the UI within a broader context but still showcase a small area, spotlight tools to focus the viewers’ eyes, and a step tool to highlight a series of areas in a single screenshot, to name a few.
Library and Reuse
Importantly, Snagit also stores each capture in a library for easy retrieval and reuse later, not only for your step-by-step guides but also for deeper training content and learning tutorials. When simple screen captures aren’t enough, Snagit’s world-leading video capture tools bring even more clarity to your audience.
Security and Privacy
Snagit also has your security and privacy needs covered when you need to keep your content within your corporate network. Snagit will store your captures locally or in an organization-approved location so your data never has to leave your network. This is particularly important for companies with stringent data security policies, as it ensures sensitive documentation is kept secure and within controlled environments.
Adaptive Content
Lasly, Snagit supports global audiences and insulates your documentation from rapid UI changes. Using Snagit’s Simplify UI tool gives the screenshots in your documentation resiliency from UI changes and allows a screenshot to cover multiple languages.
Features:
Precisely capture anything on your screen with Snagit’s crosshairs
Stamps and themes let your branding and personality shine
Industry-leading screenshot focused editing tools
Captures do not leave your network
Create rich videos from the images you capture
Rich video capture
Pros:
Professional quality with user friendly interface
Supports all documentation types, including detailed step-by-step
The go-to gold standard for documentation experts
Keep all content within your network
Pricing
Cons:
Lacks Markdown format support
Snagit focuses on all documentation types
Pricing:
Free trial for 7 days gives you access to all Snagit features.
$39/year
Dubble vs. Scribe
Dubble focuses on step-by-step guides similar to Scribe. It sets out to make creating and maintaining documentation easy, but takes things a step further and brings in video as a first-class citizen. The video is a Pro only feature, though. By default, your viewer sees a video and can instead choose to scroll down to look at the steps in a more traditional text, screenshot, text, screenshot, etc. format. After the capture sequence, Dubble offers basic image annotation and editing options to improve the efficacy of the screenshots.
Features:
A simple web-based recorder tracks your clicks to create a video and step-by-step documentation.
Add annotations, add/remove steps, and redact sensitive information.
Share your documents through their website or export them to standard formats like HTML, PDF, and Markdown.
Pros:
A video and a step-by-step guide will be created immediately after finishing the capture.
The editing controls to crop and zoom are intuitive and quick to use for each step.
The free tier allows for unlimited documents if you share through their system.
Priced competitively against Scribe.
Cons:
Only supports web browser content during capture for now (a beta of a Mac version is available)
While capturing the website, distracting colored rectangles appear all over the experience
The most basic screenshot editing capabilities in the list
For security reasons, your content is sent to their servers
The video is recorded in one shot without editing tools to remove your mistakes, remove noise like keyboard typing, or zoom and pan to focus appropriate areas
Limited branding capabilities
I was unable to choose the webcam I wanted it to use (Chrome extension)
Pricing:
14-day free trial
Pro plans require at least 3 users at $24/month (or $216/yr)
Stop repeat questions
Create clear videos and guides with Snagit so you only have to explain tasks once.
Folge excels at documenting processes for native applications. As a native Mac or Windows application, it creates step-by-step guides regardless if the process uses many native applications and/or many web pages. Once the capture process completes, your work loads in a familiar, PowerPoint-like interface. With Folge’s basic image editing tools, you can move through each step to bring attention to areas of interest through callouts, text, and numbered markers.
Once happy with the steps, clicking export presents an interface to customize the look and feel of the output.
Features:
Support for capturing any application.
Export to many industry standard formats, including Word, PDF, HTML, and Markdown
An optional cloud option, Folge Cloud, to share your documents online
Support for Windows 7 through 11 and localized into many languages
Pros:
Your captures and steps stay on your machine unless you share them with the Folge Cloud
Richer image annotation capabilities than Scribe
Document step-by-step processes beyond the web browser and across multiple applications
Familiar PowerPoint-like interface
Cons:
Unlike the other entries, you must go through the export process to see how the whole document will look
Lacks pre-defined output templates, instead requiring a lot of configuration to nail down branding
No video capability that many of the other entries here support
Pricing:
Free: 5 guides allowed with only PDF export
Personal: one-time lifetime cost. Unlimited guides. Must choose Mac or Windows. 69€
Business: 130€/seat. Mac and Windows
Tango vs. Scribe
Tango enables software training and onboarding walkthroughs in minutes. A key differentiator of Tango that sets it apart from the other alternatives. Guide Me superimposes visual cues onto the viewers website instead of watching a video or reading a set of steps alongside your application. When you land on a web page that your team created a Tango for, the Tango extension gets a number badge to clue you into the existence of the guide.
Features:
Capture a process for a single web application
Basic image editing features for each screenshot (text, arrows, blur, shapes, and crop)
Export a step-by-step guide
A desktop application to capture native applications
Pros:
Tango’s Guide Me integrates directly into the real website experience, reducing reliance on a separate knowledge base
While capturing the steps, the extension’s side bar shows each one as you progress, allowing you quickly to remove extraneous steps or miss-clicks
Cons:
Lengthy user onboarding compared to others with questions to understand what you intend to do with Tango
Security conscious may not like another company storing how-to content, especially when capturing sensitive material
Limited output configurability. A sequence of steps with images running down the page only.
Requiring the Tango extension limits the Guide Me feature to internal usage
Pricing:
Free level: offers 15 workflows, browser only
Pro level: $240/month brings unlimited workflows with light branding
Business level: Pro + SSO, Auto-blur sensitive info, Analytics – Must call for info
Enterprise level: Must call for info
Guidde vs. Scribe
Guidde styles themselves as a video documentation company that can explain and document the most complex processes in seconds powered with AI. Guidde leans into generative AI more than other tools in the round up. After going through your process with the Guidde capture extension, a Large Language Model generates a video script and, depending on your subscription level, will generate a voiceover for a video. By default, the viewer gets an AI-powered video followed by the familiar repeating text and then screenshot pairings.
Features:
Browser extension to handle recording
Auto generates an AI powered video of the captured process with a voiceover
Pros:
A video complements the step-by-step guide
A basic video editor
Cons:
The most expensive tool in the round up
Browser only content
Lacking image editing capabilities
At times the generated script misses the mark and needs a lot of editing
Security conscious may not like another company storing how-to content, especially when capturing sensitive material
The default audio voiceover sounds robotic
Pricing:
Free for 14 days. 24 how-to videos with a watermark
Pro $192/year. Unlimited how-to videos. Custom branding. Blur sensitive information.
Business 14 day free trial. $420/year. Pro features + text to voice, video insights, and interactivity.
Enterprise – Call for info
Which step-by-step documentation tool is right for you?
Every team has unique needs that should guide their decisions on which tool to adopt. For instance, Scribe is a good choice if your primary focus is creating streamlined, straightforward how-to guides. Built with simplicity in mind, it is ideal for teams that prioritize quick, easy-to-follow step-by-step instructions.
However, if your documentation needs go beyond basic how-to guides and extend into more comprehensive internal and external documentation, Snagit may be the better fit. This versatile tool caters to a wider range of requirements, including onboarding and training as well as the creation of rich video tutorials. Additionally, Snagit excels in generating explanatory content, side-by-side comparisons, and offering remarkable screenshots, all while providing improved localization support for global teams.
Selecting the right tool can significantly impact your organization’s overall efficiency. An amazing documentation tool not only enhances your team’s productivity but also boosts your customer’s efficacy, bolsters your brand, and ultimately deepens your customer engagement. High-quality documentation helps to minimize user frustration, ensuring that customers can easily find the information they need. As a result, your team spends less time on support requests and more time on innovation, while customer satisfaction and loyalty increase.
Annotate and edit screenshots with Snagit
Professional mark-up tools and powerful features make it easy to create helpful images.
TechSmith is the market leader in screen capture software and productivity solutions for daily in-person, remote, or hybrid workplace communication and customer-facing image and video content. Our award-winning flagship products, Snagit, Camtasia, and Audiate, empower anyone to create remarkable videos and images that share knowledge for better training, tutorials, and everyday communication.
Clear and effective written communication is essential for conveying ideas, information, and instructions in the workplace.
In professional settings, communicating effectively enhances productivity, builds trust, and helps with problem solving and collaboration.
Compared to verbal communication, it can be challenging to set the tone and intention of a message through written word alone, without in-person visual cues, such as eye contact and body language. By practicing the 5 C’s of written communication (clear, concise, coherent, correct, complete), you can ensure that messages are clear and free from ambiguity, minimizing the risk of misinterpretation or confusion.
Snagit makes it easy to create and share high-quality images and videos that deliver messages better than text alone.
The results showed that 67% of employees perform better when communicated with visually compared to text alone. Not only do they absorb the information better, they also do so 7% faster.
Visual content also increases comprehension: using text coupled with visuals instead of text alone increases accuracy by 8%, and using video rather than text increases accuracy by 6%.
Why written communication is critical for every work environment
Strong written communication skills are key to success in nearly every field. Snagit helps you enhance your written communication to save time and deliver effective communication.
It’s never been easier to record presentations, deliver clear feedback, and share quick project updates with your team. With Snagit, you can capture or record anything on your screen, mark it up or add contextual information, and then send it in an email, document, or message.
Make complex concepts easy to understand
Forget that lengthy email no one was going to read anyway. Capture and share images and videos that show exactly what you mean.
Provide clear, actionable feedback
Highlight exactly what needs to be changed or improved, and avoid extra back-and-forth.
Get everyone up to speed quickly
Replace endless meetings with step-by-step guides, status updates, and video tutorials that can be watched anytime.
Improve global or remote team communication
Visual communication makes it easy for remote and hybrid teams to stay connected and collaborate effectively.
Effortless collaboration starts here
With Snagit + Screencast, sharing videos and images is easy. Generate a link to your content that can be accessed anywhere, anytime—no account needed. Your team can add comments to provide feedback or continue the discussion.
Wall of text? Next!
Snagit makes it easy to communicate more effectively with visuals.
Add information directly to your image with callouts or text.
Provide numbered steps as a visual reference alongside written instructions.
Concise and effective reporting
Snagit allows you to capture specific, relevant information quickly, making communication more concise by eliminating lengthy explanations. Instantly capture what is on your screen to report problems, provide feedback, or share information.
Mark up the image or record a video walkthrough to share. Snagit visuals save time by replacing lengthy write-ups.
Why Snagit is a must-have for written communication
Snagit helps teams break out of the digital monotone. Email is an essential communication tool, but it falls short when it’s used to communicate with just a block of text. Videos and screenshots are easier to consume and increase engagement.
According to the Chaos to Clarity Report, TechSmiths Guide on How to Thrive in the Modern Workplace:
One way to keep emails clear and concise is to incorporate images. A whopping 97% of those who create images like screenshots, infographics, and charts to support communication say it makes their messages more effective. They report that adding images to messaging can reduce misunderstandings by providing clarity and save time by reducing the need for back-and-forth conversations.
The future of work is async
Survey shows more than half of workers would rather watch a video update than attend a meeting.
Snagit can instantly transform your communication when you add Snagit visuals to your message.
Benefit 1: Enhanced visual communication
Replace long blocks of text with visually engaging images to make your messages more concise. Improve clarity and comprehension of written messages by adding visual elements like callouts and arrows to highlight key areas.
Benefit 2: Efficient feedback and reporting
Snagit allows you to capture and share screenshots or screen recordings in real time, ensuring quick and concise communication for faster project progress.
Benefit 3: Simplified documentation and sharing
Snagit helps create organized, professional documentation by enabling users to capture key project moments and instantly share them with the team.
Ready to improve your written communication with Snagit?
Download Snagit to discover all the ways you can enhance your written communication by incorporating visuals created in Snagit.
Annotate and edit screenshots with Snagit
Professional mark-up tools and powerful features make it easy to create helpful images.
How can I make my written communication more effective?
Show, don’t just tell. Pair engaging visual content with your text to help reinforce and clarify key points. Make sure to follow the 5 C’s of written communication to practice effective communication techniques.
What are the benefits of adding visuals to written communication?
Images and videos can help with comprehension, visualizing information to save you time instead of having to write it all out, and creating engaging and exciting content for your audience.
How can Snagit support written communication?
Snagit is a daily tool to help you quickly communicate processes and concepts clearly and deliver your message anywhere. Snagit’s tools help you to make complex concepts easy to understand, provide clear and actionable feedback, document processes, provide quick project updates, and improve team communication.
TechSmith is the market leader in screen capture software and productivity solutions for daily in-person, remote, or hybrid workplace communication and customer-facing image and video content. Our award-winning flagship products, Snagit, Camtasia, and Audiate, empower anyone to create remarkable videos and images that share knowledge for better training, tutorials, and everyday communication.
A big challenge is figuring out what tools empower businesses and creators to produce videos that drive results. Vidyard is one of a plethora of video creation options available today, so how do you choose?
This guide will explore Vidyard and the leading Vidyard alternatives in the market, helping you make an informed decision and support your need to create high-quality videos.
Understanding your video creation needs
Before diving into the alternatives, it’s crucial to assess your specific requirements:
Are you making just one type of video or all of the above?
Is it important that your videos are personalized?
What’s your budget for video creation tools?
Do you need video editing capabilities beyond basic trimming?
Is collaboration important for your team?
Do you want to be locked into a specific hosting platform?
As a business, a first step is to consider if you want to manage and support multiple different creation options designed for only a specific type of video, or is it better to provide a single option that enables beginners and advanced users the flexibility to create a variety of different video types? It is easier and cheaper to support one solution across a department or organization that provides creation flexibility versus trying to support multiple different tools.
If you are evaluating options as an individual user, the question is: what tool creates effective videos in the shortest amount of time, is quick to learn, and will grow with you as your needs grow? You don’t want to outgrow a tool too quickly and then have to learn something new when you want to do more with video beyond basic recording.
Answering these questions will guide you toward the most suitable solution for your needs.
Top video creation tools compared
Vidyard
Vidyard is a video messaging platform designed for sales professionals.
Primary audience: Sales professionals
Content focus: Personalized video messages, sales outreach, and prospecting for sales teams
Key features
Screen, webcam, and audio recording
Generate avatars instead of using the camera
Basic video trimming
Share videos through email or link
Detailed analytics and CRM integration
Video playlists to share multiple videos
Pricing
Free limited plan and current pricing for subscriptions starting at $228/year paid annually or $348/year paid monthly per seat for the Pro plan, $708/year paid annually or $1,068/year paid monthly per seat for the Plus plan, or custom pricing for enterprise solutions.
Strengths
Specialized for sales video messages
CRM integrations
Video calls to action
Weaknesses
Higher pricing compared to other video platforms
Limited editing capabilities
Locked into hosting videos within Vidyard’s platform
TechSmith Camtasia
Camtasia is an all-in-one screen recorder and video editor designed to support a variety of video creation needs. It has been around longer and is used by more people than any of the other tools included in this article (40 million users worldwide).
Primary audience: Customer education and customer success managers, trainers, instructional designers, educators, marketers, and content creators.
Multi-track screen, webcam, mic and system audio recording
Add interactive calls to action, quizzes/polls, and tables of contents
Multi-track timeline for advanced editing
Add video effects, filters, masks, animations, text, callouts, graphics, transitions, and more
Change and edit the mouse cursor and the cursor path post recording
Grab attention with dynamic social captions and ensure accessibility with closed captions
Local storage and offline capabilities
Integration with Screencast.com for easy hosting, sharing, and content reviews
Share with YouTube, social media, your website, a link, a learning management system (LMS) or upload to your hosting platform of choice
Edit videos like editing text, AI generated scripts and voices, and millions of assets included with Create and Pro plans
Pricing
Free trial with current pricing for subscriptions starting at $179.88/year for Camtasia Essentials, $249/year for Camtasia Create, or $499/year for Camtasia Pro.
Strengths
Versatile recording and editing capabilities
Easy-to-use yet powerful video editor for non-video pros
Works with any hosting platform offering a variety of ways you can deliver your video to viewers
Thorough tutorials, webinars, and certification training are available
Weaknesses
More editing capability increases the learning curve
No monthly subscription options
Loom
Loom is a basic video recording tool for internal employee communication.
Primary audience: Remote teams, big enterprises with dispersed employees
Content focus: Quick video messages, team updates, and internal communication
Key features
Screen, webcam, and audio recording
User-friendly interface
Instant sharing capabilities
Basic trimming tools
Transcription and closed captions for accessibility
Basic video analytics
Pricing
Free plan with up to 5-minute videos available, with current pricing for subscription plans starting at $150/year paid annually or $180/year paid monthly per creator for business, and custom pricing for enterprises. Add $48/year per creator for AI features.
Strengths
Intuitive for beginners
Integration with workplace tools
Quick sharing
Weaknesses
Limited editing features
Less suitable for complex video projects
Locked into hosting videos on Loom’s platform
Wistia
Wistia is a video marketing platform that hosts videos and offers a basic screen recording tool.
Primary audience: Marketing teams and content creators
Content focus: Brand videos, webinars, and marketing campaigns
Key features
Screen, webcam, and audio recording
Advanced video analytics
Customizable video player
Email capture and lead generation tools
Pricing
Free plan available (up to 10 videos), with current pricing for subscription plans starting at $230/year paid annually or $288/year paid monthly for Wistia Plus (100 videos), $950/year paid annually or $1,188/year paid monthly for Wistia Pro (up to 300 videos), or $3,830/year paid annually or $4,788/year paid monthly for Wistia Advanced (up to 2,000 videos).
Strengths
Robust marketing and analytics features
Customizable player
Webinar hosting with Pro plans and up
Weaknesses
Higher pricing for advanced features
Less focus on video creation and editing
Locked into hosting videos in Wistia
Dropbox
Dropbox is a cloud-based file storage solution that includes a basic screen recording tool.
Primary audience: small to medium sized business workers
Content focus: video messages, internal communication, low stakes presentations
Key Features
Screen, webcam, and audio recording
Share with a link
Videos are stored in your Dropbox account
Pricing
Current pricing for subscription plans starting at $198.96/year paid annually or $239.88/year paid monthly for Essentials, $540/year (includes 3 users) paid annually or $648/year paid monthly for Business, $864/year paid annually or $1,080/year paid monthly for Business Plus.
Strengths
Easy recording
Content review commenting
Quick sharing with a link
Weaknesses
No advanced editing capabilities
Locked into Dropbox cloud storage
Adobe Premiere Pro
Premier Pro is Adobe’s professional video editing software that is part of Creative Cloud.
Primary audience: professional video editors
Content focus: TV series, movies, TV ads
Key Features
Multi-track timeline for advanced editing
Extensive plugin ecosystem for applying effects
Add transitions, text, animation, motion graphics, and other effects
Add captions for accessibility
Integration with other Adobe tools
Advanced color management
Pricing
Current pricing for subscriptions starts at $275.88/year paid annually for individuals (Premiere Pro only), or $719.88/year paid annually for Creative Cloud, $455.88/year paid annually for teams (Premiere Pro only), or $1,079/year paid annually for Creative Cloud.
Strengths
Professional grade video editing
Advanced color grading
Mature plugin marketplace
Weaknesses
Steep learning curve and complex user interface
No recording capabilities
Plugins add to the cost
Choosing the right tool for your needs
When selecting a video creation tool, it is important to answer the questions presented in the beginning of this post about understanding your content creation needs. The biggest differences between products often come down to: do you need more than a basic one-take recording, and do you need to edit and polish your videos to engage your viewers more effectively?
Also, how important is it that you are not locked into a single video hosting and storage solution? Many of the available options require using their hosting to share content. Most organizations already have some type of hosting in place, whether that is OneDrive, Google Drive, or their own servers.
Another important consideration is the learning curve and ease of use. Can you and your users learn the tool quickly enough and remember how to use it the next time? Don’t forget most options provide a free trial. Take advantage of those trials to better understand if a tool will meet your needs.
Finally, consider if you or your colleagues will need to create more than one type of video. Some options are built only for a specific use case, which can be limiting. If you have multiple types of videos you need to create, then a more flexible option that can share to many different locations might be best for you.
For example, Camtasia offers the flexibility to produce a wide range of video types, from quick screen recordings to polished marketing content, all with the security of local storage and the option for cloud-based sharing through Screencast.com or your preferred hosting provider.
Take the next step in your video creation journey
Ready to elevate your video content? Try Camtasia free and experience the power of professional video editing combined with easy screen recording, all in one simple-to-use solution. Whether you’re creating educational content, marketing materials, or internal communications, Camtasia provides the tools you need to bring your vision to life.
TechSmith is the market leader in screen capture software and productivity solutions for daily in-person, remote, or hybrid workplace communication and customer-facing image and video content. Our award-winning flagship products, Snagit, Camtasia, and Audiate, empower anyone to create remarkable videos and images that share knowledge for better training, tutorials, and everyday communication.
With teams that are increasingly distributed, the digital workplace needs help sharing ideas while keeping communication overhead low. Lucky for us, there is a set of apps designed to do just that! But how do you choose the right one?
One app that Mac users might already be familiar with is CleanShot.
What is CleanShot?
CleanShot is a screen capture tool for MacOS. It gives Mac users the ability to capture images and record videos of their screen, and then to annotate and adjust their new creations. CleanShot is Mac-focused (and only available on that platform), which allows it to quickly adopt new abilities and features introduced by Apple.
CleanShot pros
Feels like a native Mac app
Performant and responsive
Unique feature: hide desktop clutter
CleanShot cons
Only available on Mac
Basic editing abilities
CleanShot pricing
No free tier or trial
$29 perpetual license
$96/year Pro subscription
Credit card needed to try? Yes
5 CleanShot Alternatives
Snagit
Snagit is a versatile and user-friendly screen capture and editing tool for both MacOS and Windows that offers extensive annotation features. Plus, it offers editing features like background removal, drag and drop templates for how-to guides, and more.
One standout feature is image simplification (SUI), which helps with creating clear tutorials or documentation. Snagit also includes tools for annotations, templates, and stamps, making it a great all-in-one solution.
With a free trial available and no need for a credit card, Snagit is ideal for professionals who need more than just basic screenshot capabilities.
Loom is a tool for recording videos, mainly focused on simple video communication for teams. It’s easy to use and lets you quickly record and share videos.
However, it doesn’t offer many features for advanced screen capture or image editing. Loom’s free version is basic, so people looking for more features might feel limited. While Loom works well for quick video updates, it’s not the best choice for those needing advanced tools.
Loom pros
A focus on collaboration tooling
Available as a standalone or Chrome app
Unique feature: paid tiers have engagement tracking
Loom cons
Very limited screenshot features. Loom’s focus is on video, not images
Loom pricing
Free tier available
$150 /year Business tier
Enterprise plan available
Credit card needed to try? No
Zight (formerly CloudApp)
Zight provides basic screen recording and sharing, with some team collaboration features. It includes versioning, which helps track changes in files.
However, the interface feels old, and the editing tools are quite simple. It works for small tasks, but users wanting a smoother experience might feel frustrated. Zight has a free version, but it doesn’t offer much for users needing more advanced features.
Zight pros
Comprehensive basic set of features
Team features allow for group organization at that tier
Unique feature: Versioning
Zight cons
Recorder UI feels clunky
Editing is basic
Zight pricing
Free tier available
$96 /year Pro or Team plan
Enterprise plan available
Credit card needed to try? No
Droplr
Droplr focuses on file sharing, with some basic screen recording features. It’s useful for sharing files and screenshots, but its capture and editing tools are limited.
Droplr works well enough for teams that need simple sharing, but users expecting more might find it lacking. It requires a credit card for the free trial, and while the price is competitive, it doesn’t have many standout features.
Droplr pros
Focus on file sharing
Branding and team tools
Unique feature: self-destruct after a set time
Droplr cons
With a focus on file sharing, the screen recording functionality itself is basic
Droplr pricing
Free trial available
$72/year individual subscription
$84/year for small teams
Enterprise plan available
Credit card needed to try? Yes
Shottr
Shottr is a simple tool for taking quick screenshots on MacOS. It’s easy to use and includes tools like a pixel ruler, which is helpful for UI designers. However, it is a basic utility with limited editing options. Shottr is free to use, with affordable upgrade options, but it’s best for users who need only the most basic screen capture features.
Shottr pros
Straightforward community tool
Ruler tool for pixel measurement is loved by UI workers
Unique feature: Engagement with creator and community
Shottr cons
More of a utility than a full application
MacOS only
Shottr pricing
Free tier available
$8 perpetual Basic subscription
$25 perpetual Friends subscription
Credit card needed to try? No
The best Cleanshot alternative? Snagit
When it comes to screenshot tools, not all are created equal. Some are basic, while others offer a wide range of features and customization options. If you’re looking for a tool that can help you capture, edit, and share your screen content with ease, Snagit is a top contender.
Here are some of the features that make Snagit stand out:
Rich editing tools: Snagit offers a variety of tools for editing your captures, including cropping, resizing, adding text, and drawing.
Customizable capture presets: You can create custom presets for different types of captures, such as screenshots, full-page captures, and video recordings.
Image simplification: Snagit’s Image Simplification (SUI) feature allows you to simplify complex images into more easily digestible diagrams.
Cross-platform compatibility: Snagit is available for both macOS and Windows, making it a versatile choice for teams with mixed operating systems.
Based on its comprehensive feature set, ease of use, and affordability, Snagit is our top recommendation for a screen capture tool. Whether you’re a student, a professional, or simply someone who needs to capture and share screen content, Snagit has you covered.
Give it a try today and see why it’s the preferred choice of millions of users worldwide.
The best snipping tool for Windows and Mac
Don’t let clumsy built-in tools hold you back. Take and edit screenshots with Snagit!
TechSmith is the market leader in screen capture software and productivity solutions for daily in-person, remote, or hybrid workplace communication and customer-facing image and video content. Our award-winning flagship products, Snagit, Camtasia, and Audiate, empower anyone to create remarkable videos and images that share knowledge for better training, tutorials, and everyday communication.