How to Create a Knowledge Base That Enhances User Experience

Illustration of knowledge based article with text and a bar graph, a light bulb, and gear icons against a blue background.

A great knowledge base transforms the customer experience by giving users the tools they need to solve problems on their own. But how do you ensure yours is user-friendly, organized, and easy to maintain?

This guide will walk you through creating an efficient knowledge base, covering everything from choosing the right platform to organizing content. We’ll also explore the different types of knowledge bases and how tools like Snagit can streamline the process.

What is a knowledge base?

Before starting to build a knowledge base, the first place we must start is by defining it. 

A knowledge base is a centralized repository of information that helps users find answers without contacting support. It helps improve your user’s experience and save time for customers and your support teams by making information easily accessible.

Why your business needs a knowledge base

A well-designed knowledge base boosts customer satisfaction by allowing users to find answers quickly using the knowledge base’s search functionality, improving their overall experience. It can also reduce repetitive support queries, letting your team focus on more complex issues. 

A user-friendly knowledge base empowers your users to solve problems on their own, reducing friction and frustration.

When customers can self-serve and find their own answers, that helps limit the amount of inquiries a customer support team needs to respond to. This can be a large cost savings by not having to increase the number of customer support agents handling inquiries.

screenshot of TechSmith support center webpage displaying the box where you can enter in a question.

Types of knowledge bases

Let’s take a moment and talk about what kinds of knowledge bases are usually created. Below, we’ve outlined the three most common types:

  • Internal Knowledge Base: This type of knowledge base is used by teams within an organization for training or internal documentation. These are great for reducing the workload for internal IT or administrative teams.
  • External Knowledge Base: Publicly accessible by customers or users to find product information, how-to guides, and FAQs. Customer-facing teams have the opportunity to contribute significantly to an external knowledge base as they have a lot of insight into the questions that come up most frequently.
  • AI-Powered Knowledge Bases: An artificial intelligence powered search that offers personalized suggestions and responses. While these can be quicker to start up, human review is still recommended to ensure content is accurate and relevant.

How to create a knowledge base that works

Step 1: Define your audience

You’ll need to identify your users’ needs: Are they new customers? Long-term users? Internal teams?

After identifying your users’ needs, work to tailor the content based on audience experience levels and common pain points.

New customers will need more content tailored to get started and make sure they can be successful without a lot of previous knowledge or experience. Long-term users will need content that is more in-depth or covers more complex issues and challenges.

Step 2: Choose the right platform

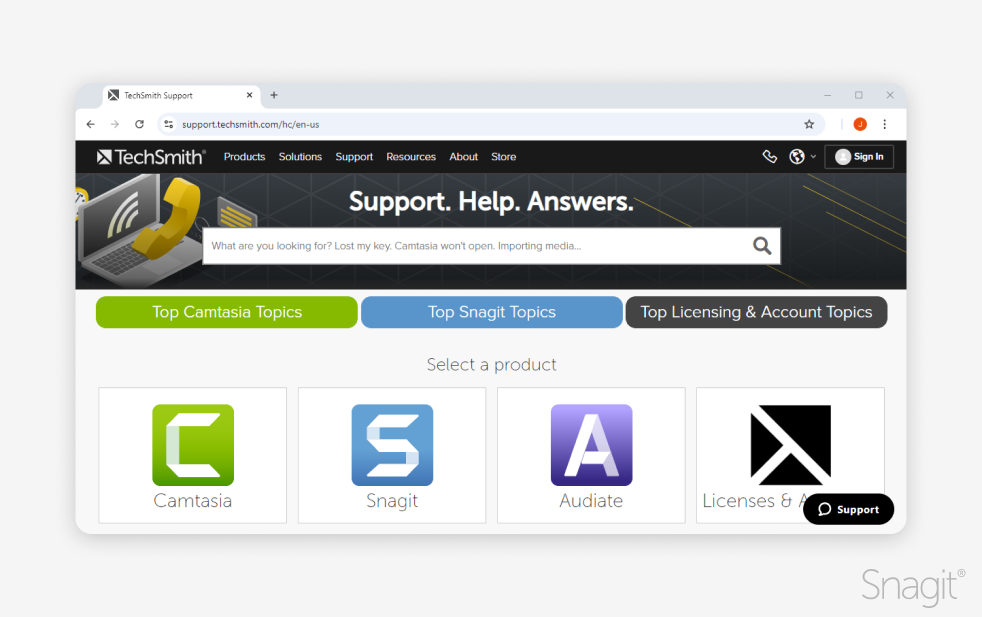
Picking the right platform can be difficult as there are many options. Popular options for knowledge base platforms are Zendesk, Confluence, and WordPress. 

Some of these platforms require more web programming knowledge than others. Be sure to choose a platform that aligns with you and your team’s technical expertise when it comes to implementation and upkeep.

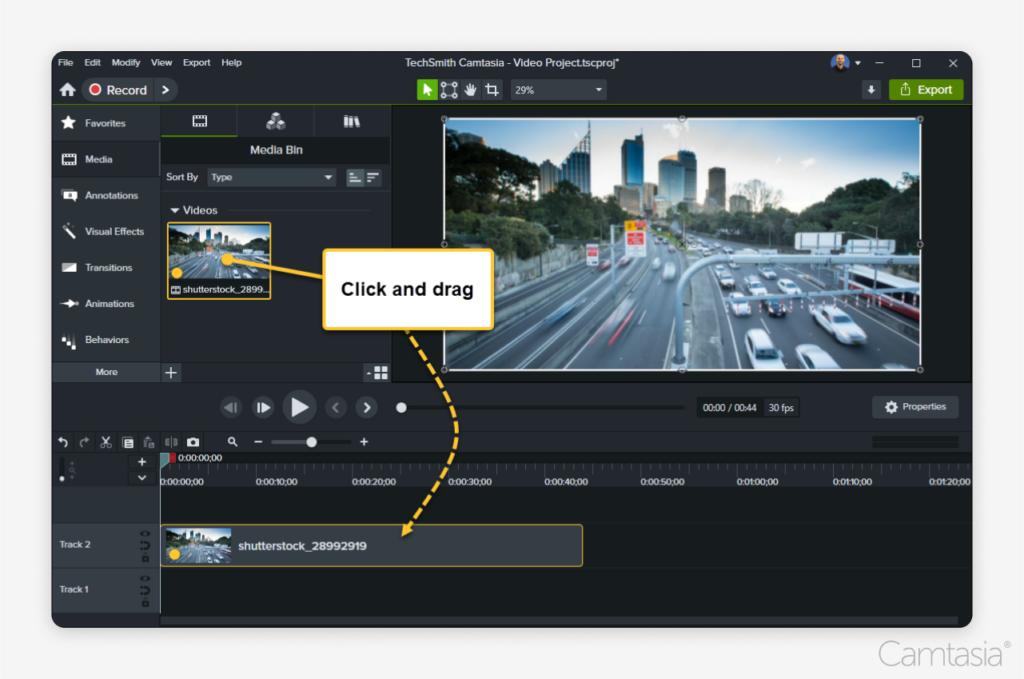
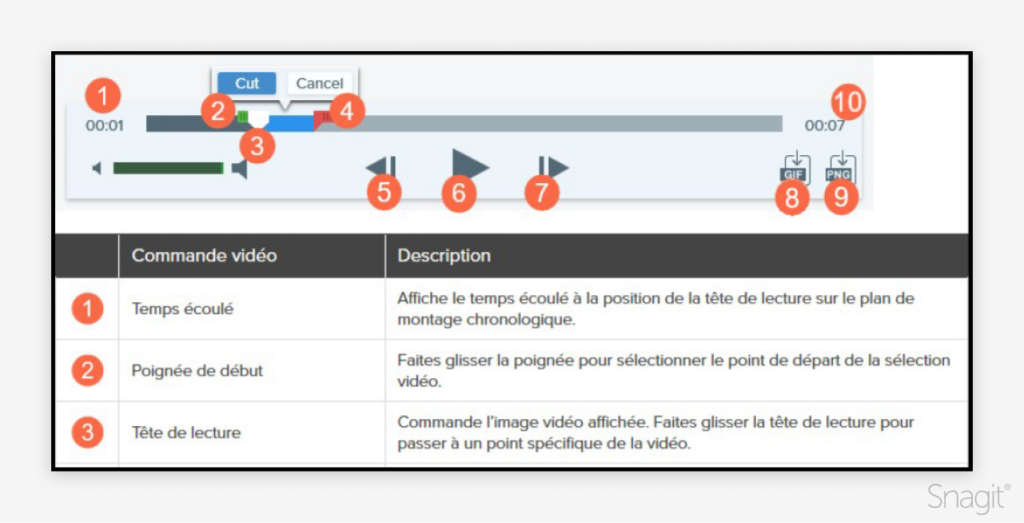
Choosing the right tool to help you build out that platform is much easier. Snagit can speed up your article writing processes with the ability to capture images, videos, and even create GIFs that will help your users find the solution they’re looking for.

WordPress dashboard showing a list of posts with titles, categories, users, publication dates, and engagement metrics.

Step 3: Organize your content for usability

Structure your articles for easy navigation. Before writing any articles, take a moment to plan out their layout. Creating categories and sections will allow you to group similar topic articles in the same bucket. 

As customers navigate to find articles that answer questions, this organization will help them get to those answers more quickly.

It’s also important to have a well-organized structure for your knowledge base articles to help users consume the information easily.  

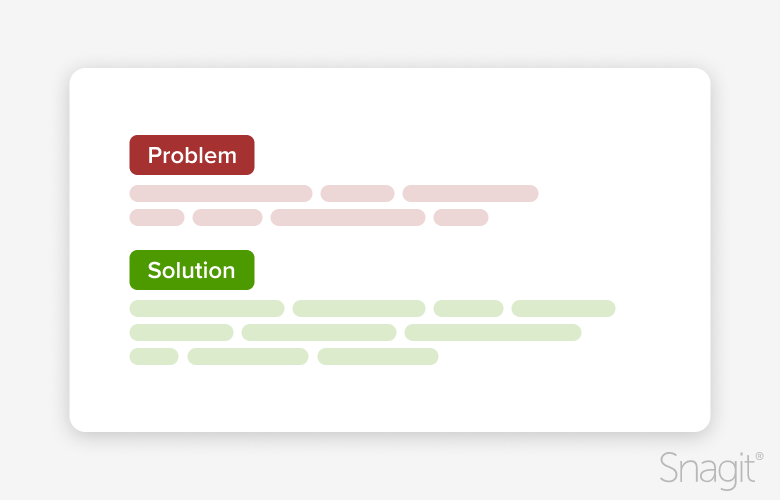
Think about things like having a “Problem” and “Solution” label at the top of the article, clearly outlining the problem the user may face, and being clear with the solution. If there are multiple solutions, make sure to outline the different options as larger headings inside the article.

This structure can also help in scenarios where customers use AI search engines to ask questions and get answers.

Diagram showing "Problem" in red and "Solution" in green with Snagit logo at the bottom right.

Step 4: Write clear and concise knowledge base articles

Use simple, concise language. Focus on creating content that solves a user’s problem quickly. Avoid jargon and overly technical language. 

The simpler, the better. This is where using images and videos that you made from Snagit can greatly benefit the user experience. 

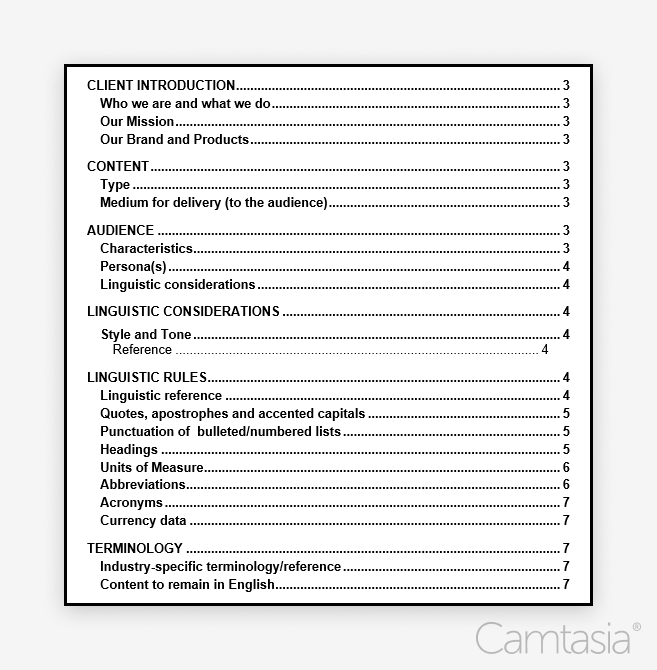
Creating articles that follow a style guide (designed by you!) is important. After creating your style guide, stick to it so your articles are easy to follow.

Step 5: Incorporate visuals
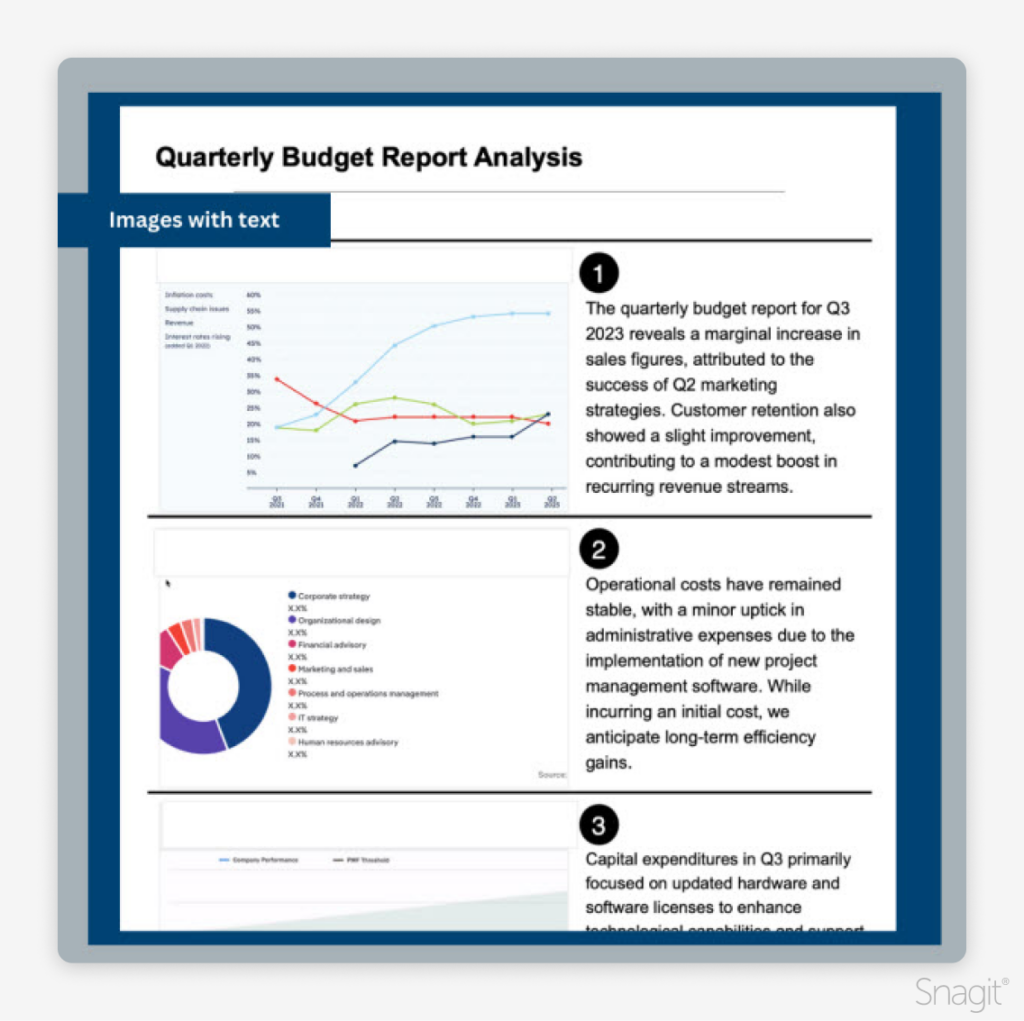
A picture is worth a thousand words.” – This rings true for knowledge-base articles. 

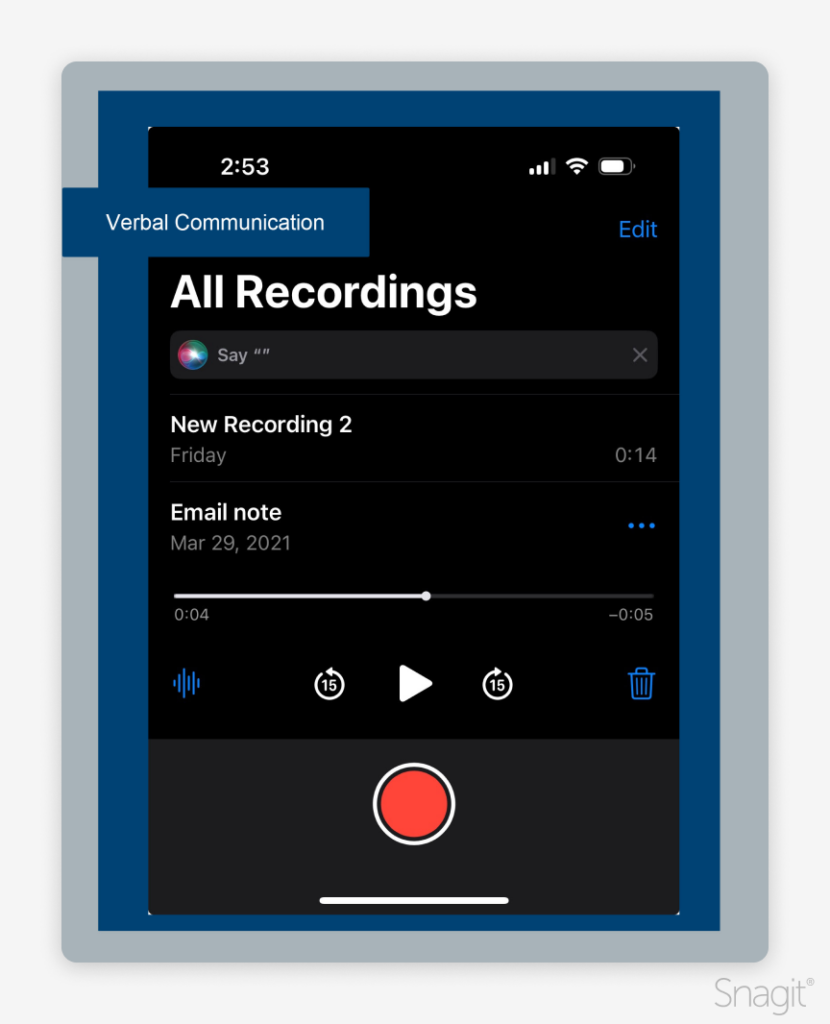
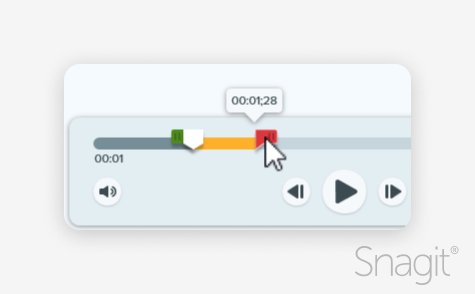
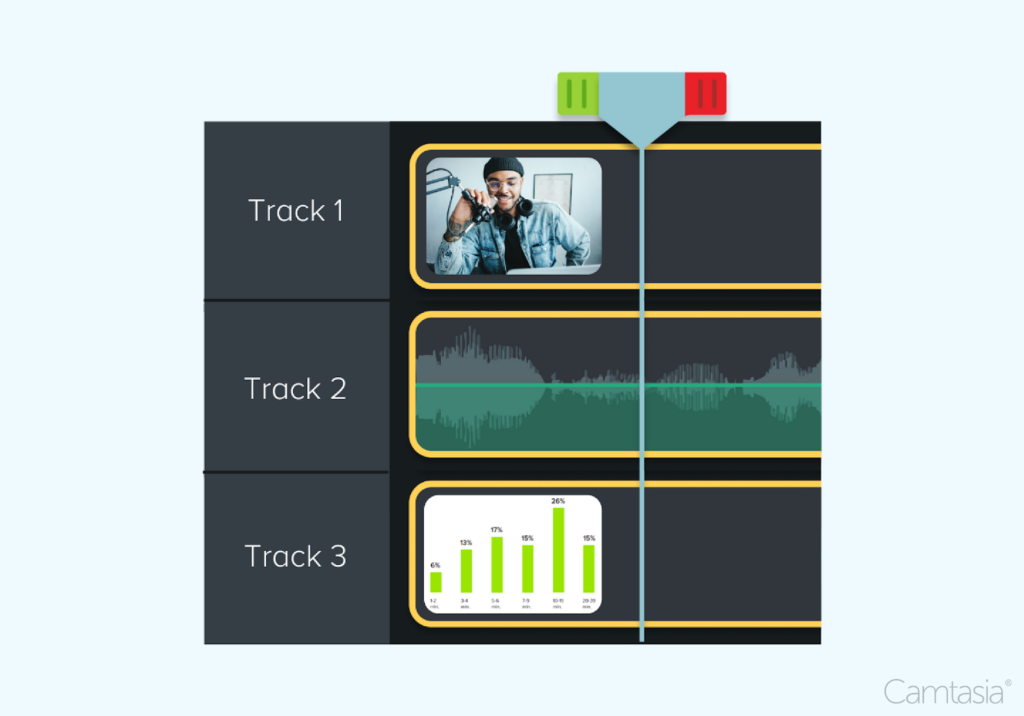
Use images, GIFs, and videos to explain complex processes. 

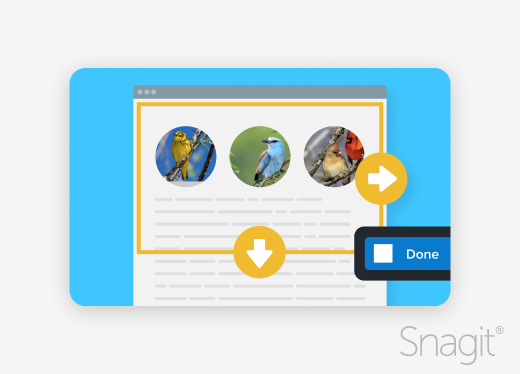
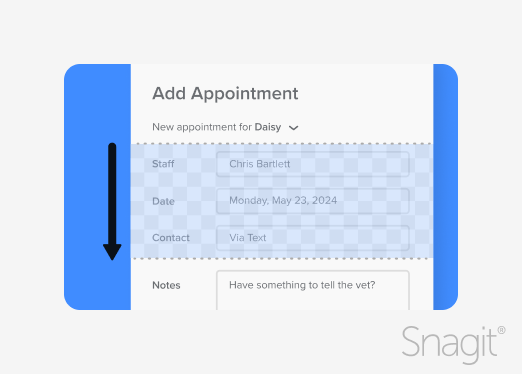
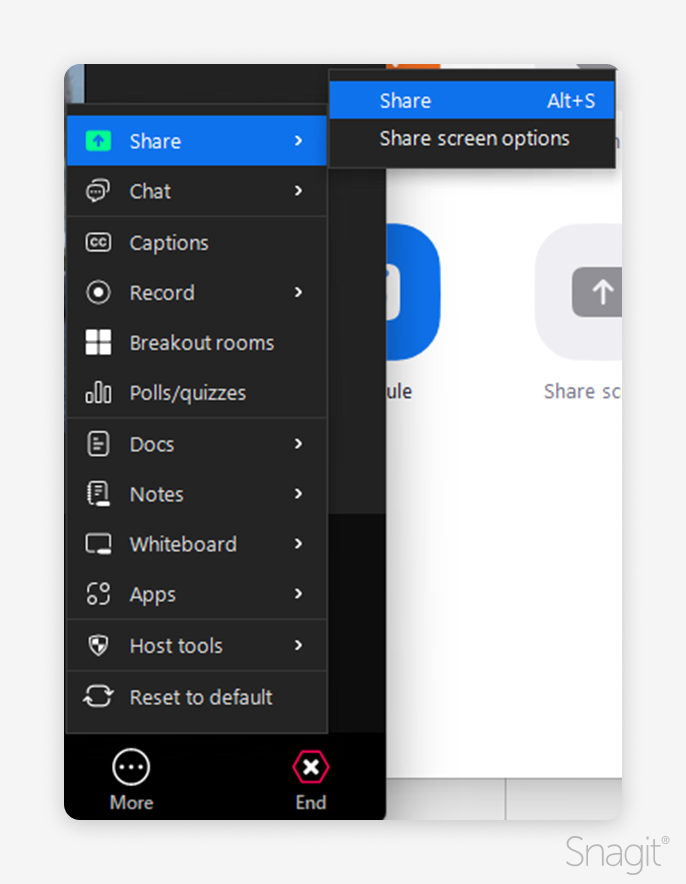
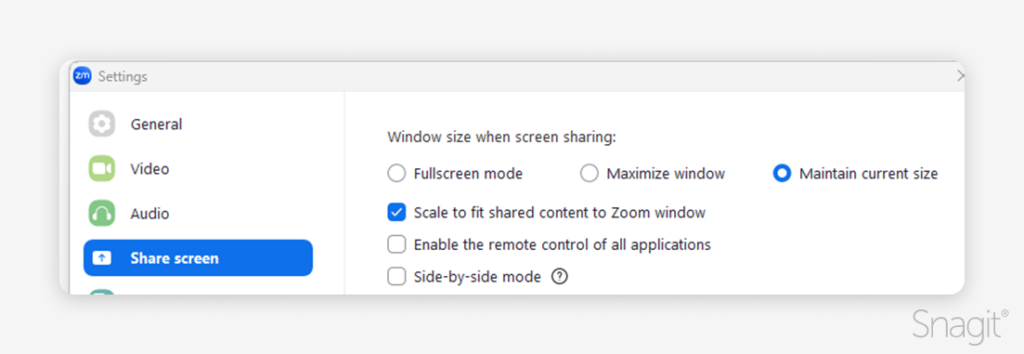
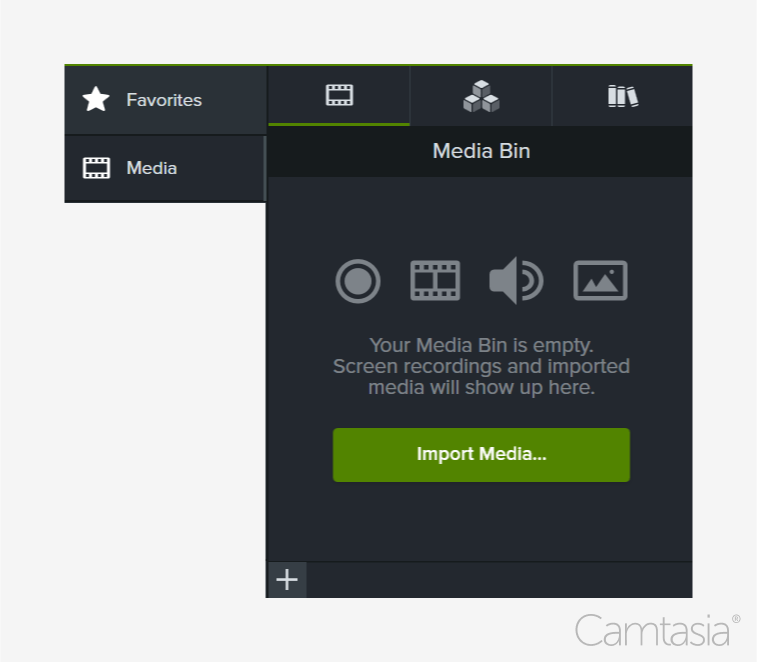
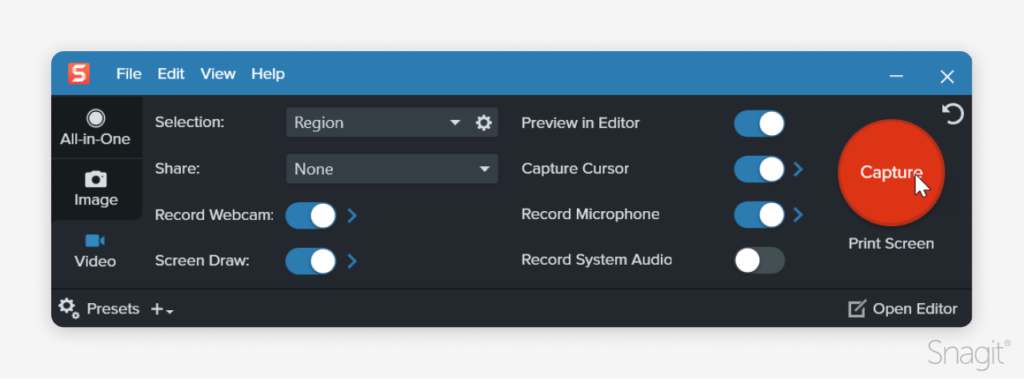
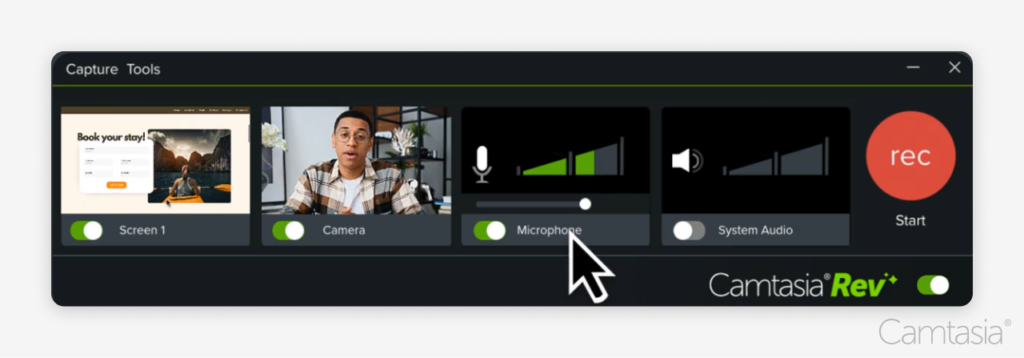
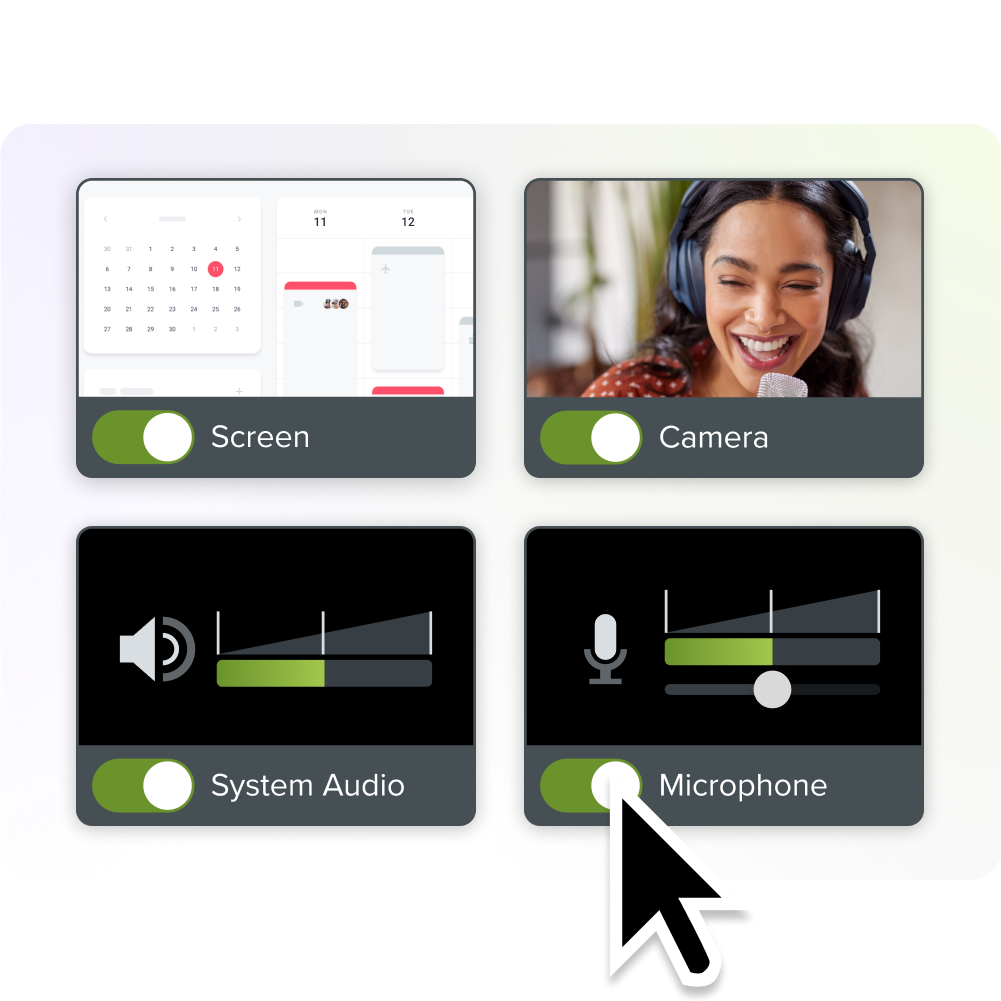
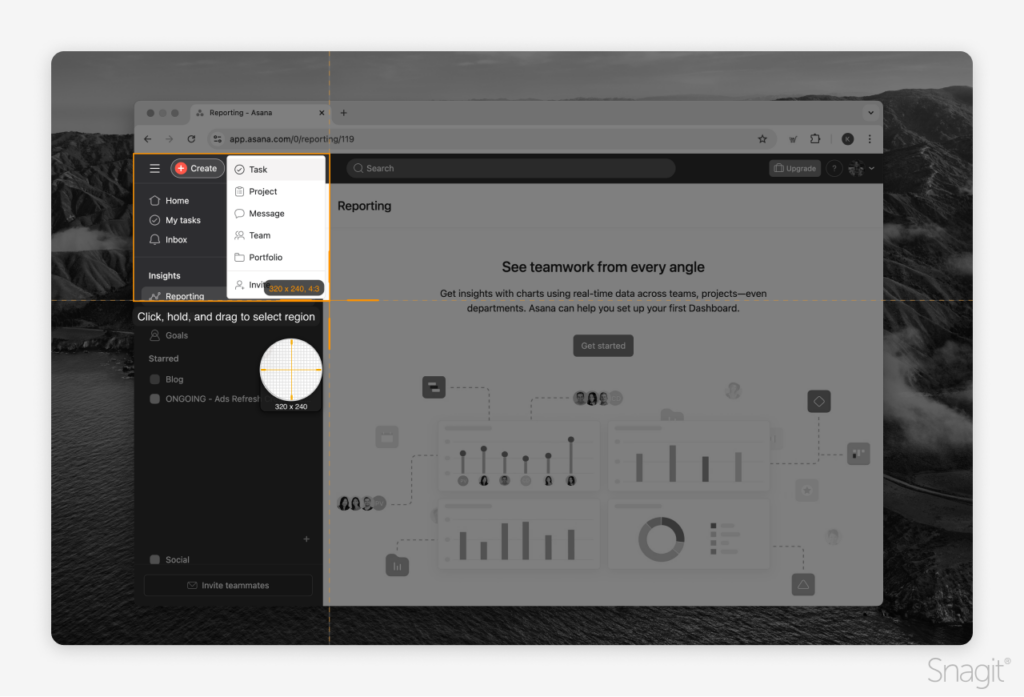
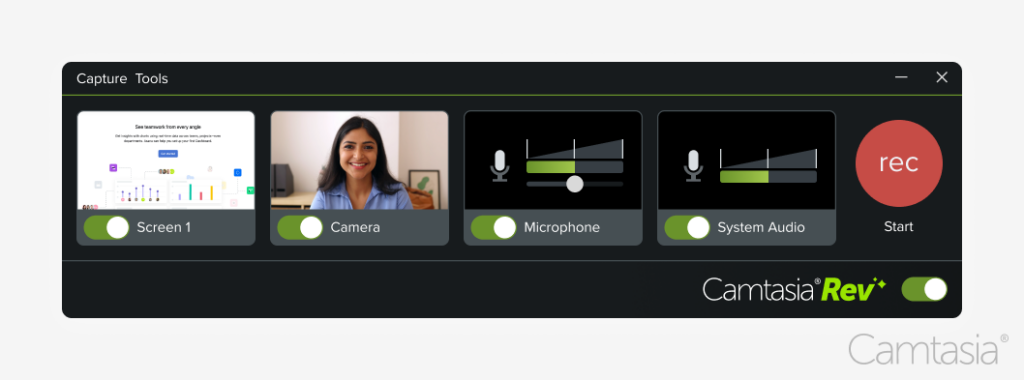
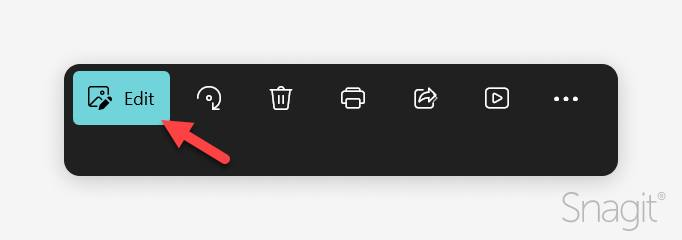
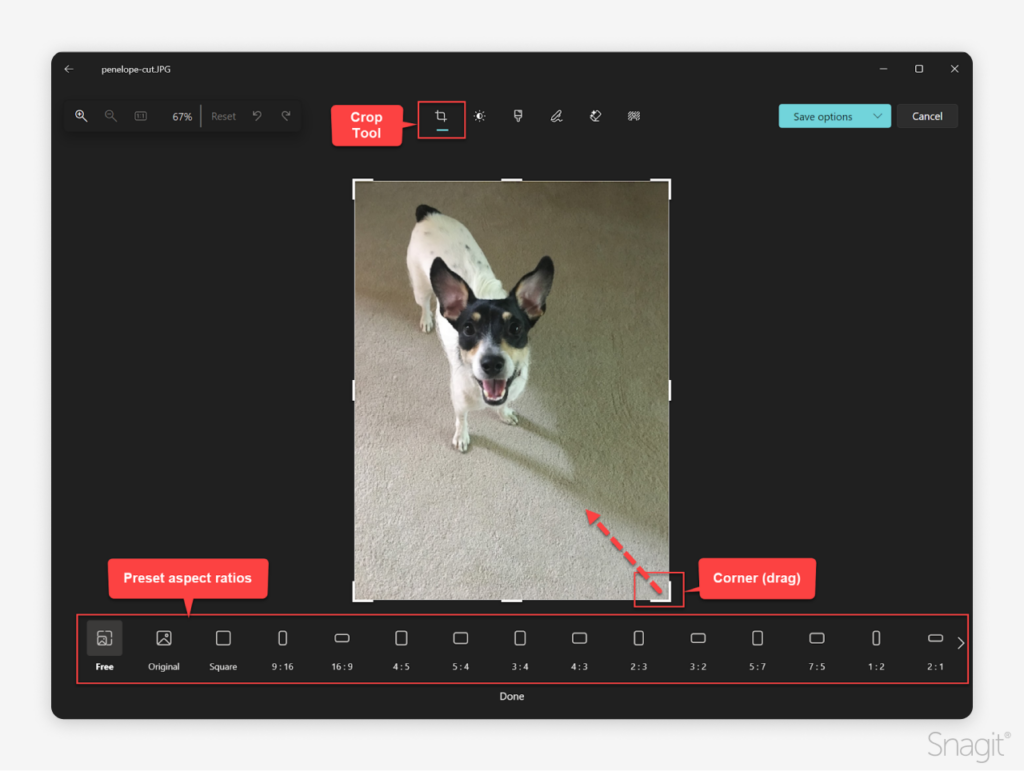
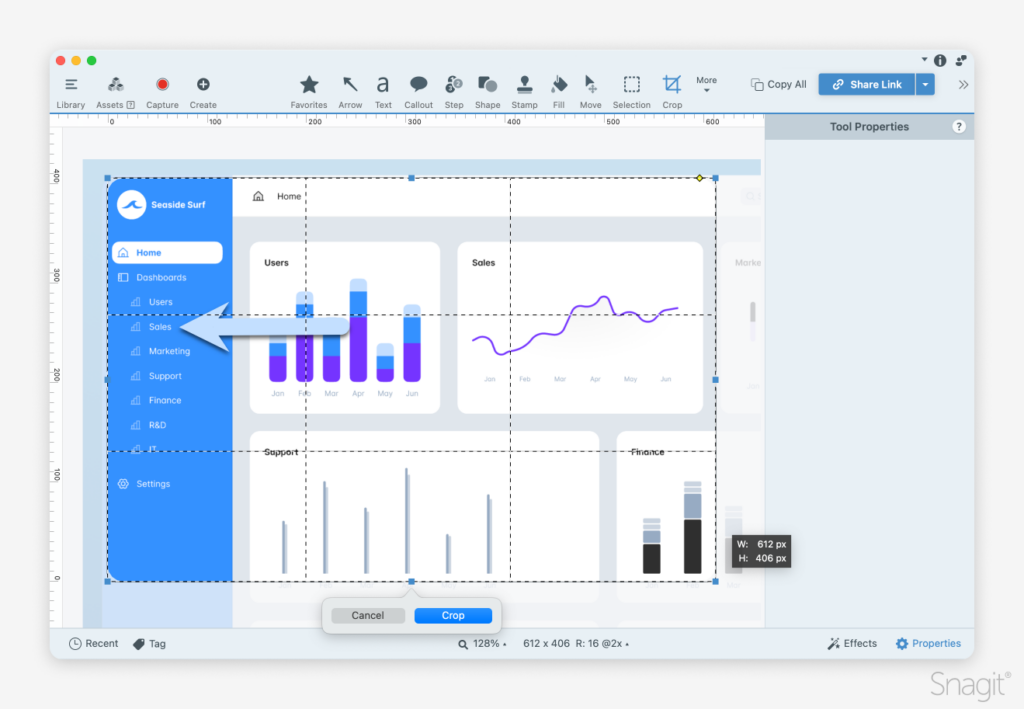
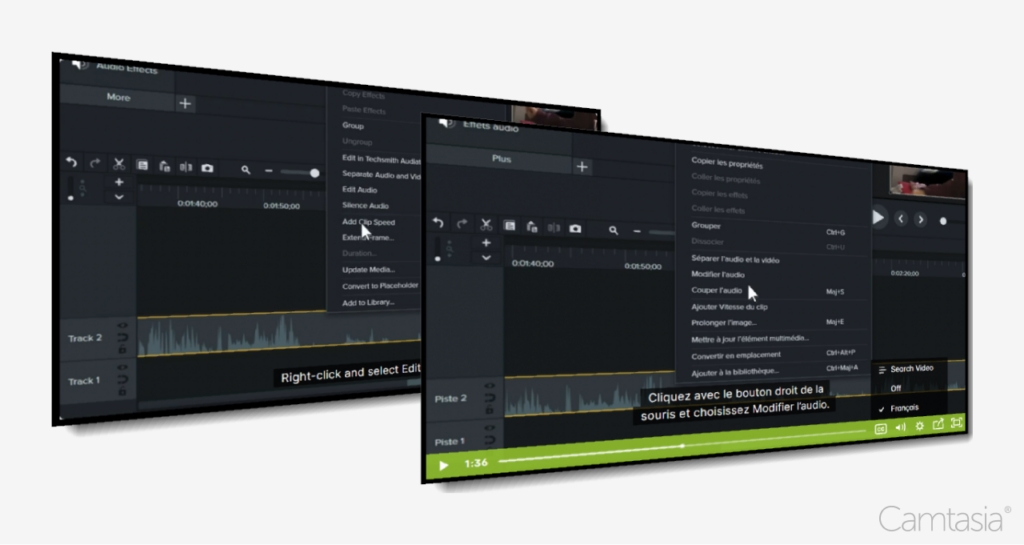
Tools like Snagit make capturing scrolling screenshots or short screen recordings easy and efficient, perfect for creating visual aids. 

Videos are especially helpful when explaining or demonstrating complex solutions, where GIFs and images make guiding the user through written steps more accurate and easy to understand. 

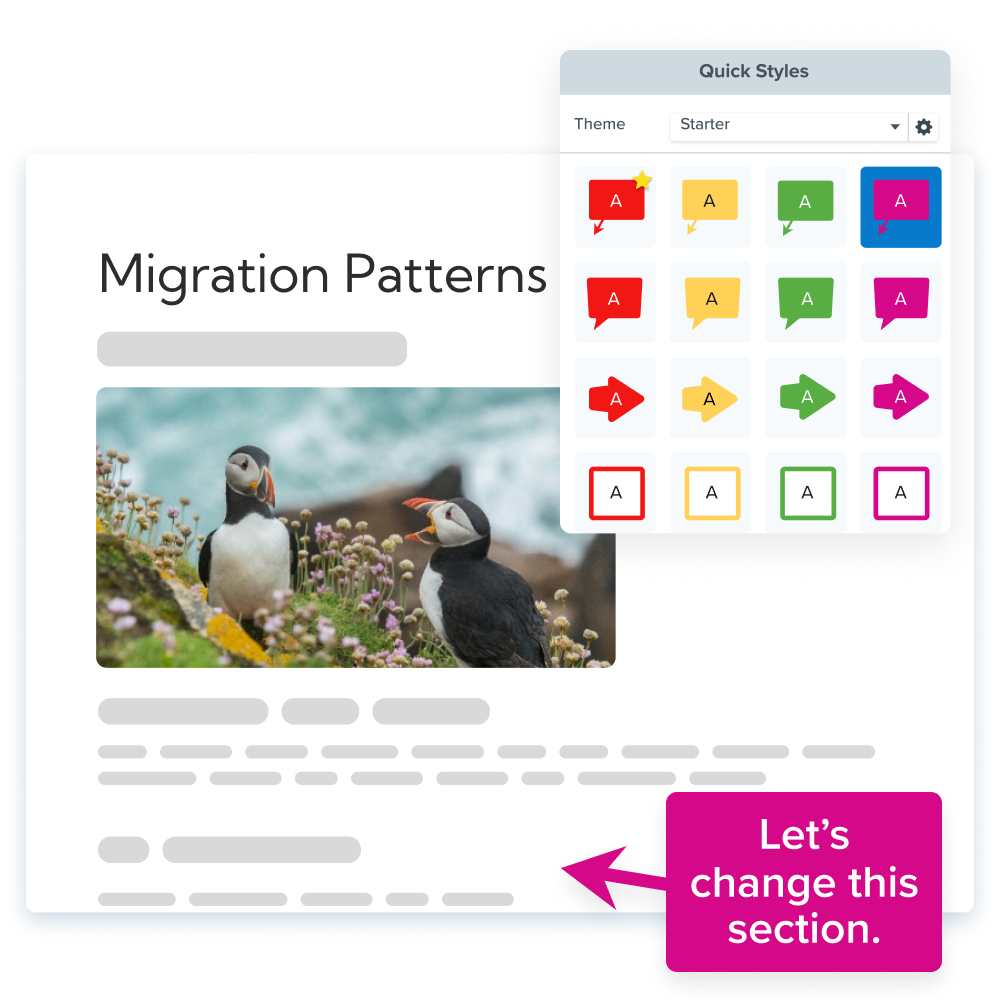
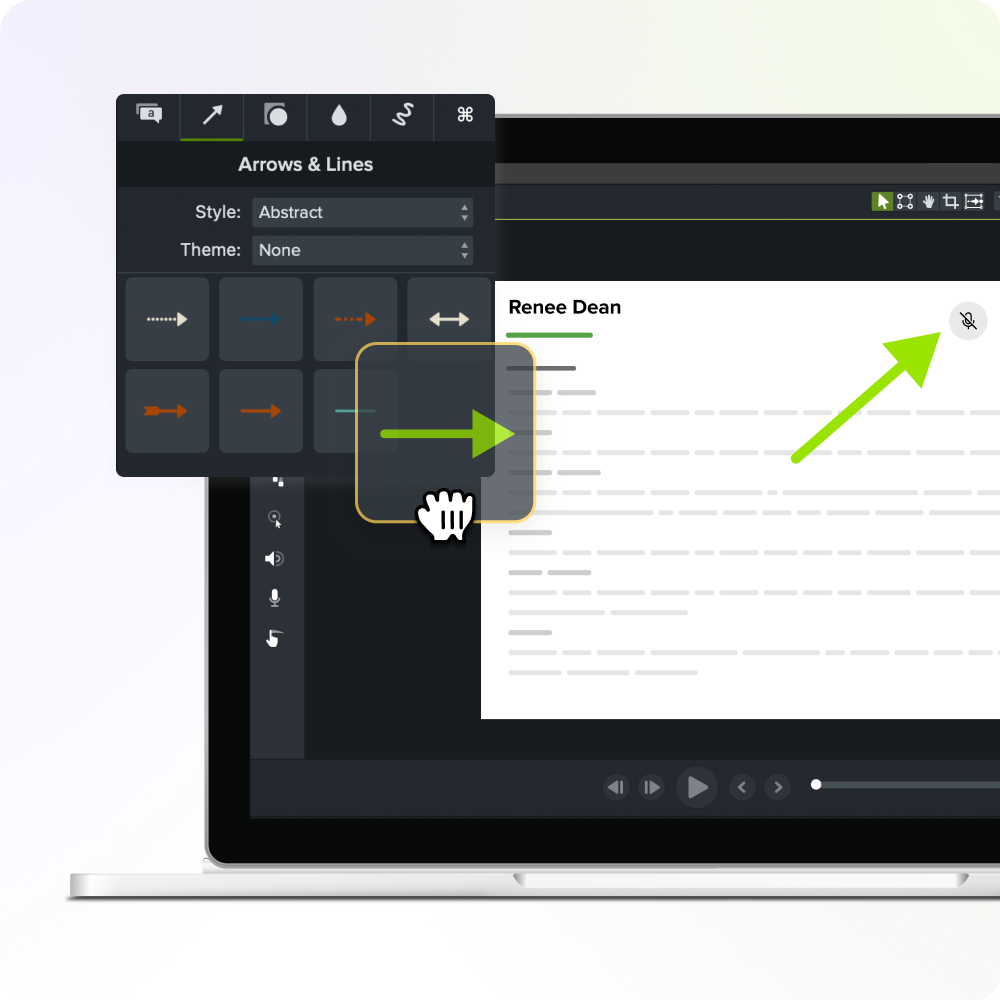
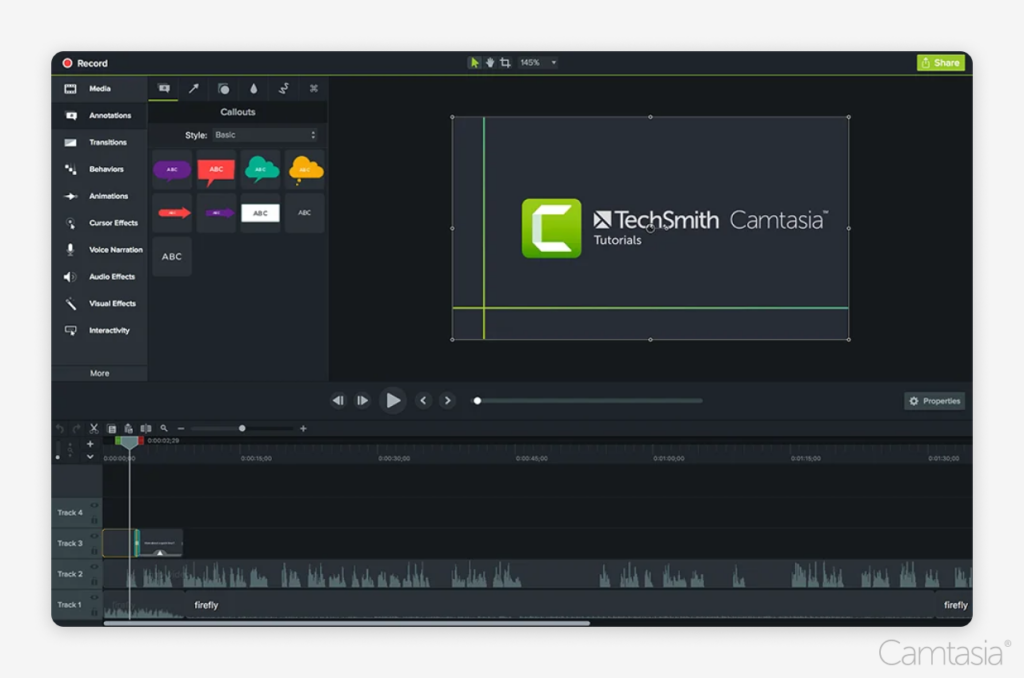
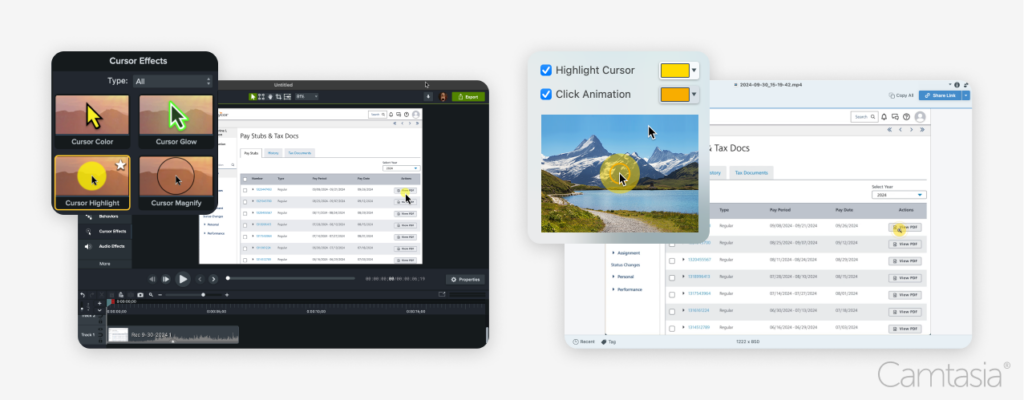
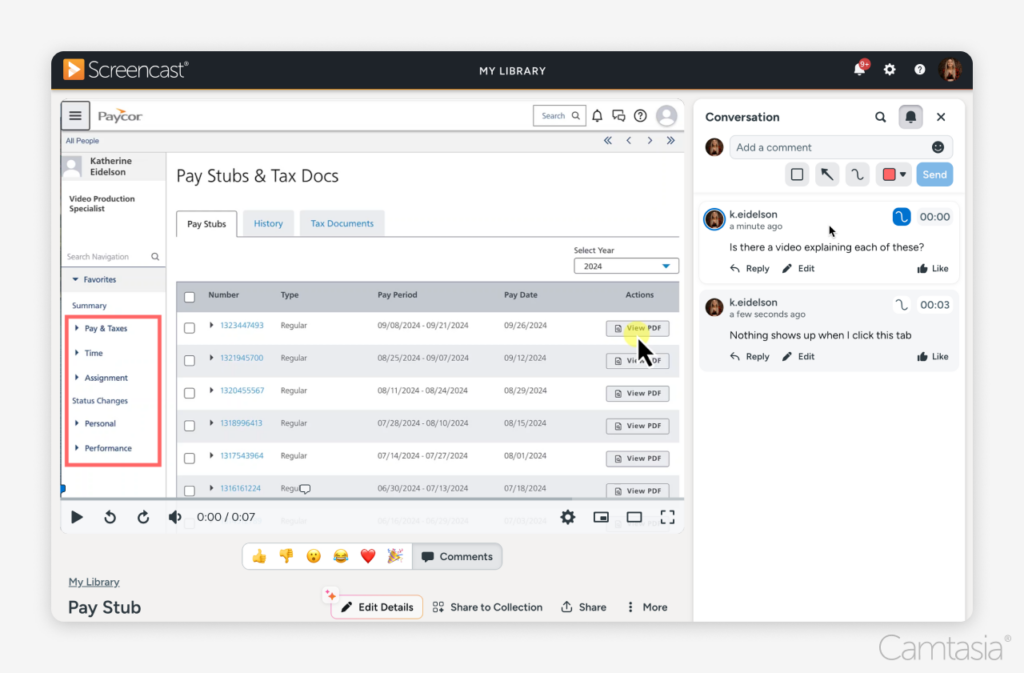
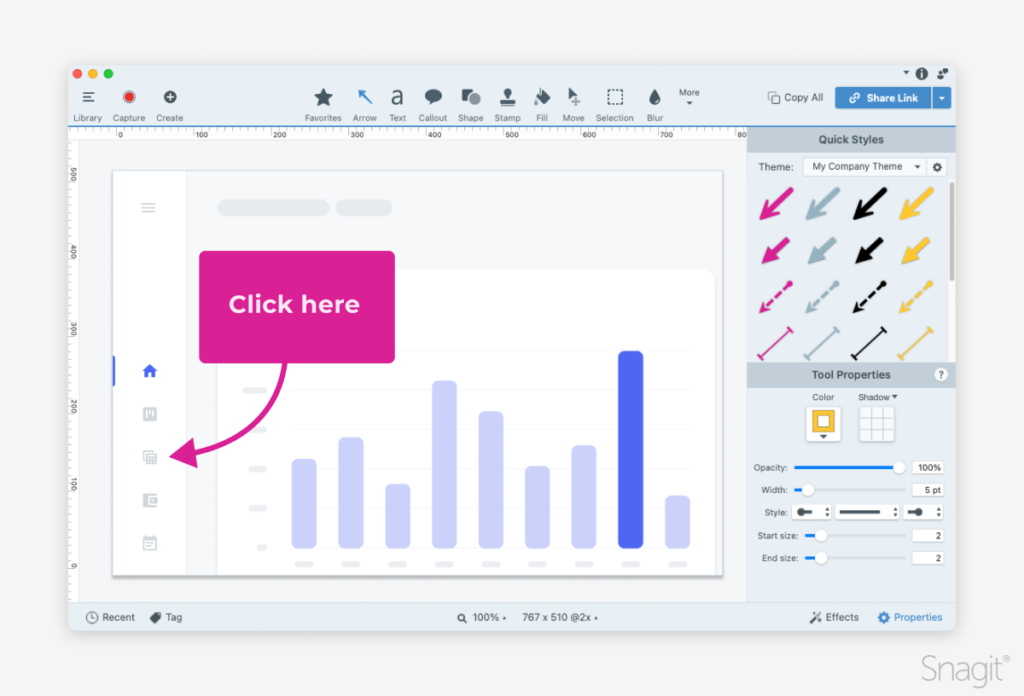
The use of annotations, like arrows and text callouts, increases the helpfulness of an image or video even more. Reading through lengthy instructions can be tiring for your users, so utilizing images with clear annotations to break up the steps is ideal when writing how-tos. 

Step 6: Update regularly

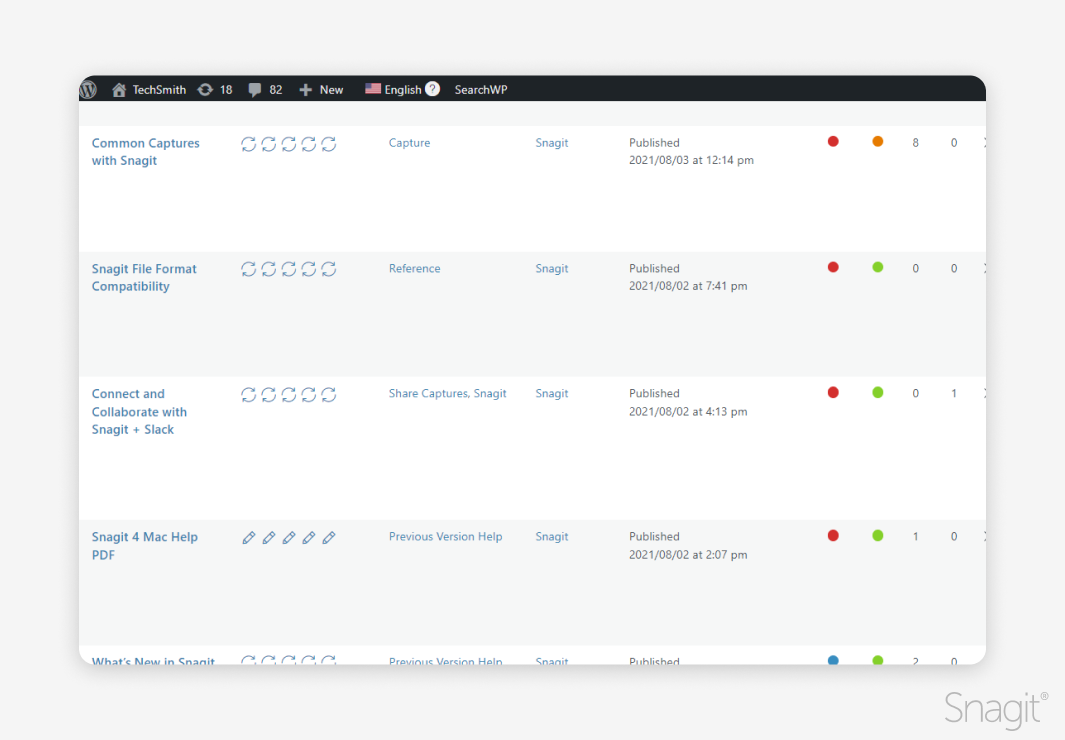
Keep your knowledge base current by reviewing and updating outdated content. It’s important to have a process or workflow that you follow so content does not become inaccurate or out-dated. Many knowledge center platforms include features and functionality to help streamline the review process of articles.

It can also be a good idea to create a knowledge base review process to supplement any automation within the platform you are using. A great example of this would be to assign roles to those who write your knowledge base content.   

Of course, you’ll need to assign those who will write the articles, but you’ll also want to make sure that at least one person is designated as a reviewer. The reviewer of these articles can be responsible for double-checking the article before it’s published for the first time. This can help ensure that the quality of published articles remains high.  

They can also be responsible for reviewing current articles to make sure the content is consistently reviewed and updated.

Best practices for knowledge base content

Now that you’ve got the hang of creating a great knowledge base, let’s address some best practices for writing, maintaining, and updating a knowledge base. 

First, it’s best to always write with your end-user in mind, ensuring content is accessible and easy to follow. 

If your users are lost in a sea of words, they’ll give up and sail off to contact your support teams before finding a solution, causing them to not only be frustrated but also add to the pile of support tickets you may already be facing. 

Another way to avoid causing your users more frustration is to make sure that every article follows the same structure, which improves readability. 

Start with a problem statement and move on to a solution in a step-by-step guide.

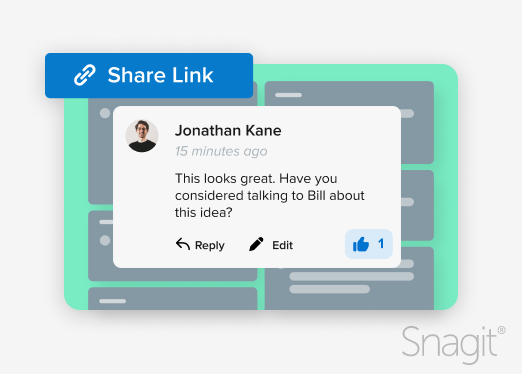
Make sure to encourage your users to leave feedback on articles so you can continuously improve the knowledge base. This will also keep you accountable for updating outdated information in your articles.

How Snagit simplifies knowledge base creation

Screenshot of Snagit interface highlighting a bar graph and a callout pointing to a sidebar icon.

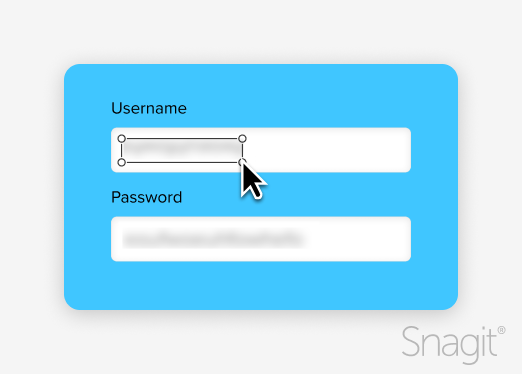
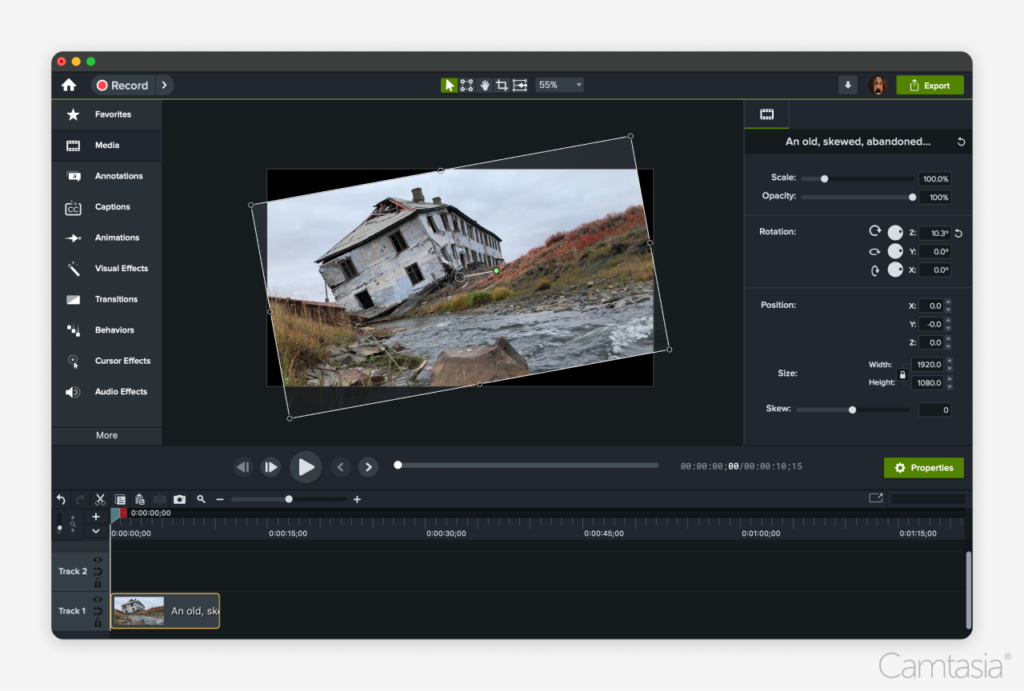
Snagit enables you to quickly capture, annotate, and share screenshots and videos that enhance knowledge base content. 

This not only helps the user navigate any complex processes that may be outlined in your articles, but also allows your knowledge base creation team members to be most efficient and deliver great content to your users (and internally!) much faster. 

When processes change, you can quickly update visual instructions with Snagit, ensuring your knowledge base stays current without extensive rework.

Common knowledge base pitfalls (and how to avoid them)

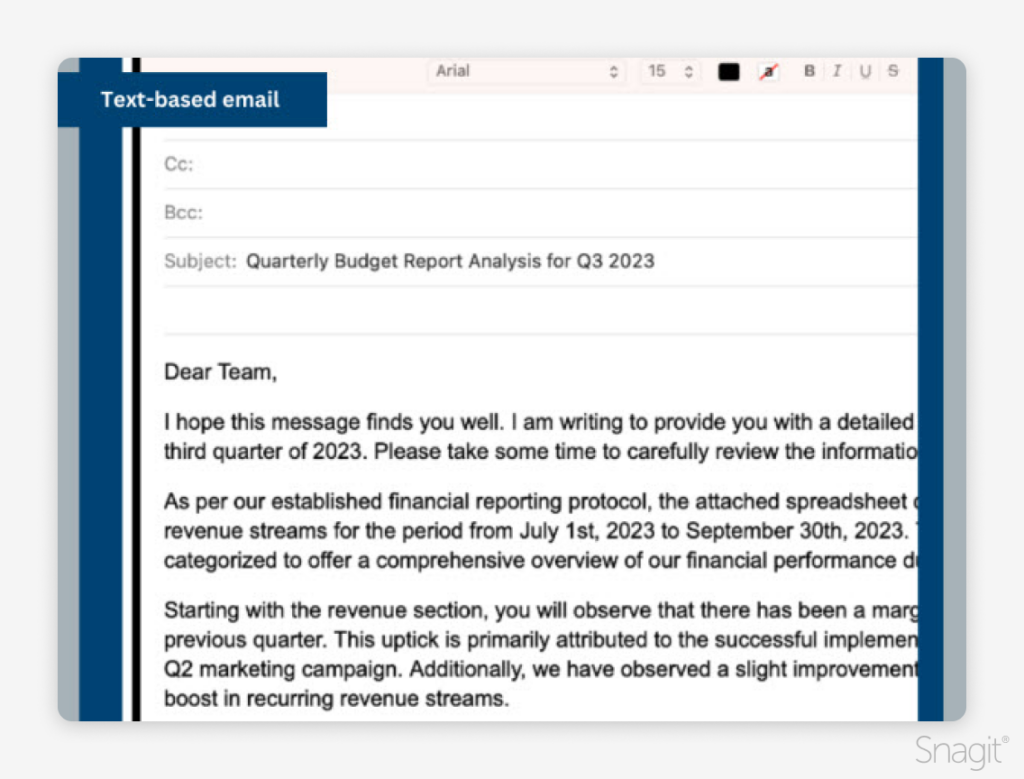
Overwhelming users with large blocks of text can be off-putting. Break it up with visuals and concise explanations.   

Customers are often skimming articles looking for the specific area that will be helpful to them. Avoiding large blocks of text can help customers easily find what they are looking for.

A neglected knowledge base can frustrate users. This is one of the most common pitfalls because of how much time it can take to consistently update content.   

Regular reviews are key. Some articles may need to be reviewed monthly, while others may only need to be reviewed biannually.  Setting up a person or team as reviewers is invaluable to keeping a strong knowledge base.  

Ensure that users can find what they need through effective categorization and tagging. 

Before you start creating the knowledge base and writing articles, it’s important to devise a plan for how your team will tag and categorize your articles.

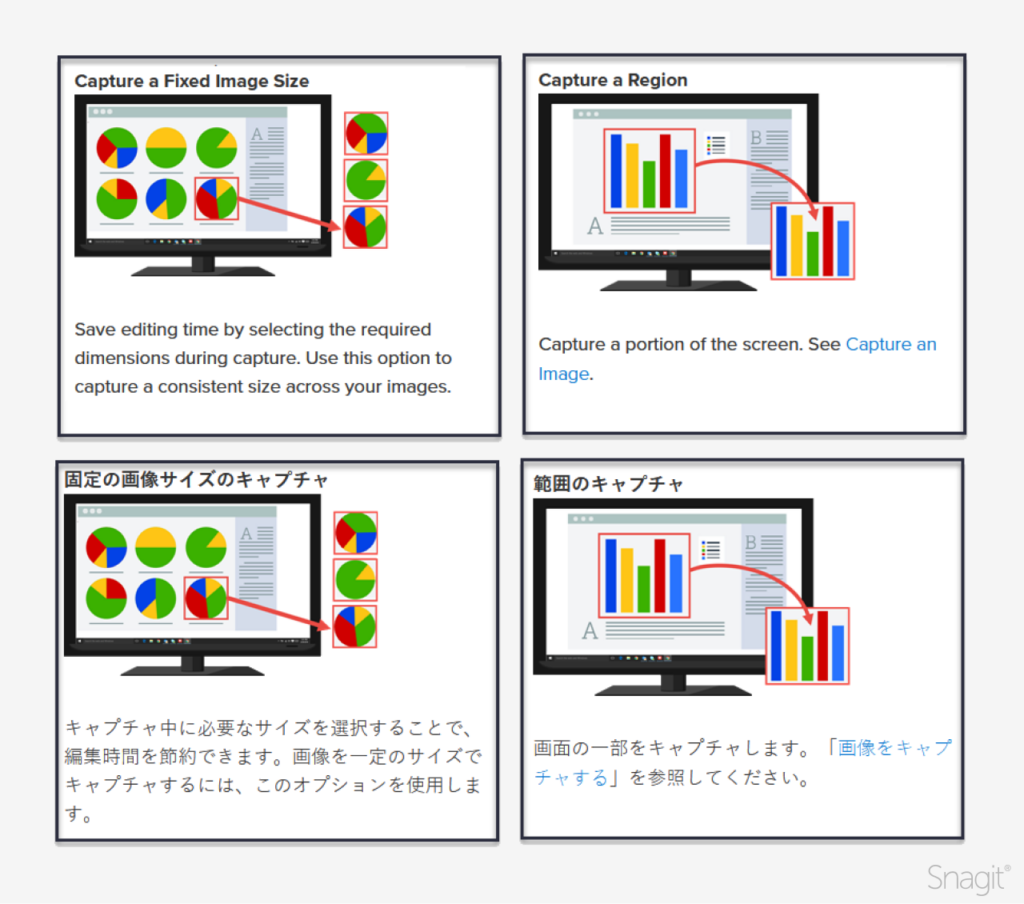
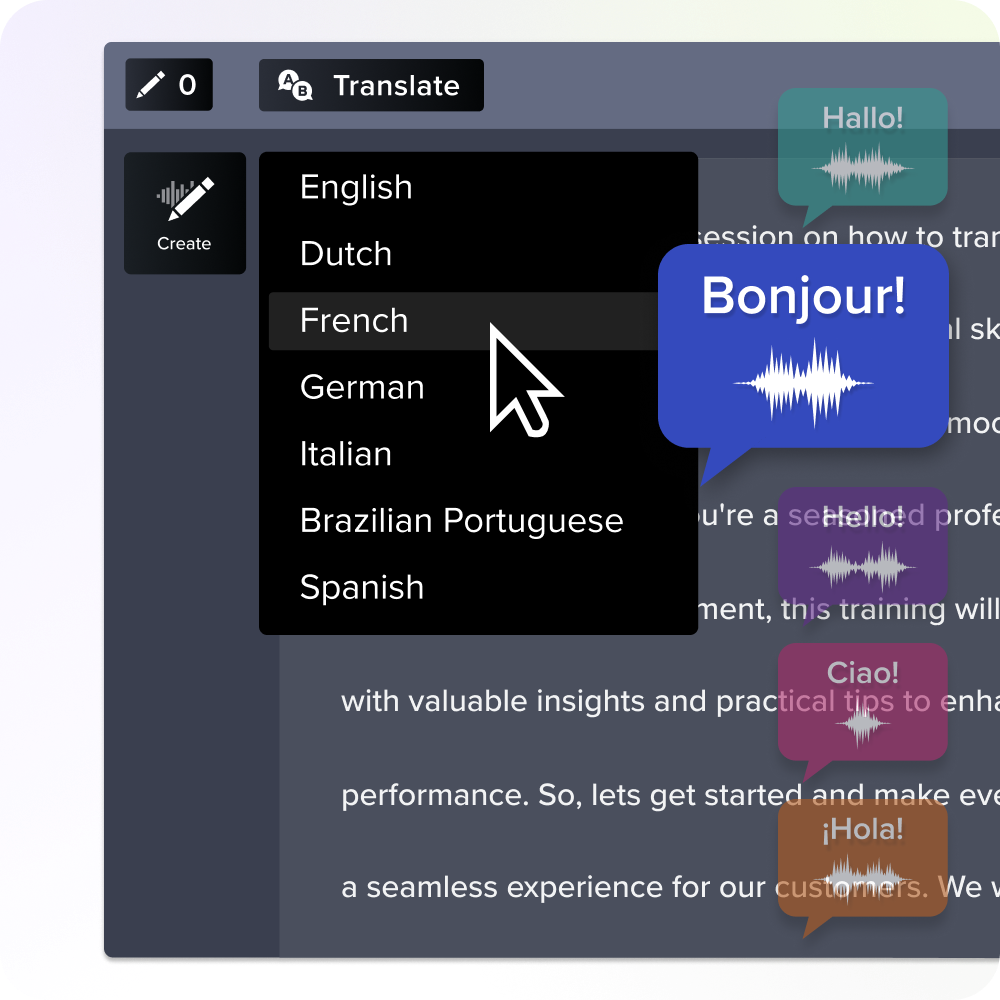
Another common pitfall is missing the opportunity to add translations in other languages. This type of global support extends the reach of your business and improves customer satisfaction. Utilize AI to assist with translating articles.

Start building your knowledge base today

Building a knowledge base can seem daunting, but with the right approach and tools like Snagit, it’s easy to create something that improves the user experience and cuts down on support costs.

Ready to create a user-friendly knowledge base? Download Snagit to get started with your first visual tutorial today!

FAQs about knowledge base creation

How often should I update my knowledge base?

Regularly, at least once a quarter, or whenever there are major product changes.

What kind of visuals should I include?

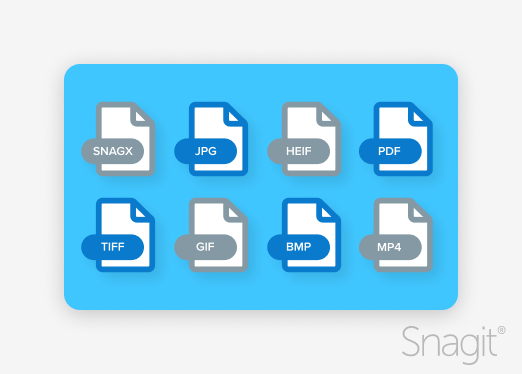
Screenshots, video tutorials, GIFs. Use Snagit for easy, high-quality capture.

Can I create a knowledge base without a dedicated platform?

Yes, you can use simple tools like Google Docs or WordPress, but a dedicated platform offers more functionality.

Lizzy Smiley

Marketing Content Writing Specialist at TechSmith. I love my dog and The Office.

How to Edit a Screenshot: A Step-by-Step Guide

A screenshot icon with a text callout and arrow annotation.

We all respond to elegant, thoughtful visuals—screenshots are as crucial as any other image.

Screenshots are a handy way to capture and share information quickly, whether illustrating a technical process, sharing visual updates, or protecting essential data. These visuals can make boring content more engaging, e.g., a table of contents or frequently asked questions document.

However, screenshots often need a bit of editing for clarity, emphasis, or security. Editing a screenshot can enhance its readability, hide sensitive information, or highlight key details. 

With powerful tools like Snagit, the process is quick and efficient. In this guide, we’ll walk you through the steps to edit a screenshot, ensuring your images are polished and professional.

Over-the-shoulder view of a laptop user adding a callout annotation to a chart with Snagit

Why edit a screenshot?

Editing a screenshot is crucial for various reasons. 

Sometimes, a screenshot might contain irrelevant or sensitive information that needs to be cropped out or blurred. Other times, drawing attention to specific areas might require adding text, arrows, or highlights. Effective screenshot editing can make instructions more precise, presentations more concise, and protect personal data from being exposed.

Tools like Snagit allow you to capture screenshots and provide comprehensive editing capabilities.

Step 1: Capture your screenshot

Using Snipping Tool or Snagit to capture screenshots

The first step in editing a screenshot is, of course, to capture it. Built-in tools like Print Screen or the Snipping Tool offer basic functions like capturing a specific portion of the screen. For more advanced capture and editing features, Snagit is an excellent choice. Snagit allows users to capture scrolling windows, select multiple areas, or take consecutive screenshots with keyboard shortcuts—all while keeping them organized in a library.

Snagit's automatic scrolling arrows on a webpage to take a vertical or horizontal scrolling screenshot

A benefit of using Snagit is its versatility. If you’re capturing a long webpage or an extended menu, Snagit can capture it in one seamless image. It simplifies gathering multiple screenshots and is an excellent tool for professionals who frequently work with visual content.

Step 2: Open your screenshot in an editor

Upload the screenshot to Snagit or another editing tool

After capturing your screenshot, you are ready to start editing.  The next step is to upload it into an editor for adjustments. This step is streamlined if you’re using Snagit, as the screenshot automatically opens in Snagit’s editor. For other editing tools, you can double-click to start your editing application, drag and drop your screenshot into the editor window, or use the upload button to bring the image in.

Most screenshot editors allow users to access cropping and resizing quickly. Some have more advanced tools like annotations or blurring sensitive information.

Step 3: Basic edits: crop, resize, and rotate

Cropping and resizing screenshots

One of the most common edits made to a screenshot is cropping. Cropping removes unnecessary areas, allowing you to focus the viewer’s attention on the critical part of the image. In most image editors, you can use a cropping tool by selecting it, clicking the edges of the image, and dragging it to your desired size.

An illustration of Snagit's cut-out tool used to remove unnecessary sections inside an image

Most cropping tools edit the edges of the content only. Cut-out tools, a feature of Snagit, allow you to remove specific sections inside an image—automatically creating a smooth transition with effects like torn edges. Another Snagit feature, Smart Move, automatically detects and enables users to move UI elements within screenshots, maximizing fast editing.

Resizing is needed to fit a particular format, such as a presentation slide or a web page layout. With Snagit’s tools, resizing is as simple as selecting your desired image dimensions.

Rotating screenshots for better presentation

Sometimes, the orientation of your screenshot might need adjustment. Rotating ensures your text is easy to read. In Snagit, rotating an image is as easy as selecting the rotate tool and choosing your desired angle.

Step 4: Add annotations and text to your screenshot

Adding text and shapes to highlight critical information

Annotations are a powerful way to highlight important areas or add clarity to your screenshots. When sharing a screenshot to explain a technical process, use text boxes to label sections or arrows to draw attention. These annotations make it easier for viewers to understand points or follow instructions.

In Snagit, add text or shapes like arrows by selecting the tool and dragging it to the desired location. Snagit also provides a Step Tool to add sequential numbers automatically.

For a polished look, create shared themes by modifying professionally designed templates to align with your brand guidelines. Stamps, emoticons, and templates are often available in integrated asset libraries. These are all features of Snagit.

Applying a blurs to a screenshot to obscure a username and password

Protect sensitive information

Hiding sensitive information is crucial, especially when sharing screenshots publicly or with external parties. Obscuring or permanently removing information is essential to prevent unauthorized disclosure and protect against identity theft. The General Data Protection Regulation (GDPR) mandates related data security measures. 

Snagit’s blur tool makes it easy to hide:

  • email addresses
  • credit card numbers
  • social security numbers 
  • phone numbers
  • other private information

Select the blur tool from the editing menu, and simply click and drag to cover the sensitive area with the blur effect. This ensures your data remains private while providing the information you need to share. To complete the redaction process, save the file in PNG or another format. 

Snagit can also remove text by transforming detailed screenshots into simplified graphics through simplified user interface (SUI) generation. It also provides Text Recognition (OCR) to allow for the text to be extracted.

In addition to the Snagit desktop app, TechSmith provides a free online tool to blur screenshots.

Step 5: Save and share your edited screenshot

Illustration of supported file formats, including SNAGX, JPG, PDF, and others

Saving in the correct format

After editing your screenshot, the final steps are to save and share it. Most editors offer the option to save in various formats like PNG or JPEG. PNG is often preferred for higher-quality images, while JPEG is useful when file size is a concern. Choose the format that best suits your purpose while ensuring that image quality is preserved.

Snagit also supports batch processing, enabling format conversion to be applied to multiple images simultaneously.

Sharing your screenshot

Sharing your screenshot is often as important as editing it. With Snagit, the sharing process is straightforward. Once the edits are complete, you can directly export your screenshot to email, cloud storage services like Google Drive, or even social media platforms. Your image can be distributed to your intended audience with just a few clicks.

Illustration of feedback on a screenshot shared via the ShareLink button

Save time with Snagit’s optional functionality, which allows collaborative sharing, annotating, and discussion of screenshots online.

Snagit: The best tool to edit screenshots

Editing a screenshot is an essential skill that enhances communication, whether you’re documenting technical issues, highlighting important details, or protecting sensitive data. Tools like Snagit make this process quick and efficient, allowing users to capture, edit, and share screenshots– in minutes. 

Ensure your screenshots are clear, informative, and secure by following the steps outlined in this guide—capturing, cropping, resizing, adding annotations, and finally, saving and sharing. For more impact, use Snagit to create a screen recording, animated gif, or video from images.

Whether new to editing or looking to streamline your process, try Snagit and experience how easy it is to edit a screenshot and share your work! Download a fully-functioning free trial on the TechSmith website to get started today.

Annotate and edit screenshots with Snagit

Professional mark-up tools and powerful features make it easy to create helpful images.

Try it Free
Screenshot of a document about puffin migration patterns with a section for changing styles highlighted.

TechSmith

TechSmith is the market leader in screen capture software and productivity solutions for daily in-person, remote, or hybrid workplace communication and customer-facing image and video content. Our award-winning flagship products, Snagit, Camtasia, and Audiate, empower anyone to create remarkable videos and images that share knowledge for better training, tutorials, and everyday communication.

Best Laptops for Video Editing (Fall 2024)

An open laptop with a video editing app on the screen and a recording button overlaid.

Looking for a laptop for video editing? 

We’ve collected a few machines that will address a wide range of use cases, specifically those related to video editing. 

In such a demanding field as content creation, having a high-performing laptop that can serve as a mobile workstation without breaking the bank is critical. Whether you’re looking for a Windows laptop or want to jump to a MacBook, our guide to the best laptops for video editing has you covered!

Mobile offices and computing on the go are commonplace in today’s remote-friendly world. Finding the right laptop that mixes price and performance without sacrificing either is paramount. 

Below are a few machines that we would recommend to both new and experienced creators,, and we kept a few things in mind when choosing these machines:

Price will naturally be a primary concern, so we selected a more performance- and price-focused machine. 

It’s important to accept that a laptop that might fit within the “budget” category isn’t well-suited for content creation and video editing. While budget laptops may be great for running an occasional video game or watching 4K movies, most are lacking in some respect and would perform poorly at advanced video editing.

Vintage video camera with film.

Key specifications for video editing laptops

Processors

*Processors*, or “CPUs” for short, are the brains of your computer and come in all manner of specifications. 

ARM processors are currently the new hotness, with Apple’s latest blazing-fast M3 chip, and they are excellent candidates for those who need to do some heavy video editing. 

Don’t discount traditional high-performance processors, though. AMD’s latest offerings are some of the best in class, outperforming more established manufacturers. Intel’s Core i9 powerhouse is a workhorse in disguise; often housed in full desktop replacement laptops, Intel’s premier line of processors won’t let you down.

CPU.

RAM

*System memory (RAM)* and its importance can vary from machine to machine, and though more is typically better, speed is just as important. In most cases, setting your system up with modern memory will yield speeds fast enough that you won’t need to make the jump to 32GB of RAM. While it won’t hurt, the additional cost may be prohibitive.

AMD processors like fast RAM and are incredibly efficient with the right specs. Apple’s ARM-based M2 and M3 processors are brilliant at handling heavy workloads, so they don’t rely on RAM as much and can get away with a little less, which is why you’ll see the Apple offerings below having the lowest amount of RAM.

Video cards

Video cards (or “GPU,” which is short for “graphics processing unit”) are often the backbone of video editing, and they do a lot of the heavy lifting in applications that support GPU acceleration. 

Some laptops feature an integrated GPU, combining the CPU and GPU into a hybrid unit. This design is ideal for laptops because it saves space, although it sacrifices some raw power.

Laptops geared toward video editing will likely have dedicated/discrete video cards, primarily manufactured by one of two major manufacturers (NVIDIA and AMD). These machines are typically heavier, thicker, and louder than their integrated cousins. 

Another downside is that the battery life on laptops with discrete GPUs can be shorter than that on their hybrid counterparts; the upside is that these machines are often total desktop replacements and can serve many more roles.

GPU.

Hard drive and storage

We also kept hard drive type and size in mind as content creation, especially video editing and production, can quickly fill up a hard drive. Fortunately, each machine, except for one, comes with 512GB SSD storage drives that will be plenty fast for video editing.

The sole exception is a 1TB M.2 NVMe drive; of them all, this drive is the largest and the fastest. Housed in the more expensive Windows 11 machine listed below, this hard drive will have speeds as fast as 10x the speed of the traditional SSDs in the other machines.

Storing your original media or video editing projects on an external hard drive is tempting, but we strongly recommend against this. 

While external hard drives, cloud drives, or even network drives are quite fast, they are still external to the computer itself, which introduces latency. This latency (aka “lag”) can cause some editors to perform poorly.
We recommend you keep your active projects locally stored on your computer until you have completed editing.

SSD.

Top affordable laptops for video editing

Let’s take a look at some of the best laptops for editing videos. All prices listed were valid at the time of writing but are subject to change. 

Option 1: M3 MacBook Pro

M3 Pro MacBook Pro (16″) $2499 USD 

  • 16″ Liquid Retina XDR display
  • 12-core M3 Pro processor
  • 18-core GPU
  • 18GB Memory
  • 512GB SSD hard drive space
  • MacOS 15 Sequoia
M3 MacBook Pro.

Apple’s premiere MacBook Pro, powered by the latest M3 Pro ARM processor, is a workhorse like none other. 

Sleek and refined on the outside, a work of art on the inside, the 16” MacBook Pro comes standard with its Liquid Retina XDR display. Taking the standard HDR to an extreme, the XDR Retina Displays are a sight to behold; capable of the full-color gamut, these displays alone are magical.

With more ports than ever before, the M3-powered 16” MacBook Pro can connect two additional displays with its HDMI port, x3 Thunderbolt ports, SDXC card slot, MagSafe port, and traditional headphone jack.

Whether you want to record a video with TechSmith Camtasia or put together a presentation, the M3 Pro-powered MacBook Pro won’t disappoint you. 

Option 2: Asus ProArt Studiobook OLED

Asus ProArt Studiobook OLED (H7604) $2499

  • 16″ 3200×2000 120Hz display
  • Core i9-13980HX processor
  • NVIDIA RTX 4070 GPU
  • 32GB Memory
  • 1TB M.2 NVMe SSD hard drive space
  • Windows 11

A true desktop replacement designed with content creators in mind and a potentially excellent gaming laptop, the Asus ProArt Studiobook OLED is a work of art in and of itself. 

The 120 Hz OLED screen has unparalleled color accuracy and is blazing fast for gaming on the go. Powered by Intel’s flagship Core i9 and paired with the speeds of the blisteringly fast M.2 NVMe SSD drive, the ProArt Studiobook is one to take note of if you’re looking for a Windows-powered laptop.

Packing an NVIDIA RTX 4070 GPU, hardware-accelerated applications like TechSmith Camtasia can leverage its power while freeing up the CPU for other tasks.

The RTX 4070 is perfect for those of you looking to expand your desktop with an external monitor or two. The ProArt Studiobook sports multiple connections, including the latest in HDMI technology. Perfect for expanding your working space!

This model is also perfect for those of you who might use a digital camera or DSLR in lieu of a traditional webcam. It sports an integrated SD card reader for fast file transfers from your camera card to your computer!

Asus ProArt Studiobook OLED (H7604).

Option 3: M2 Macbook Air (Budget Option Mac)

What is the best laptop for video editing that’s affordable? If you’re looking for a Mac, then this is a great opinion.

M2 Macbook Air (13″) $1199

  • 13″ Liquid Retina display
  • 8-core M2 processor
  • 10-core GPU
  • 8GB Memory
  • 512GB SSD Hard drive space

Apple’s entry-level M2-powered MacBook Air laptops are the perfect balance between battery life and the power that will be necessary for budding content creators.

Capable of reaching 18 hours on its battery, the 13” MacBook Air is the ideal travel companion; it is great for plugging your microphone into and recording on the go. 

The MacBook Air is almost purpose-built for applications like TechSmith Snagit; it’s great for capturing your screen or recording a little footage to send to a client!

Don’t let the lower specs fool you, though.  Apple’s M2 processor is still a major contender and not one to be overlooked. 

Especially if you’re only looking for basic recording needs, a job that TechSmith Snagit is perfectly suited for and runs extremely well on the M2-powered machine. 

Snagit, like the M2 MacBook Air, is well-suited to entry-level content creation; designed to take crisp, professional captures and mark them up, it can also record your screen, so it’s perfect for making quick clips to share with colleagues and friends alike!

M2 Macbook Air.

Option 4: Lenovo ThinkPad p16s Gen 2 AMD (Budget Option Windows)

Looking for a good laptop for video editing on Windows. Check out this option. 

Lenovo ThinkPad P16s Gen2 AMD $1179

  • 16″ WUXGA 1900×1200 IPS
  • AMD Ryzen™ 7 PRO 7840U Processor
  • AMD 780M Integrated Graphics
  • 16GB RAM
  • 512GB SSD hard drive space

If you’re looking for a great Windows laptop that will open the door to video editing, then look no further than the Lenovo ThinkPad P16s Gen2. 

Powered by AMD’s premium mobile processor, the AMD Ryzen 7 PRO 7840U APU (accelerated processing unit- a hybrid GPU and CPU that’s perfect for mobile computing), you’ll never be left wanting. 

Backed by the best-in-the-industry integrated graphics adapter in the AMD 780M, you’ll be able to comfortably run advanced video editors like Adobe Premiere Pro or TechSmith Camtasia.

While not as powerful as its Asus counterpart we mentioned above, the Lenovo ThinkPad P16s more than fits the bill for entry-level video editing at a budget laptop price point. 

Though there are significantly less expensive laptops on the market, not all will be up to the task of editing media. This ThinkPad is paired with some blazing-fast RAM and plenty of space available on its 512GB SSD. 

This machine is perfect for creators looking to break into the content creation market but may be limited in where they can apply their funds. With plenty of system memory, ample storage space, and AMD’s flagship APU, this Lenovo ThinkPad P16s is perfect for the budding creator!

Lenovo ThinkPad p16s Gen 2 AMD.

Other considerations for hardware

Bonus! We wanted to add a few noteworthy peripherals as a bonus to this article; in many cases, “what microphone/webcam should I use” is often found not far off from the types of “best laptop for video editing” conversations that this guide will address.

If you plan to do your own voice work, we recommend the Audio-Technica AT2020USB as an excellent microphone selection.

If you’d like to hear a live demonstration, head on over to one of TechSmith’s free webinars! The host, Jason Valade, uses the Audio-Technica AT2020USB and has been a vocal advocate for the microphone whenever asked!

For those looking to record themselves but don’t have the budget for a mirrorless camera or DSLR and want something higher in quality than the built-in webcam, look no further than the venerable Logitech Brio 4k webcam. Capable of 4K at 30 frames per second, the Brio is a beautiful addition to any content creator’s growing hardware collection.

TechSmith

TechSmith is the market leader in screen capture software and productivity solutions for daily in-person, remote, or hybrid workplace communication and customer-facing image and video content. Our award-winning flagship products, Snagit, Camtasia, and Audiate, empower anyone to create remarkable videos and images that share knowledge for better training, tutorials, and everyday communication.

How to Enable Screen Sharing on Zoom

A Zoom meeting screen with a cursor arrow pointing to the Share Screen icon in the Zoom menu bar.

Screen sharing creates clarity and impact. In this post, we’ll instruct you how to share your screen(s) on Zoom using a desktop computer, Android device, or iOS device. We will cover features like Google Drive and OneDrive sharing and turning off full-screen mode. Plus, we’ll show you how Snagit can help capture and annotate important moments.

Key functionality options for Zoom screen sharing:

  • Share your entire screen or just one app 
  • Show slides and drawings, or share a whiteboard
  • Share files from Google Drive or OneDrive
  • Stop Zoom from going full-screen automatically

Note that with important presentations, it’s a good idea to restart your device before the meeting. This reduces the risk of poor system performance from competing background software.

Now, let’s dive into how you can get started.

How to share your screen with Zoom on a computer (desktop / laptop)

Step 1: Start or enter a Zoom meeting

If you are a guest, remind your host to invite others to grant screen share access. Also, close unnecessary applications that may generate system sounds or pop-ups.

Step 2: Locate the screen share option in your meeting controls

Locate the green Share Screen button along the bottom interface in your meeting controls. 

The green share button highlighted to show its location on the Zoom toolbar.

Tip: If your Zoom window is too small, the toolbar at the bottom might hide some icons under the “More” option to the right. Hover over “More” for additional options.

The green share button highlighted to show its location from the 'more' option on the Zoom toolbar.

Step 3: Select which screen or application to share

Under Share, pick Entire screen, then select Screen 1, Screen 2, or Screen 3, etc. This will display everything you have on that respective screen.

Alternatively, display only one application by selecting one of the Application windows. This option avoids clutter and reduces the risk of messaging pop-ups.

Step 4: Click share

Zoom will automatically switch to full-screen mode.

Tip: Pick Maintain current size to prevent content from being distorted. 

The 'maintain current size' option selected from the zoom 'share screen' settings tab.

Step 5: Exit fullscreen mode

Select the View option located in the top right corner or press the ESC key to return to your regular Zoom window.

The 'view' option selected in zoom.

How to share your screen with Zoom on an iOS device and Android device

Step 1: Join the Zoom meeting

Open the Zoom application on your phone or tablet and join (or start) the meeting. 

Step 2: Click share content

This green button is labeled Share Content. This is located at the bottom of your iPad or iPhone screen.

Step 3: Select the type of content to share

Note that sharing services are also supported, including: Box, Dropbox, Google Drive, Microsoft OneDrive, or Microsoft OneDrive for Business. Android devices include the ability to share the phone’s camera feed as well.

Step 4: Click share

After choosing what to share, finish the process by clicking the Share option within the application. Zoom will then display your content to the other participants in the call.

Step 5: Stop the share

To end screen sharing, tap the Stop Share option. This is a red button on the bottom left of the screen on Android devices. The Zoom call will continue.

Tip: The “more” section of the menu contains an option to pause the share. 

How to enable screen sharing on Zoom for other participants

Step 1: During the meeting, hover over the upward arrow next to share

Look for the green share button at the bottom of the Zoom interface. 

  • To the right of it, there is an upward arrow
  • Choose Advanced sharing options in the dialog box 
  • Ensure the Who can share? option has All participants selected
'advance sharing options' tab open and showing multitude of different options.

Useful screen-sharing tips

Share locally stored content or cloud files

Zoom makes showing Google Drive and Microsoft OneDrive content easy without worrying about permissions or download links.

Tip: Only PDFs and images are supported when sharing files directly from cloud services.

Options are your friends

Many settings are available before a meeting: full-screen options, allowing others to share, and sizing files. 

Open the chat window

Zoom has a chat feature. To chat, open the chat window. Chat helps manage feedback and questions without people talking over each other. Find this option at the bottom of the Zoom app, or under More. Use the chat to share links, add emojis, or let participants express thoughts.

Enhance screen sharing with Snagit

Capture key moments

The meeting host may or may not record the entire meeting. Regardless, you may prefer to take notes rather than reviewing hours of video later. 

Using Snagit, screenshots or recordings can be quickly and easily captured during the Zoom meeting without interrupting it. This is a fantastic way to grab graphs, quotes, or other vital items. Snagit makes it as easy as pressing a single key to add tagged content to your Snagit library quickly.

Annotate your screenshots and trim recordings

With Snagit, you can quickly grab essential parts of the live meeting content and add context not shared in the meeting. With the software, you can:

  • Add titles and callouts to add insight
  • Use shape tools such as rectangles and circles to direct your eyes to areas of importance 
  • Crop edges and even cut out entire parts of the capture
  • Generate a sharing link or archive in your library

Annotate and edit screenshots with Snagit

Professional mark-up tools and powerful features make it easy to create helpful images.

Try it Free
Screenshot of a document about puffin migration patterns with a section for changing styles highlighted.

Use Snagit to eliminate unnecessary meeting time

Use Snagit to record videos, including presentation voiceovers, and share them with your audience as a pre-reader. This allows meeting attendees to consume at the best time and pace for them.

This reduces the need for meetings to watch presentations. And the subsequent offline discussion may even eliminate the need for a meeting. And with a fully-functioning 15-day trial, you can get started with Snagit for free today.

FAQs about Zoom screen sharing

Can I share a full-screen video clip on Zoom?

Absolutely! Select the window size when screen sharing option. Choose between the fullscreen mode, maximize window, and maintain current size selections.

How do I exit full screen mode during screen sharing?

Look for the exit full screen option under view in the top right corner, or press the ESC key. You can also double-click at the top of the application window.

You used both the terms fullscreen and full screen – which one is correct?

Both describe a mode that shows content without tools, borders, or other visual interference. This article reflects that Zoom uses both in different places throughout its interface.

What if I want to share content from my iPhone, iPad, or an Android mobile device?

Zoom similarly supports screen sharing on phones, tablets, and computers. Under Share Content, choose your content before tapping the share button.

Why can’t I find something with a specific option?

Hover over more to find and explore additional options.

TechSmith

TechSmith is the market leader in screen capture software and productivity solutions for daily in-person, remote, or hybrid workplace communication and customer-facing image and video content. Our award-winning flagship products, Snagit, Camtasia, and Audiate, empower anyone to create remarkable videos and images that share knowledge for better training, tutorials, and everyday communication.

How to Add Music to Google Slides

A Google Slides image with music notes and a Play button on the featured slide.

Let’s face it—Google Slides presentations can sometimes be a bit boring. As the presenter, it is important to keep your audience engaged, but how? Adding background music to your Google Slides is one of the best ways to create a more dynamic presentation! In this guide, we will walk you through step-by-step instructions on how to add music and other audio elements to your slides.

Step 1: Prepare your audio files

While you can use pre-made music or audio files in your presentation, we recommend creating your own audio file. Custom audio recordings grab people’s attention and can help convey your message better. There are tools out there that you can use to easily record and edit your audio. 

We recommend Camtasia Audiate for in-depth audio recording and editing. With Audiate, you can easily record audio on your computer and edit that audio by editing the text. This means you can edit the audio by directly manipulating the transcribed text—cutting, moving, or adjusting parts of the recording as easily as editing a text document.

With Audiate, you can ensure that your audio flows smoothly and sounds professional, adding a layer of sophistication to your presentation.

If you have simple voice overs or audio instructions to add in, Snagit’s screen and audio recording features can be a quick solution to create customer audio files to complement the visual elements of your Google Slides.

Edit audio like text

You don’t have to be a professional to record and edit audio. Audiate makes it as easy as editing a text document.

Get Audiate
An image showing text being deleted in a doc and a corresponding timeline being cut

Upload your audio to Google Drive

Before adding audio to your Google Slides presentation, you first need to upload the audio file to your Google Drive account. 

To upload an audio file to Google Drive, follow these steps:

  1. Open Google Drive
  2. Click New in the top left corner
  3. Click File Upload
  4. Select your audio file

This quick and easy process will get you on your way to creating your best slideshow presentation yet!

Mouse hovering over folder upload in Google Drive.

Step 2: Insert audio into your Google Slides 

Select the slide to add your audio file.

It’s time to decide which slide you want the audio or music to play on. Once chosen, navigate to that slide in your presentation and click “insert” from the top menu.

Insert audio using Google Drive

From the “insert” dropdown menu, select “audio”. This will open Google Drive, where you can choose the audio file you uploaded. Once you have selected the correct audio file, you can add it to your Google Slides presentation.

Mouse hovering over "audio"

Step 3: Customize audio playback

Adjust playback options

You may want audio in your presentation but might want to have more control over when it starts or stops playing. You’re in luck! In Google Slides, you are in control—you can have the music start playing automatically or when clicked. You can adjust these settings by right-clicking the audio icon and selecting “format options”. 

Set background music to play throughout your presentation

If you’re wanting cohesive background music throughout your Google Slides presentation, you can adjust the playback settings so the music continues through multiple slides. 

Under the format options for your audio, make sure to unclick “stop on slide change”. This will allow your audio file to continue playing while in presentation mode.

Mouse hovering over "stop on slide change"

Step 4: Fine-tune audio appearance and behavior

Hide the audio Icon

No one wants to have an obtrusive audio icon disrupting your beautifully designed slides. So let’s hide that pesky audio icon throughout your presentation while keeping the music playing. All you need to do is open the format options by right-clicking the audio icon, then choosing to hide the icon in presentation mode.

Control volume and playback options

We’ve all watched a show where the audio of the dialog was much quieter than the background music, which is super jarring and unpleasant. If you want to avoid this issue, it’s simple to adjust the volume of your audio file. Under the format options panel, you can adjust the volume levels as well as set the audio to fade in or out depending on the mood of your presentation. 

Changing volume on audio playback.

The easiest way to edit videos

Stop wasting time and discover how Camtasia makes creating incredible videos easier than ever.

Free Download
An image of a laptop showing the camtasia drag-and-drop editing feature

Best practices for adding music to Google Slides

Use high-quality audio

Clear, high-quality audio recordings will enhance your presentation and keep your audience engaged. According to a TechSmith study, poor audio quality is a leading reason people stop watching videos, highlighting the critical importance of clear audio.

Tools like Camtasia or Snagit can make your audio creation process quick and easy. You can create professional-quality audio to engage your audience. Or capture professional sound effects that fit your presentation’s tone.

Keep the music subtle

While background audio can keep your audience engaged, it also has the potential to distract from the main purpose of your presentation. To avoid this, ensure the volume levels of your background music are subtle enough not to overshadow your core message.

Remember to adjust the volume levels of your audio. Selecting calm or instrumental tracks can add to the presentation without overpowering it.

Steps to add audio to Google

  1. Upload your audio files to your Google Drive Account
    1. Click “new”
    2. File Upload
    3. Select your file
  2. Pick your slide then select
    1. Insert from the top menu
    2. Then click Audio
  3. Adjust playback options
    1. Right click on the audio icon
    2. Select format options
    3. Adjust volume, playback options, and icon options
  4. Optional: Insert a YouTube video for audio
    1. Click insert from the top menu
    2. Then click Video
    3. Search for the video you want

Frequently Asked Questions (FAQ)

Can I add different music to each slide?

Yes! You can customize the soundtrack for each slide by adding different music or audio files to individual slides. This can be easily done by selecting each slide and following the same steps to insert audio from Google Drive.

What audio formats are supported in Google Slides?

Google Slides is compatible with most common audio formats, including but not limited to, MP3 and WAV files. You can upload these types of audio files to your Google Drive account for easy access to use within your presentation!

Effectively Using the Four Types of Communication

Icons depicting communication types, including an eye icon for visual, a texting icon for written, and a person icon for non-verbal.

Communication can make or break personal and professional relationships.

Communicating effectively in a professional setting can help create meaningful relationships with friends, co-workers, colleagues, and acquaintances. Strengthening the bonds with others you work and socialize with fosters trust.

With trust comes a great sense of teamwork and collaboration, which is helpful in a work environment and life. Conversely, ineffective communication can lead to misunderstandings and slow or even halt work.

Communication involves spoken or written words and non-verbal cues like body language and tone of voice. These cues convey emotions, thoughts, and even hidden messages.

Visual communication can help clarify any misunderstandings in tone, message, volume, or grammar. All of these types of communication are important and useful in business and life.

Understanding the different types of communication can improve collaboration and trust within your relationships. Using verbal, non-verbal, written, and visual communication will help you deliver your message with ease and clarity.

Using Snagit, you can capture and share visual content with your message recipients to improve the effectiveness and clarity of your message. Read on to learn more.

The big four types of communication

1. Verbal communication

According to the National Institute of Health, modern speech originated almost 1.4 million years ago. This means humans have communicated using spoken words for over a million years!

I can’t imagine those early humans could imagine where we’d be with meetings and phone calls today, but alas, here we are.

These spoken interactions are prevalent at work and in personal settings. Making a phone call, stopping to chat face-to-face, and presenting in a meeting are all great examples of using verbal communication to explain your message.

But getting the words right isn’t always so easy.

The tone of voice, the words you use, and the volume can all contribute to the message you’re trying to get across. With explanations, carefully chosen phrases, and an appropriate volume, verbal communication can be a great strategy to increase collaboration within a group or team.

Video messages > meetings

Record your screen and camera with Snagit for quick updates and feedback.

Learn More
Screenshot of a video message with a dark-themed dashboard and various reaction emojis

2. Non-verbal communication

Non-verbal communication is everything you can see but can’t hear from a speaker.

These non-verbal cues can include eye contact, hand gestures, facial expressions, and body language.

 If someone comes into the room with a frown on their face and their arms crossed, you can quickly tell their demeanor before they speak. Reading nonverbal cues from a speaker will help clarify their message and the emotions they’re trying to convey.

Nonverbal cues can help manage the flow of conversation. Nodding can signal agreement or encourage the speaker to continue, while looking away might indicate a desire to end the conversation.

Using Snagit, you can record yourself demonstrating examples of non-verbal cues for training your colleagues. You can also use Snagit to screenshot still images of people showcasing non-verbal cues in workplace communication to share for feedback or training.

3. Written communication

Effective written communication is essential for conveying messages clearly and professionally. It includes well-structured sentences, proper grammar, and an appropriate tone.

These types of written communication can include emails, PowerPoint presentations, text messages, reports, Slack messages, and other documentation.

Written communication has been the default business communication for many years – think about how many emails you’ve received today alone.

In order to break up the monotony of walls of text in written communication, use Snagit to help you create images, gifs, and videos to insert into your documents.

These graphics create visual interest for your readers and help keep them engaged in your content. Instructional guides can greatly benefit from visual examples of menu items, step-by-step instructions, and tutorials.

Wall of text? Next!

Snagit makes it easy to communicate more effectively with visuals.

Learn More
Screenshot of a document about puffin migration patterns with a section for changing styles highlighted.

4. Visual communication

Visual is perhaps the most fun form of communication. This type of communication includes anything that displays a concept using graphics instead of words alone. These graphics include screenshots, charts, graphs, photos, and even videos or gifs.

Visual communication is widely used in fields such as marketing, advertising, user interface design, educational materials, and presentations because it presents information in a precise, efficient, and visually appealing manner.

Using visuals can keep your readers engaged in your message and helps create good communication.

You can use Snagit to create and edit visuals that complement written or verbal communication, helping to explain complex ideas quickly and effectively.

With Snagit, you can capture your screen (screenshots, screen-recorded videos, webcam), add context (highlight important ideas, add stamps or callouts, include arrows to emphasize certain points), and share anywhere (create a custom link to your content or send it to your favorite app).

Examples of different types of communication

Below, you will see the same message using each of the 4 kinds of communication. 

They all have benefits and drawbacks, but which do you like best?

Verbal communication

Voice memo screen with overlay of 'Verbal Communication'

Nonverbal communication

mostly blurred screenshot with a woman's face in the lower left corner, text overlay 'nonverbal communication'

Written communication

generic business email with overlay 'text-based email'

Visual communication

3 images with captions and numbered guides, overlay 'images with text'

Why use Snagit to improve communication?

Benefit 1: Enhanced visual communication

With Snagit, users can capture screenshots, videos, and annotated visuals, making communication more effective.

Specifically, TechSmith has proven that a business can save up to $1,200 in productivity per year for every employee who consumes content as part of their job just by integrating visual content. (Download The Value of Visuals report PDF.)

In today’s modern work environment, colleagues from all walks of life need to communicate effectively and work cross-generationally and cross-culturally.

Integrating visuals into your communication strategy helps bridge the gap between what verbal, nonverbal, and written communication leaves behind.

Tools that make it easy to communicate visually — like Snagit — are indispensable for remote teams, as research suggests that a lack of visual communication could jeopardize productivity and engagement in organizations. (Download The Value of Visuals report PDF.)

According to a TechSmith survey, 98% of respondents who use video, a form of visual communication, at work say it improves the effectiveness of their message.

Even a quick how-to video showing a colleague how to change the settings on their email more clearly gets the message across than a tedious email with written instructions.

Process explanation documents are enhanced with the Step Tool, which shows where to click and in what order. Using these two features in Snagit, your documentation, emails, or quick messages to teammates will be understood more clearly.


Benefit 2: Better written communication

Snagit can significantly enhance written communication by providing tools that make it easier to create clear, concise, and visually appealing content. Here are some key ways Snagit can help:

Screen Capture and Annotation

Snagit allows you to capture screenshots and annotate them with text, arrows, shapes, and more. This is particularly useful for creating tutorials, guides, and documentation where visual aids can clarify complex information.

Video Recording

You can record your screen to create video tutorials or demonstrations. This is a great way to explain processes that are difficult to describe with text or images alone.

Scrolling Capture

Snagit can capture long web pages or documents that extend beyond the visible area of your screen. This feature ensures you can include all necessary information in a single image.

Grab Text

Snagit can extract text using OCR (optical character recognition) from images, making it easy to repurpose content without retyping. This is handy for capturing and editing text from screenshots.

Quick Style Presets

You can create and save custom styles for annotations, ensuring consistency across your documents. This helps maintain a professional look and feel by retaining your organization’s brand styles and formatting.

Easy Sharing

Snagit integrates with various platforms, allowing you to quickly share your captures and recordings with colleagues or clients.

By leveraging these features, Snagit helps streamline the creation of visually rich and easily understandable written content, improving communication efficiency.

Benefit 3: Streamlined feedback

Have you ever needed to give feedback to a colleague on a work-related piece of content?

With Snagit, that feedback is so easy to give. Rather than write paragraphs of confusing instructions, “In paragraph three, the word ‘give’ should be ‘gives’, but then you will need to change the margins to fit into the space provided…”

Wouldn’t it be so much easier to send a screenshot of exactly what your colleague needs to change and where that word is located in the document?

Not only is this a faster way to provide feedback, but it also reduces miscommunications in your message.

Another research study by TechSmith examined the tickets of technical support agents.

On average, the customers who submitted their tickets without visuals and the agents who responded to the ticket without visuals doubled the amount of emails sent back and forth.

This shows that when an agent used images or videos in response to their customer tickets, it would cut their email touches in half.

When feedback to your colleagues is clear and specific, they can understand, iterate, and respond. This ensures that the whole process goes quicker and has less back-and-forth than written communication.

Communicating with your team members in the workplace leads to productivity, trust, and efficiency.

With clear communication, the team can work together without misunderstandings.

Using Snagit, you can provide clear, actionable feedback and highlight exactly what needs to be changed or improved, and avoid extra back-and-forth.

screenshot of a workplace app messaging service with a few annotations to describe changes that need to be made

Ready to improve your communication with Snagit?

It’s time to try Snagit.

You can improve your communication across all the different communication types: verbal, non-verbal, written, and visual.

You can create amazing visual elements that will enhance your documents and showcase technical details with clarity.

Visual Clarity

Snagit allows you to capture screenshots and record videos, making it easier to explain complex ideas visually. This can be particularly useful for creating tutorials, documenting processes, or providing feedback.

Efficiency

By using visuals instead of lengthy text explanations, you can save time and make your communication more efficient. Visuals are often quicker to create and easier to understand.

Engagement

Visual content tends to be more engaging than plain text. Snagit enables you to create eye-catching images, gifs, and videos that can capture and retain your audience’s attention.

Precision

Snagit offers features like crosshairs for precise screenshot capture and the ability to set exact dimensions for your images. This ensures that your visuals are clear and accurately convey the intended message.

Collaboration

Snagit makes it easy to share your visuals with others, facilitating better collaboration. You can quickly share screenshots or videos with team members to provide clear instructions or feedback.

Customization

With Snagit, you can annotate your screenshots and videos with text, arrows, shapes, and other annotation elements to highlight pertinent information. This customization helps tailor your visuals to your specific communication needs and your audience.

More time back in your day

We often think about how our improved communication helps others. We make a quick tutorial video to help a colleague with a software application to make their life a little easier.

Helping out is great, but when we do this, we’re also helping ourselves be more efficient. We might open up time on our calendar by avoiding a live call or desk visit to resolve the issue.

Maybe someone else has the same question next week? We already have a video made that we can share.

Annotate and edit screenshots with Snagit

Professional mark-up tools and powerful features make it easy to create helpful images.

Try it Free
Screenshot of a document about puffin migration patterns with a section for changing styles highlighted.

TechSmith

TechSmith is the market leader in screen capture software and productivity solutions for daily in-person, remote, or hybrid workplace communication and customer-facing image and video content. Our award-winning flagship products, Snagit, Camtasia, and Audiate, empower anyone to create remarkable videos and images that share knowledge for better training, tutorials, and everyday communication.

How to Trim a Video in Just a Few Simple Steps

How to trim a video

Whether you’re brand new to video editing or an experienced editor, trimming video is a critical part of the video editing process and a key skill for anyone creating content. Why trim your video? Trimming removes unnecessary elements and adds polish and professionalism to your video. It also helps drive engagement by keeping your content concise. This is especially important if you’re trimming and cutting your video to optimize for specific social media platforms.  

Step-by-step guide: How to trim a video using Camtasia

Camtasia is a powerful video editor with easy-to-use trimming features, making it a great place to start when you’re looking to cut videos. If you don’t already have Camtasia, download a free trial of Camtasia here.

Step 1: Import your video clip and drag to timeline

  • Open Camtasia and start a new project.
  • Click the Media tab.
  • Click Import Media.
Image of the media bin in Camtasia.
  • Click to select the media to import.  Control+click (Windows) or Command+click (Mac) to select multiple files.
  • Click Open (Windows) or Import (Mac).
  • The imported media appears in the Media Bin.
  • Adding media to your video is just a simple drag and drop from the media bin to the desired location on the timeline or canvas.
Image of the Camtasia editor instructing to click and drag a video onto the editing track.

Step 2: Trim the beginning or end of the video

  • To trim the beginning or trim the end of a video, click to select a clip on the timeline.
  • Hover the cursor over the beginning or end of the clip
  • Drag the edge of the clip in to trim. Trimming can help you quickly shorten or remove an unwanted part of a video.
Image of trimming the beginning or end of a video in Camtasia.

Step 3: Trim sections from the middle (cut and split)

What if what you need to remove isn’t at the edge of the clip? Camtasia has two options – you can cut the video or you can split the video. A cut removes a selection from the timeline and adds it to the clipboard. You can cut a single clip or cut across multiple clips. A split allows you to divide a clip into separate clips and make space for transitions, title slides, or graphics between clips.

To cut sections of a clip on the timeline:

  • Click the lock Lock icon used to lock or unlock tracks on the timeline button to lock tracks on the timeline that contain media you do not want to cut.
  • Click and drag the green or red handles on the playhead to make a selection. For a more precise video edit, drag the Zoom slider to zoom in on the timeline content.
Image of trimming the middle of a video in Camtasia.
  • Click the cut Cut icon button (scissors icon). The selection is removed, and the remaining media is stitched together.
  • To paste the selection on the timeline, move the playhead to a new location and click the paste Paste icon button.

To split a video clip:

  • Drag the playhead to the location to split.
  • Click the split Split icon button or press S on the keyboard.
Image showing the split clip button in Camtasia.

All unlocked media on the timeline splits into separate clips.

To split selected media, click to select media before splitting. Hold Shift+click to select multiple media.

For a more in-depth overview of trimming and cutting, along with other key edits, please check out our Camtasia “Explore the Timeline” video.

The easiest way to edit videos

Stop wasting time and discover how Camtasia makes creating incredible videos easier than ever.

Free Download
An image of a laptop showing the camtasia drag-and-drop editing feature

Alternative: How to trim a video using Snagit

Using Snagit for quick trims

While Camtasia is great for in-depth editing, sometimes you just need to quickly trim a portion of the video.  Snagit is a great alternative, especially when you’re cutting screen recordings or demo videos. Snagit has an easy-to-use interface that allows you to quickly trim unwanted parts of your video before sharing. If you don’t already have Snagit, download a free trial of Snagit here.  Here is how you can trim your video in just a few steps with Snagit:

  1. Record or open a video in Snagit.
  2. Drag the Start selection handle on the timeline to the location to start the cut.
Selecting the beginning of a trim in Snagit.
  1. Drag the End selection handle on the timeline to the location to end the cut.
Selecting the end of a trim in Snagit.
  1. To review the segment to be cut out, drag the playhead across the timeline.
Dragging the playhead across the part of the video selected to be cut out.
  1. Click the Cut Out button.
Image depicting trimming in Snagit that says cut out.
  1. A yellow line on the timeline indicates where the segment was cut out.
An image of a clipped video in Snagit.

Conclusion 

Learning to trim your video is a great way to begin your video editing journey. Snagit makes basic cuts and trims quick and easy. While Camtasia allows you to start with simple cuts and splits, it offers much more than just trimming. With Camtasia, you can add additional editing features like annotations, music, animations, and on-screen text. Both Camtasia and Snagit are excellent tools to help make your videos more professional and concise. Ready to get started?

Record your screen with Snagit

Snagit makes it easy to share quick updates and how-to’s by capturing exactly what’s happening on your screen.

Get Snagit
Screen recording of a dashboard showing conversion rate, spend, and monthly performance with a picture-in-picture webcam view of a smiling man.

Frequently asked questions

What video formats can I trim in Camtasia?

Camtasia supports a variety of video file formats, including MP4, MOV, and AVI, making it versatile for different projects.  Learn more about all supported media formats in Camtasia.

Can I undo a trim in Camtasia or Snagit?

Both Camtasia and Snagit allow users to undo trims or revert to the original version if needed, making editing non-destructive.

Matt Pierce

Matt Pierce is a Learning & Video Ambassador at TechSmith. In this role speaks and teaches about video creation and visual communication. A graduate of Indiana University he has ten years of experience working in learning and development with a focus on visual instruction. He has directly managed the training, user assistance, video, and other teams for TechSmith. Teach him something @piercemr

How To Rotate a Video

How to rotate a video

Have you ever filmed a video on your smartphone, an action camera, or a DSLR camera, only to realize it was recorded crookedly when you edited it? Are you trying to edit a piece of content that’s slightly skewed? Worry not! 

Camtasia has the perfect solution for you with numerous tools, including an anchor point for rotation, the ability to fine-tune rotation via the X, Y, and Z rotation editor, and for animated effects, the tilt and custom animations!

Image of the Camtasia editor with a tilted image of a house on the canvas.

Easily tilt or rotate your video, then move directly into editing your content with Camtasia’s full-screen recording and video editing suite. 

This guide is intended to walk you through tilting your video with Camtasia, so feel free to start up Camtasia or download our free trial today and follow along! 

If you don’t have any content on hand to follow along with, then feel free to browse Camtasia’s assets as there are hundreds of thousands of pieces of content available!

The easiest way to edit videos

Stop wasting time and discover how Camtasia makes creating incredible videos easier than ever.

Free Download
An image of a laptop showing the camtasia drag-and-drop editing feature

Why do we want to tilt our video?

The most common use case will be to fix slightly skewed or off-center recordings. 

Tilting can be quickly achieved by using Camtasia’s rotation anchor. 

Once you have your media on the timeline, there will be an anchor point on screen that will allow you to rotate your media, whether video, image, or annotation. 

Another reason for tilting or skewing your media is to make room for additional media in the project. Perhaps you want to add a piece of media but don’t know where to fit it on screen.

Simple! Select one or multiple pieces of media on the timeline, and you can rotate them all by clicking and dragging one of the central anchor points. This will allow you to tilt them to the desired angle directly in the preview window.

Gif of an image of a house rotating within the Camtasia editor.

Taking the time to skew or rotate your media can also add a dramatic flair to otherwise static media.

Take, for example, a recorded PowerPoint presentation. Rather than seeing a simple, flat presentation, you can alter the perspective by adding a Tilt animation as found in the Animations tab. This will help make the content more interesting and, in turn, more engaging.

In that same respect, and in addition to making content more interesting to look at, it also allows you to fine-tune the position of media in your project. 

Using the rotate tool in the properties manager, you can enter the precise angle at which you want your content to be, not only on the X and Y axes but also within the Z axis. 

The granular control over positioning, rotation, and skew enables you to create precise angles while opening up space on the canvas for more content.

How do I tilt my video?

To tilt your video in Camtasia, first open your project and add your media to the timeline.

Next, look at the center of the clip in the media bin, and you’ll notice two small anchors (circles) in the center of the clip; the anchor that changes your mouse cursor to a circular image on the right is the anchor we’ll be focusing on.

Image of a house with two small anchors in the center of it.

Once you have your click on the timeline and you see that anchor, left-click-and-drag the smaller of the two anchors and your media will rotate! 

As soon as you get to the angle you’re looking for, release the mouse button, and you’re set to add callouts, drop shadows, animations, or other effects to the clip on the timeline. You can even adjust the skew to add a new focal point using the rotation properties panel in the right-hand side of the editor. 

This method is excellent for fine-tuning your tilting and is especially useful when trying to match multiple clips on the timeline.

Image of the rotation editor in Camtasia.

Camtasia also makes life simple for users in the form of the Tilt Left and Tilt Right animations, both found in the Animations tab of the editor. These animations are shortcuts designed to help smoothly animate your content to a left or right tilt, depending on your particular needs.

By simplifying the animation process, Camtasia cuts out significant time manually adding custom animations, setting properties, and then applying those across multiple clips.

You can even apply the tilt animations to multiple clips at once by first selecting all of the media on the timeline that you want to apply the tilt to, then right-clicking on the Tilt animation and choosing, “Add to selected media.”

Why use Camtasia to tilt my video?

Camtasia offers many different options that empower you to do much more than just tilt your video. From the aforementioned Tilt Left and Tilt Right animations to the more hands-on rotation properties panel found in the left-hand pane of the editor, Camtasia has it all.

Need to capture additional content for your project? 

Camtasia’s screen recorder is a world-class recorder, and as long as you have your project open, Camtasia can record and import directly to it! From there, you can apply your tilt properties to the new recording so it fits in seamlessly with the original content. 

Image of Camtasia's capture window.

Want to add an element of interactivity to your video as you intend on sharing your media to Screencast? 

Camtasia can do that! With its unique hotspot functionality, you can add live links and calls-to-action directly within your finalized video to help drive traffic or raise awareness of your site/content.

I’m done editing, now what?

Now that you’ve tilted your video and utilized the full suite of video editing tools available in Camtasia—adding interactive hotspots, visual effects, intros, outros, and other pertinent edits to the project—what’s next?

With your project complete, all that’s left is to export it. Camtasia’s new exporter offers numerous options, including uploading directly to Screencast or YouTube, or producing a local MP4 file. Camtasia has you covered.

Image of Camtasia's export options.

Is your project incredibly short and a video isn’t necessary? No worries—Camtasia also allows you to export high-quality GIFs!

The easiest way to edit videos

Stop wasting time and discover how Camtasia makes creating incredible videos easier than ever.

Free Download
An image of a laptop showing the camtasia drag-and-drop editing feature

The Complete Guide to Lower Thirds in Videos

Graphic design of a stylized male figure in a monochromatic green shade, representing a guide to lower thirds in videos. The figure appears to be standing behind a white graphic element resembling a lower third display area used for text in video production.
Lower thirds are visuals that contain text and graphics placed near the bottom of the screen to convey information.

You likely know them from professional broadcasts or interviews where you see a graphic with someone’s name, job title, and other relevant information. While rooted in professional video, they are now a standard part of the video editing toolbox.
Image of a video with editable lower third subtitle and title.

Why use lower thirds?

Lower thirds are important because they make it easy to communicate key details without interrupting the video content. Beyond helping convey valuable information, lower third logos and text, along with graphics, also help add a layer of professionalism to your videos. These aren’t just for names and titles. They are also great for a wide range of content, like quotes, locations, statistics, dates/times, and social media handles.

Step-by-step guide to creating lower thirds

Step 1: Choosing the right video editing software

Camtasia is an easy-to-use, non-linear video editor with drag-and-drop features for creating professional-looking lower thirds. You can build them from scratch or choose from a variety of pre-made templates, making it simple to get started.

Image of theme manager open in Camtasia.

You can even create a theme to apply your brand colors (as well as other text, titles, graphics, animations, and more). In addition to titles and lower thirds, Camtasia offers a full suite of video editing tools to give you professional video quality, even if you’re just beginning your video creation journey.

Download a free trial of Camtasia to get started.

Step 2: Designing your lower thirds

There are a few key things to keep in mind when designing lower thirds:

  • Take into account the size and position. Make sure it is within the “title safe area,” ensuring it is visible across all devices. This means leaving some space around the edges to account for differences in how different devices may display your content. A good rule of thumb is to keep any lower third content out of the exterior 10% of the display area.
  • Keep your designs simple and clean. They should be easily readable and on-brand/consistent with other graphics. Beyond the core text/information, focus on only including basic shapes and logos that don’t distract from the primary content of the video.
  • Use appropriate colors and contrast: Ensure the colors of your lower thirds complement your video’s overall design while maintaining readability. Choose high-contrast color combinations to make text and elements stand out, especially on varied backgrounds. This helps prevent them from blending in or becoming difficult to read, keeping them visually effective.

Step 3: Animating your lower thirds

Adding simple animations can help increase engagement with your viewers. But it’s important to keep these animations simple to avoid distracting your viewers. Focus on simple fade or slide animations and avoid anything that spins, bounces, or takes a long time to animate.

Image of optional behaviors for lower-thirds in Camtasia.

Camtasia’s built-in animation tools for lower thirds are a great way to introduce smooth transitions. You may find it helpful to start with a template and work towards incorporating your own graphical elements.

The easiest way to edit videos

Stop wasting time and discover how Camtasia makes creating incredible videos easier than ever.

Free Download
An image of a laptop showing the camtasia drag-and-drop editing feature

Best practices for using lower thirds

Keep it simple and clean

You don’t want too much of a good thing. Be careful not to overload the lower third with too much text or graphics. Ensure readability by using clear fonts and maintaining a balance between text and graphical elements.

Image of lower-thirds with background color vs no background color.

Mind the title safe area

Ensure these remain within the “title safe” part of the screen, guaranteeing visibility across all devices. Camtasia’s built-in guides can assist with proper alignment and placement, ensuring they look professional and stay legible on any screen.

Where to use lower thirds

YouTube and social media

Lower thirds are especially effective on YouTube videos to highlight additional information like social media handles, CTAs, or key takeaways. Camtasia makes it easy to export videos in the right format for social media, ensuring they look great across platforms.

Screenshot of YouTube video with lower third introducing the speaker.

Corporate and educational videos

In corporate or educational settings, lower thirds can be used to introduce speakers or provide context to the video. Titles and lower thirds can transform a basic recording of a Zoom meeting into a more professional video by creating easy cut points to repurpose individual parts of the meeting. Camtasia’s template library is perfect for creating polished lower thirds in these contexts.

Conclusion

Lower thirds enhance videos by making them more professional and engaging. If you’re looking to take your video productions to the next level, check out Camtasia’s free trial to easily create these with built-in templates and animations.

The easiest way to edit videos

Stop wasting time and discover how Camtasia makes creating incredible videos easier than ever.

Free Download
An image of a laptop showing the camtasia drag-and-drop editing feature

Andy Owen

Andy Owen is the Video Production Specialist at TechSmith.
Most Proud of: being a husband to Chandra, father to Elle & Kai Favorites: The Muppets, Hanna-Barbera, Friends & Firefly Dislikes: Writing in the third person...

A Comprehensive Review of Snagit and Camtasia Alternatives

Snagit and Camtasia icons with arrows encircling them

The number of screen recorder alternatives is increasing. This thorough review of screen recorders covers forty screen recording software tools.  

Screen capture tools are an essential method of content creation. Choosing the suitable alternative depends on your use case.  Paid alternatives provide richer functionality and support. However, a free recorder may serve your needs. 

Snagit is the leading quick-share screen capture tool. Camtasia is the leading multi-track recorder and video editor. This article lists alternatives for the screen recording portion of these products.

Refer to the Ultimate Screen Recorder Guide for information on use case considerations and product feature sets.

Table 1: Best quick-share screen capture for knowledge sharing and Snagit alternatives

Screenshot of Snagit's video recording settings

Snagit is the top-ranked screen recorder.  Quick-share recorders focus on efficient, casual visual communication for knowledge-sharing. Snagit, like others in this category, offers simple editing features. 

A fully-functioning trial of Snagit is available, so you can try it, risk-free, and get acquainted with all of the available functionality. The trial is fully functioning and lasts initially for 15 days. Additionally, there is a robust series of tutorials available for Snagit which is helpful to review when new to the software.

These types of products–quick-share recorders–consistently provide:

  • One click to start recording
  • User-friendly interface
  • Full screen and region capture
  • Screen recording tool with capture of audio and video (webcam)
  • Automatic conversion to a shareable video format
  • Automatic link generation to share your video via email

Common strengths across this category include HD capture, scrolling screenshots, and integration with other platforms.  Unique features include custom branding (Snagit), prospecting (Vidyard), and educational integrations (Screencastify).  

These tools lack advanced video editing. Instead, these products focus on sharing a video instantly. Other common limitations include comprehensive system audio capture or platform-based limitations (e.g., only desktop or Chrome extension).

G2’s rankings for Best Screen and Video Capture Software guide this list.  In addition, consider built-in screen recorders tied to a specific software app.  Examples include Screenjar (Capture for Jira), Screen Recordings (by Screendesk), and Birdie.

ProductPlatformUnique StrengthsWeaknesses
SnagitDesktop Windows and Mac$39/yr ($139/yr if optionally using TechSmith cloud to share)

HD capture

Live draw and annotation

Mouse animations

Configure for local storage, provided cloud, or designated secure location

Scrolling and panoramic screenshots

Advanced image editing

Replace, edit, and markup shared documents without changing the link

Create video from images

Extensive file format support

Custom branding elements

Integration with Slack, Teams, Screencast 

Stock library

GIF creation

Auto-generate step by step documentation from screen recording (v25)

Additional AI features (optional)
Desktop Only

Lacks advanced video editing, but integrated with Camtasia
Atlassian LoomDesktop, Chrome extension, mobileHD capture

Live draw

Mouse animations

Video splitting

Delightful effects like confetti spray

Fastest at returning a link

The most significant number of integrations, including Slack and Trello via an SDK

Additional AI features
$150/yr

Lacks advanced image editing

Lacks advanced video editing

All content shared through Loom’s cloud
VidyardDesktop, Chrome extensionHD content

Specializes in video messaging for sales prospecting
$228/yr

Lacks system audio and cursor capture

Lacks image capture and image editing

Lacks video editing beyond trimming
Vimeo RecordChrome extensionFreeLacks system audio and cursor capture

Lacks image capture and image editing

Lacks video editing beyond trimming

All content shared through Vimeo cloud
Veed.ioOnlineFree tier

Advanced video editing features, including assets library, overlays, and subtitles
Lacks cursor capture

Cannot suppress system audio capture

Lacks image capture or image editing

Online recorders have lower-resolution quality

Online only

All content shared through Veed cloud
Wistia Recorder (Soapbox)Chrome extensionAdvanced tracking with Wistia OVP license 

Video trimming, zooming, transitions
Lacks system audio or mouse cursor capture

Lacks image capture and image editing

Lacks advanced video editing

All content Shared through the Wistia cloud

Limitations of Chrome extension
ScreenPal (Screencast-O-Matic)Desktop, Chrome extensionScrolling Capture

Integration with learning management systems

Interactivity features

Advanced video editing, including transitions, text overlays

Image capture and some editing
Lacks some advanced video editing features (multi-track editing, animations, effects)

Lacks audio editing/ background noise removal
DropBox CaptureDesktopIntegration with DropBox OVP 

Can replace/revoke a file without changing the link

Specialty in sensitive documents with DocSend integration
Desktop only
Zight (CloudApp)Desktop, Chrome extensionIt also supports image annotation

Integration with Slack, Confluence, and Teams
Lacks advanced video editing beyond annotations
TechSmith CaptureWindows and MacFree screen recording with no recording time limit  and no watermark

Integrated with Screencast OVP

Save locally

It also supports screenshots and screenshot annotation
Cannot suppress cursor capture

Lacks video editing capabilities
ScreencastifyChrome extensionK12 focus

Interactive questions

Collect video submissions

Integration with Google Classroom
Lacks image capture and image editing

Limitations of Chrome extension
DroplrDesktop, Chrome ExtensionIt also provides image editingLacks advanced video editing
Nimbus CaptureChrome, Firefox, and Opera extension, DesktopIt also includes image editing

Multiple browsers supported
Features vary by platform

Limitations on  audio and mouse capture

Lacks advanced video editing beyond trimming and annotations
JumpshareDesktopExtensive file format support

Custom branding
Desktop only

System audio capture is limited based on the platform

Lacks advanced video editing beyond annotations
ScreenRecDesktopFree screen recording with unlimited recording and no watermarkDesktop only

Lacks optional mouse capture

Lacks video editing capabilities
BerrycastDesktop, Browser ExtensionEditing functionality in the browser extensionLacks or limited system audio and mouse cursor capture

Lacks image capture and image editing

Lacks advanced video editing
Cleanshot XMac onlyScrolling screenshots

Some Image editing tools

The choice to configure for local storage or their provided cloud
Lacks video editing beyond trimming and annotations

System audio capture requires configuration
MonosnapWindows and MacScrolling screenshots
Image capture and some editing tools
Lacks advanced video editing beyond annotations

Record your screen with Camtasia

Camtasia is the best way to share information via video without out the hassle of learning how to edit.

Try Camtasia for Free!
Camtasia icon

Table 2: Best multi-track screen recorder/video editors and Camtasia alternatives

Multi-track recorders focus on precision video editing of screen-recorded content.

These products minimally provide:

  • Capture of screen, webcam, microphone, and system audio in separate tracks
  • Flexible design and repurposing
  • An integrated non-linear video editor

G2 rankings for Top Video Editor Software guide this list. Camtasia is the leader in this category.

Screenshot of Camtasia recording options
Screenshot of Camtasia video editor

Products in this category consistently offer advanced video editing features, including animations and transitions. A few, such as Camtasia and ActivePresenter, provide interactive elements.

Common weaknesses are often platform-specific, such as ScreenFlow, which is only available for Mac.  A subscription and perpetual pricing model is available for only a few products.

ProductCapture CapabilitiesEditing CapabilitiesPricing
CamtasiaSpecialized cursor and keystroke capture capabilities to create tutorials and high-quality video filesAdvanced editing suite, animations, interactive elements, unlimited transcription$179.88/yr subscription or $299.99 one-time fee
DescriptSpecialized audio capabilities for podcastersText-based video editing, transcription, AI-powered tools$288/yr for features specified (or $144/yr hobbyist)
ScreenFlowMac only, multiple audio and screen sourcesAdvanced video editing, animations, transitions$149 one-time fee
Wondershare FilmoraMulti-track capabilities recently introducedAdvanced video editing, animations, transitions$155.88/yr
ActivePresenterScreen, webcam, software simulations – eLearning authoring categoryPowerful editing, interactive elements, simulations$199 one-time fee

Table 3: Alternatives for gameplay recorders

Recorders for gaming focus on high-quality recording with minimal system impact.  

They minimally provide:

  • 4K 60 FPS recording
  • Limited performance impact
Screenshot of OBS Studio

This list includes combined screen recorders/video editors like Camtasia with medium system impact. These specialize in editing high-resolution screen content.  Use these to edit OBS recordings in order maintain the quality.

  • They also offer the convenience of a recorder plus integrated editing.  However, they may only be suitable for recording some kinds of gameplay.

A free trial of Camtasia is available, so you can test it out, and get started right away. The trial is fully-functioning, though any videos produced during the trial will have a watermark. There is a library of tutorials available which is useful content to get acquainted with the software.

RecorderCapabilitiesPerformance ImpactIntegrated Video Editing
OBS StudioHigh-quality recording, live streaming, hardware acceleration, configurable pluginsMinimal with proper setupNo
NVIDIA ShadowPlayGPU-accelerated, up to 4K resolution, instant replayMinimal for NVIDIA usersNo
AMD ReLiveGPU-accelerated, up to 4K resolutionMinimal for AMD usersNo
BandicamHigh compression, low resource usage, hardware accelerationLow impactOffers basic editing tools
Action! by MirillisHigh-quality recording, real-time frame rates, live commentaryLow impactOffers basic editing tools
Camtasia4K 60FPS, GPU acceleration configuration optionsMedium impactTop Rated Video Editor
DemoCreator4K 60FPS, GPU acceleration configuration optionsMedium impactOffers some video editing, including annotations
Movavi Screen Recorder4K 60FPS, GPU acceleration configuration optionsMedium impactNo, but Movavi provides a video editor separately

Table 4: Best free screen recorders without time limits and watermarks

Operating systems, online video editors, and online video hosting platforms often include built-in features to record your screen.

These products minimally provide:

  • Free-for-life access
  • Screen, webcam, and microphone capture
  • No watermarks appear on the free tier
  • Unlimited recording time on the free tier

This list excludes these products due to limitations on free use.

ProductRecording Time LimitsWatermarkTrial or Tier
Snagit, mmhmm, DrplrNoNoShort trial
ScreenPal (Screencast-O-Matic), Movavi, Free Cam, BandicamNoYesShort trial
CamtasiaNoYesInfinite trial
ScreenpressoNoYesFree tier
Vmaker, Jumpshare, CALIPIO, ClipChamp, Loom, Zight (CloudApp)YesNoFree tier
ScreencastifyYesYes – on exportFree tier
IcecreamYesYesFree tier

Common strengths in this category include cross-platform support, often via browser plugins.  Less common strengths include online storage with instant sharing links and editing.  OBS is unique as open-source, with many configuration options.

Several tools cannot hide mouse capture or have limited system audio capabilities.  Items with online storage only may have a cost if usage grows.

Screen RecorderPlatformOnline StorageLimitations
OBS StudioWindows, Mac, LinuxNoNo formal support and training
ApowersoftOnline + Browser PluginCan upload to YouTube, Vimeo, Google Drive, and Dropbox
TechSmith CaptureWindows, MacYes, but local use is supportedCannot suppress mouse capture
ScreenRecWindows, Mac, LinuxYes, onlyCannot suppress mouse capture
ShareXWindowsCan upload to YouTubeCannot suppress mouse capture
Canva Screen RecorderOnlineYes, onlyLimited system audio capture

Limited mouse capture
Windows Xbox Game BarWindows 10 and 11NoLimited system audio capture
Snipping Tool (Windows)Windows 11NoLimited system audio capture

Cannot capture mouse cursor
macOS Screenshot ToolbarMac (Mojave and later)NoLimited system audio capture
Fenêtre Capture ToolWindows 10 and 11No, but it has integration with Teams and Outlook
MonosnapMac and WindowsYes, onlyThe free tier is for non-commercial use only
Camtasia WebOnlineYesUnranked TBD, currently in beta

Record your screen with Snagit

Snagit makes it easy to share quick updates and how-to’s by capturing exactly what’s happening on your screen.

Get Started for Free
Snagit icon

Deciding on Snagit, Camtasia, or an alternative screen recorder

Step 1: Identify your general use case from this document.

Step 2: Identify platform preferences and budget constraints.

  • Some prefer online recorders, while others are concerned about security and privacy.  
  • The most powerful recorder and editors are on-device.
  • Start with a free screen recorder if budget is a limitation.

Step 3: Research the type of use case and target customer associated with the product. Picking a product based on its leadership in a niche is the safest approach since feature comparisons change.

Step 4: Consider the vendor in your selection.

  • Do they provide comprehensive training and phone support?  
  • What is the vendor’s capability and reputation for customer service? 
  • Do you trust the vendor with privacy and security?  
  • Are they a stable company with stable pricing or a struggling start-up?

More about TechSmith

TechSmith has been the market leader in screen capture for thirty years.  Our niche is instructional content creation, such as documentation, training, software demos, and educational presentations. 

We take pride in customer satisfaction. TechSmith has the highest customer NPS and CSAT scores in the industry. Our large, diverse customer community includes:

  • All Fortune 500 companies
  • The top 100 higher education organizations in the US
  • Every country globally
  • At least 200 established social media influencers
    • Our products have produced tens of millions of YouTube videos.

We invest in our customers’ success.  Comprehensive free training includes weekly live webinars, certification training, and podcasts with industry experts. We provide 24/5 live chat support. And we are about the last software vendor that still provides phone support to all customers. 

We are a family- and 30% employee-owned company, entirely bootstrapped, headquartered in Michigan with an office in Berlin. All our level two+ support agents and product software developers are employee-owners.

Consider a free trial of Snagit, Camtasia, or free TechSmith Capture.

TechSmith

TechSmith is the market leader in screen capture software and productivity solutions for daily in-person, remote, or hybrid workplace communication and customer-facing image and video content. Our award-winning flagship products, Snagit, Camtasia, and Audiate, empower anyone to create remarkable videos and images that share knowledge for better training, tutorials, and everyday communication.

The Best Multi-Track Screen Recorders

Multitrack Screen Recording

Multi-track screen recording options are essential tools for content creators and professionals. They offer the ability to capture and edit multiple audio and video sources independently on separate tracks. 

This feature allows creators to edit their videos with precision that isn’t possible with a non-multi-track recorder. These types of recorders are perfect for creating professional-grade tutorials, and presentations, and fine-tuning edits to add flair to videos. 

A popular option is Camtasia by TechSmith. Camtasia’s multi-track recorder is perfect for beginners and professionals alike and is compatible with Windows and Mac, making it the perfect choice for anyone.

Crystal-clear screen recording

Why settle for blurry screen content? Camtasia’s screen recorder captures everything at up to 4K!

Free Download
A image showing the user interface for the recorder in camtasia

Why use a multi-track screen recorder?

Multi-track screen recorders offer significant advantages for content creators and professionals in various industries. These tools provide great flexibility and control over recorded content, allowing users to capture multiple audio and video sources at the same time on separate tracks.

You can edit the audio, screen, camera, cursor, and other small details individually. For example, let’s say you’ve just recorded a perfect walk-through tutorial of a process for your team, but your cursor is too small and not noticeable enough for viewers to follow along easily. With Camtasia, you can edit the cursor only and make it larger, add a highlight, or click animations for improved visibility. 

This example is only one of countless reasons why multi-track recorders make a huge difference in content creation.

Benefits of multi-track recording

One key benefit is the ability to adjust audio levels independently for different sources, such as system audio, microphone input, and background music. This feature is particularly useful for creating professional-quality tutorials, presentations, and demonstrations. 

These types of content require users to juggle different audio inputs at once, so being able to adjust noise up or down, or even mute it altogether, is super important. 

Additionally, multi-track recorders seamlessly combine webcam footage with screen recordings, which creates engaging picture-in-picture presentations. 

Let’s say you recorded a great PowerPoint presentation, but your webcam recording of yourself is too small in the bottom-left corner. Instead of re-recording with different webcam settings, you can enlarge the video and move your camera recording anywhere in the video because Camtasia always records it on an independent track. 

Last but not least, independent tracks make it easy to apply effects, transitions, and animations to certain elements without affecting others. For example, you can use the video editor to add a nice filter to your webcam recording so you look better without affecting the color grade of your screen recording.

For industries like education, corporate training, and marketing, multi-track screen recorders provide the tools necessary to create polished, professional-grade content that effectively communicates complex information or showcases products and services. Multi-track screen recorders are a must-have tool in these industries.

The advanced editing techniques of multi-track recorders unlock a lot of creative possibilities for content creators post-production. Because these tools precisely sync audio, video, and other tracks together, they become versatile tools for almost everyone who creates videos for fun or as a part of their job.

Let’s go over a few popular options for you to check out.

Camtasia- the “perfect for everyone” option

Camtasia is a powerful screen recording and video editing tool that can capture your screen, webcam, cursor track, system audio, and microphone, at once. 

As we mentioned earlier, having a separate track for small details such as cursors and different audio inputs is a huge plus. Camtasia is a decked-out screen recorder that provides users with everything they need to get started or improve their content creation journey. 

Camtasia features an impressive editing suite, useful animations, and tons of interactive elements for users to experiment with. Plus, users have access to millions of assets in Camtasia’s Asset Library that will take videos up a notch in seconds. Users can add sound effects, b-roll, images, and much more without having to leave the editor.

This screen recorder is compatible with Windows and Mac.

The easiest way to edit videos

Stop wasting time and discover how Camtasia makes creating incredible videos easier than ever.

Free Download
An image of a laptop showing the camtasia drag-and-drop editing feature

ScreenFlow- the Mac option

ScreenFlow is a Mac-only screen recorder and video editor. It can record your screen, webcam, iOS device, and audio source at once.

It features basic video editing capabilities, animations, and transitions. This option is a fine choice for beginners, but its Mac-only status makes it a restricted choice.

OBS Studio- the Windows option

OBS Studio is a Windows-only open-source broadcasting software with recording options. It can record your screen, webcam, and multiple audio sources. 

This software is different than Camtasia and ScreenFlow because it does not feature any built-in editing options and is used for streaming. Although lacking in features, it is a free option, which is a fine choice for beginners who need to create basic screen recordings. 

Choosing the right recorder

When choosing a multi-track screen recorder, consider your specific needs, budget, and technical requirements. Here’s a concise summary of key factors to consider:

  • Capture capabilities: assess your need for separate tracks, and how much you need to create the content you want. 
  • Editing features: Will you need editing tools to refine your footage or is raw footage good enough for you? Evaluate what you think you’ll use.
  • Ease of use: Are you a new video editor or an experienced one? Some options may have a greater learning curve than others so it’s important that you keep in mind how much time you want to invest in learning a new skill. Some video editors such as Camtasia are made to fit beginners and professionals so a steep learning curve is out of the question!
  • Price: Compare the cost of the tool to your budget and how much you intend to use it. High price points can be daunting so keep in mind that you can try out software with a free trial.
  • Platform compatibility: Ensure the software works with your machine. This one is easy to overlook at first so double-check first.

Digital multitrack recorders are everywhere, so make sure you do some research to see what fits your needs best.

For professional-grade editing, options like Camtasia are worth the investment given the extensive editing options and capture capabilities. 

Check out Camtasia’s features and what it can do for you here. Ready to take the next step? Try out Camtasia for free now, and see how it can transform your screen recordings.

Crystal-clear screen recording

Why settle for blurry screen content? Camtasia’s screen recorder captures everything at up to 4K!

Free Download
A image showing the user interface for the recorder in camtasia

TechSmith

TechSmith is the market leader in screen capture software and productivity solutions for daily in-person, remote, or hybrid workplace communication and customer-facing image and video content. Our award-winning flagship products, Snagit, Camtasia, and Audiate, empower anyone to create remarkable videos and images that share knowledge for better training, tutorials, and everyday communication.

Onboarding Procedures with Visuals & Videos

Shaking hands.

You now have an offer accepted! Don’t go patting yourself on the back just yet. We have to get through the employee onboarding process. 

Although you may not think that onboarding is an important piece of the hiring process, you’d be remiss if you didn’t have effective and engaging onboarding processes. 

According to Talent Insight Group, there is an 82% improvement in new hire retention when organizations use a robust onboarding process. 82% is HUGE. As HR professionals, don’t we all want an 82% increase in our new hire retention, especially within the first 90 days of their start dates? Here is how you go about creating a robust onboarding process.

Simplify HR workflows with visual tools

Create clear, engaging training and documentation that helps your teams better understand company policies and processes.

Learn More
A professional woman with straight black hair, wearing a white blouse, stands confidently with arms crossed against a yellow background. Next to her is a smaller inset image of a casual office meeting, featuring three people working collaboratively on laptops. A text overlay in the meeting image says,

Common onboarding challenges

The biggest challenge to overcome in your onboarding process is boredom. All companies are the same as far as the “requirements” of onboarding. Tax forms, handbooks, policy sign-offs, I9, and more (insert yawn). We can’t get away from the compliance items of onboarding processes; however, we can make them more bearable with video. 

By using video, you’re able to entertain and inform your new employees about the organization, leadership, policies, procedures, tools, skills, tasks, and so much more, all while keeping employee engagement high. You can’t change a government form, but you can change how the information is presented. 

An onboarding video being edited in Camtasia.

The way in which the information is presented can really help to outline what the work environment is like within your organization. This is even more important when you’re working with a fractured workforce (geographically, hybrid, full-remote, on-site). 

How can someone who’s never been to your office get a feel for the organization from their home office? You can either show them what the environment and culture are like, or they will go ahead and form their own assumptions. By having a robust onboarding program utilizing video, you’re able to set the tone for the new employee for their first day, week, month, and 90 days. 

There are also onboarding challenges that come with hybrid and remote work scenarios. In-person training and onboarding may be extremely difficult due to time and location constraints. The last thing you want to do is put off employee onboarding until they are able to be in the office. 

An employee working in a remote setting.

Onboarding programs that include visual and video components provide opportunities for remote employees to get onboarded immediately. In-person time can be reserved for topics and discussions that truly require a face-to-face connection.

How Snagit and Camtasia enhance onboarding processes

Step 1: Capture processes with screenshots

By using tools like Snagit and Camtasia, you can quickly grab a screenshot of whatever form, site, tool, software, etc. that you’re trying to highlight and provide clear verbal or visual cues to guide them along. This provides your new hires with a clear and concise understanding of what they’re learning. Here is more on capturing a process with Snagit.

Taking a screenshot of work with Snagit.

Step 2: Record onboarding tutorials with screen recording

These recordings can be very simple, or can be more robust, from a simple “here is where you’ll fill out your information and sign here” to “this is how we use our robust and in-depth in-house software.” By creating quick screenshots or longer tutorials, you’re able to not only inform and entertain; you’re providing them with a resource they can use for years to come. Here is more on creating a tutorial with Camtasia. 

Camtasia's pre-recording user interface with a screen, microphone, camera, and system audio enabled.

Step 3: Edit and annotate for clarity

Additionally, when creating tutorials, you are able to utilize the many tools available within Snagit and/or Camtasia to help bring attention to certain items. For example, when demonstrating how to use your payroll system, you can highlight your mouse movements and even zoom in on the specific clicks the new employee needs to navigate the system. Furthermore, you can use tools like closed captioning to allow for more accessibility to all of your new hires, regardless of their abilities. 

Adding cursor effects in Camtasia; Enabling click animations and cursor highlights in Snagit.

Ideas to enhance your onboarding experience using Snagit and Camtasia

General welcome videos

From leadership or other persons of importance within the company

  • Digital time-clock training
  • Requesting time-off training
  • Filling out tax forms: intro and overview
  • Benefit enrollment assistance
  • Company history overview video
  • Company values overview video
  • Enhance your employee handbook with visuals and video
  • So much more

Individualized welcome videos

From managers and team leaders

Individualized building maps

Highlighting items important to the role

Giving your new hire Snagit/Camtasia can assist them by:

  • Recording Zoom meetings with others when being trained
  • Allowing them to review previous training
  • Creating their own individualized workflows
  • Creating quick video guides to common tools and tasks
  • Create videos to share with your manager/trainer/lead showing them what you’re struggling with in new systems or any issues you run into

Sharing onboarding content with Screencast

Typically, onboarding is not a one-person show. When developing your robust onboarding processes, there will likely be several collaborators working alongside you. People from various areas of the organization, such as HR, IT, training, learning and organizational development, facilities, security, senior leadership, and so many more. This collaboration is pivotal in creating a well-rounded onboarding experience. 

Likewise, collaboration is imperative when creating videos. By using a tool like Screencast to share your onboarding videos, you’re also able to utilize its video review features. The video review feature will allow you to share your video(s) with your collaborators and allow them to asynchronously provide in-video, time-specific feedback. This not only allows for a smoother creation of tutorials as you can collaborate asynchronously but will also provide a better overall end product for your new hire, providing a better employee experience.

A screenshot on Screencast with comments and highlighted cursor effects.

When creating videos, tutorials, and screenshots, it is important they can be integrated into existing systems as well. With any of the content you make using Snagit or Camtasia, you can seamlessly integrate them into existing LMS (Learning Management Systems), slideshows, SharePoint sites, etc. Keeping your new hire in as few systems as possible while learning should be a cornerstone of your onboarding strategy.

Why Snagit and Camtasia are the perfect onboarding tools

Another challenge that comes when onboarding new employees is getting all parties involved while still allowing for colleagues to get their work done. The likelihood that every presenter and every subject matter expert will be available on the same schedule is low. 

By utilizing tools like Snagit and Camtasia to create walkthroughs, tutorials, and videos, you don’t have to align everyone’s schedule. Presenters are able to pre-record their material well in advance and still make a great impression. This truly will help your bottom line, as business can continue as usual and you don’t have to halt operations to onboard new employees. This is a “win-win” for all parties involved.

Make great training videos

Camtasia is the best way to make training and instructional videos that keep your viewers engaged.

Learn More
An image of a laptop playing a training video created in camtasia

Conclusion

Whether you have a formal “Onboarding Program” or an onboarding checklist, or even if you just have “a new hire’s first day,” either way, you’re either driving up your long-term employee retention rate or driving up your attrition rate. 

Creating an onboarding program is more effective for your audience (new hires), more time-effective for contributors, more resourceful for new employees, and is a more entertaining way of bringing someone into your organization and company culture. It can also help relieve some of the anxiety that new hires feel when joining a new work environment and allow them to focus on their job duties and where they fit with the different roles and responsibilities of the organization.

Using Snagit, Camtasia, and Screencast as my video tools helps me (a novice video creator) to create, collaborate, and deliver videos, walkthroughs, and tutorials for new employees, allowing me to create an amazing onboarding experience. I would highly recommend you give video a try and make your onboarding experience for employees memorable. 

If you don’t know where to begin with video (neither did I), I would highly suggest checking out Snagit, Camtasia, and Screencast for your video needs. Not only are the tools powerful yet user-friendly, but they also have fantastic certification programs, tutorials, and webinars to help you get comfortable with the software. 

Record your screen with Snagit

Snagit makes it easy to share quick updates and how-to’s by capturing exactly what’s happening on your screen.

Get Snagit
Screen recording of a dashboard showing conversion rate, spend, and monthly performance with a picture-in-picture webcam view of a smiling man.

TechSmith

TechSmith is the market leader in screen capture software and productivity solutions for daily in-person, remote, or hybrid workplace communication and customer-facing image and video content. Our award-winning flagship products, Snagit, Camtasia, and Audiate, empower anyone to create remarkable videos and images that share knowledge for better training, tutorials, and everyday communication.

How to Crop an Image: Create Perfectly Framed Photos

Icon of a landscape photo with a dashed border on a gradient blue background.

Cropping an image is a quick and easy way to enhance your photo’s composition, whether you’re editing images for social media or preparing a presentation.  With modern high-resolution cameras (including your phone camera) you can crop and zoom while maintaining high quality.

In this guide, we’ll show you how to easily crop pictures on your Mac or PC, adjust the aspect ratio, and use tools like Snagit to get the perfect final image.

How to crop an image using built-in tools

Cropping an image is the process of removing or adjusting the outside edges of an image to improve framing or composition, draw a viewer’s eye to the subject, or change the size or aspect ratio.

Images are often cropped to meet a required aspect ratio, trim out dead space, or to position the subject according to the rule of thirds. This is such an important aspect of any image, that there are many tools available to help users crop an image, including built-in tools!

Cropping a photo on Mac (Photos App)

Step 1: Open the image in the Photos app on your Mac by double-clicking it.

Step 2: Click Edit in the upper right corner.

Step 3: Select the crop tool from the options.

Step 4: Adjust the aspect ratio or free crop by dragging the edges to include only the part of the image you want.

Step 5: Once satisfied, click crop to finalize the changes and save your cropped photo.

Cropping a photo on Windows

Step 1: Right-click the image and select “Open with” > Photos app.

Step 2: Click “Edit” in the upper left corner.

Screenshot of the Edit button in the Photos app

Step 3: Click the crop tool from the toolbar at the top.

Photos app screenshot with labels for the crop tool, preset aspect ratios, and how to drag the corner of a photo

Step 4: Drag the corners to adjust the crop. You can also select a preset aspect ratio for easier cropping.

Step 5: After cropping, click “Save a copy” to keep your original and final image.

How to crop an image using Snagit

Snagit is a powerful image editing tool that goes beyond basic cropping, making it easier to capture, edit, and share professional-looking screenshots and photos. It allows more flexibility in adjusting aspect ratios and provides additional photo editing features.  Snagit also has an amazing set of annotation tools that helps you draw attention to key elements of your image – this is especially useful for documentation and presentations.

Screenshot of the crop tool in Snagit

Steps to crop an image in Snagit

Step 1: Open the image in Snagit. (Download a free trial of Snagit here if you don’t have it already)

Step 2: Click on the crop tool from the toolbar.

Step 3: Drag the edges of the cropping box to include only the part of the image you want to keep.

Tip:  Snagit’s Crop tool has guide lines to help you optimize the alignment of your subject.  Why is this important? Learn more about the rule of thirds here.

Step 4: Press the command key (Mac) or Ctrl key (Windows) to fine-tune your crop, then click Crop to apply.

Step 5: Optional: Use Snagit’s resize tool and aspect ratio options to maintain specific dimensions.

Step 6: Save your cropped photo or export it for sharing.

Tips for cropping photos effectively

Choose the right aspect ratio: Depending on the platform or use case (Instagram, presentations, etc.), select a preset aspect ratio to ensure your final image fits perfectly. Learn more about aspect ratios here.
Comparison of the same photo cropped to 9:16, 1:1 and 16:9 aspect ratios

Focus on the Subject: When cropping a photo, ensure that the most important part of the image is centered or highlighted.

Remove distractions: Crop out any elements at the edges of your image that are not necessary.  Not only does this look clean, but it also helps keep your viewer’s attention where you want it.

Be Creative: There are plenty of rules and guidelines, don’t let them restrict your creative freedom.  Understand the rules, but trust your instincts.

Keep Original Copies: Always save a copy of your original image in case you need to make further edits later.

Cropping is easy

Cropping an image is simple, whether you’re using built-in tools like the Mac / Windows Photos apps or advanced tools like Snagit. With a few clicks, you can transform your images into perfectly framed, professional-looking visuals.

Try Snagit today for even more control over your image cropping and photo editing needs!

Annotate and edit screenshots with Snagit

Professional mark-up tools and powerful features make it easy to create helpful images.

Try it Free
Screenshot of a document about puffin migration patterns with a section for changing styles highlighted.

Ryan Knott

Ryan Knott is a Marketing Content Strategist at TechSmith, where he creates content about easy, effective, and efficient video creation, editing, and tips and tricks, as well as audio editing for creators of all kinds. He/him.

Content Localization and Why It Matters – Guide to Success

Globe with speech bubbles coming from different areas.

In today’s global world, many businesses are growing their brands by expanding into international markets. A key part of this, which is sometimes overlooked, is content localization. This means adapting content to fit the needs and culture of a specific market. It’s not just about translating text—it’s about making sure the content resonates with local audiences by considering their language, dialect, expressions, and cultural references.

Pizza hut webpage in two different languages.

Categories of localization

When speaking of localization, there are several key terms to understand. 

Internationalization 

Internationalization is about designing products, software, or content so they can easily be adapted for different languages and cultures. This involves setting company goals, team methods, and guidelines to support global growth. It focuses on finding efficient, scalable, and affordable ways to grow in new markets, based on strategies set by company leaders.

Localization 

Localization is a broad term that covers all the work needed to make your international growth plans happen. This includes everyday project tasks, team processes aimed at improving efficiency, localization kits, how teams are progressing with the Localization Model of Maturity (LMM), working with Localization Service Providers (LSPs), translations, and more. Think of localization as a department, like Marketing or Development, that handles all these tasks.

Under Localization are three categories for getting the language work done: 

1. Translation 

Translation is the process of putting words or text from one language into another. In the world of Localization, this term implies “as-is.” It is pretty much a word-to-word or phrase-to-phrase match, considering various locale forms of grammar, syntax, etc. 

An example might be software that looks and behaves exactly the same in any language. The features and user interface are translated as-is and no cultural adaptation is needed. 

Translation is typically based on content already created in a source language. Typically, with translation, the content looks and reads very similar across all languages. 

2. Transcreation 

This process involves adapting and translating words, images, videos, and campaigns to fit the culture of a different region. In localization, transcreation means “change.” It’s usually based on existing content but goes beyond simple translation. 

For example, taglines might be adjusted to fit local preferences, blog posts reworded to include regional examples, or page layouts changed to suit longer translations. Transcreation ensures content looks and feels similar across languages, even if it’s slightly different.

3. Content creation 

Content creation doesn’t use source content and implies “from scratch.” With this method, other language content creators write original ad copy, blog posts, video scripts, etc. without using the source language content for reference. Often outlines, brand guides, style guides, project plans, or in-person meetings help prepare the writers for the content needed. 

With content creation, the final content may look similar to the other language versions or it may be unique to each locale. 

Why content localization is important for global marketing 

In today’s digital age, businesses can quickly reach a global audience. To truly connect with them and grow, content localization is a key part of any global marketing strategy. Creating content in the language of your target audience makes them feel understood and valued, building trust.

Building trust with target audiences 

Localized marketing demonstrates you have taken the time and effort to understand their needs and preferences which fosters a sense of trust with your brand. 

Research has shown that 70% of online consumers prefer to engage with content in their language. Nearly 75% of consumers say they are more likely to make a purchase when products and supporting information are in their native language. 

By investing in content localization, you can tap into this preference and gain a competitive edge in the global market. 

Reaching global audiences with search engines 

Search engines are key in helping businesses reach their target audiences. Properly localized content boosts SEO for specific regions. By customizing your content to meet the needs and interests of each market, you increase visibility on local search engines. Factors like relevance, user experience, and local context help search engines rank websites, so localized content makes your site more likely to appear in local search results, driving organic traffic and attracting potential customers.

Content localization process: bridging the gap for global audiences 

Step 1: Understanding your target markets 

To connect with international audiences, it’s important to understand the culture, language, and preferences of each market. Before you start localizing content, research your audience by looking at language use, age groups, shopping habits, and local customs. This will help you create content that feels natural and engaging for each market.

 Step 2: Building a style guide for localization 

A style guide is a detailed document that covers a company’s goals, products, and branding, as well as specific rules for language use, tone, style, and formatting. Language-specific guides help keep content consistent across different languages. Working with local experts can improve efficiency and save costs during localization.

Index of a style guide.

Step 3: Using the right translation tools 

Translation tools help streamline localization by making the process faster and more accurate. Tools like machine translation can quickly translate content, but they often miss cultural details. Human translators bring in the cultural understanding needed for high-quality localization. 

While machine translation tools, such as neural machine translation (NMT), or other AI services can expedite the translation process by automatically translating content, they lack the finesse and cultural understanding required for effective localization. As a result complex technical terminology may be misinterpreted, or brand names may be mispronounced. Human translators, on the other hand, provide the added expertise and cultural sensitivity for high-quality localized content. 

A balanced approach, combining machine translation for initial drafts and human translators for refinement, often yields the best results. 

Step 4: Adapting content for multiple formats 

People consume content in many formats, like websites, apps, social media, and videos. When localizing content, it’s important to adapt for each format’s technical needs, such as screen sizes and resolutions. For video, tools like Camtasia can help add subtitles, voiceovers, and visuals for specific regions, making your content more relatable to local audiences.

Camtasia translating audio from one language to another.

How to build a content localization strategy

A strong localization strategy helps engage global audiences and grow your business. Hiring a Localization Service Provider (LSP) is a good way to ensure content is accurate and culturally appropriate. Different LSPs offer services from translation to creative content for specific regions. Resources like the Nimdzi report can help you find the right LSP for your needs.

One of the primary responsibilities of a localization expert is to ensure accuracy. Their job is to meticulously review and adapt the content, making sure that it is free from any errors or inaccuracies. This is especially crucial when dealing with culturally sensitive content, where a minor misstep has a significant impact on your brand’s reputation. 

Airport sign with improper translation.

Leverage technology to streamline localization processes

LSPs use tools to streamline the localization process, making it more efficient and cost-effective. These tools help with tasks like managing software updates and using translation memory. If you’re just starting out, tools like Camtasia and Camtasia Audiate can help you add captions and other localized elements to videos. They provide simple video creation and video editing with the ability to add region-specific elements and assets, on screen text in callouts and lower thirds, translated SRTs, and even AI voice over. 

Stardom awaits!

Camtasia is the perfect way to create exciting content for YouTube, TikTok, Instagram, and more!

Free Download
An image of a phone and laptop both showing variation of a cooking videos in both device sizes

Common challenges in content localization

For many businesses, reaching international markets is a priority to increase sales and boost growth. However, embarking on a localization program comes with a significant number of challenges. 

Overcoming cultural barriers

One of the main challenges in content localization is the potential for cultural misunderstandings. Localization failures occur when businesses fail to adapt their content to suit the cultural preferences of the target market. 

For instance, humor is highly subjective and varies greatly across cultures. What may be amusing in one country can be considered offensive or simply fall flat in another. Companies must carefully tailor their jokes and wit to align with the cultural sensibilities of the specific market they are targeting. This attention to detail ensures humor lands effectively and fosters a positive connection with the audience. 

Similarly, idioms and regional language expressions are filled with linguistic and cultural nuances that do not directly translate into other languages. Translating idiomatic phrases word-for-word typically results in confusion or even offense. 

The best strategy is to avoid humor, jokes, and idioms, especially if they are not essential to the message being translated. If humor, jokes, or idioms must be used, original content should be created for each specific language or the content should be transcreated – NEVER simply translated. 

Managing costs without sacrificing quality

While quality localization is crucial, it can be an expensive process, especially when relying solely on professional translation services. However, there are ways to save costs without compromising quality. One approach is leveraging in-house tools for specific localization tasks. For example, using a tool like Snagit to create one source images to be used for all languages. 

A snagit template across a variety of languages.

Using Camtasia for certain aspects of video localization can help reduce expenses since this easy-to-use tool can be used internally. Similarly, transcription and translation tools like Camtasia Audiate can be utilized to streamline the localization of audio content. 

Combining in-house tools like these with professional translation services for complex projects, can help strike a balance between cost-effectiveness and maintaining high-quality localized content.

Instant video translation

Easily translate your videos scripts and voice over into any of dozens of languages and dialects!

Get Audiate
An image of the UI in audiate for translating a script into other languages

Best practices for creating localized content

When creating localized content, it is essential to optimize web pages, URLs, blog posts, videos, tutorials, and social media for in-country audiences. 

Optimize blog posts and social media for local audiences

SEO optimizing content for a different locale includes using region-specific keywords, incorporating local references, or even adjusting the overall structure of the content to better suit the target audience. By customizing your content to resonate with local audiences, you increase the chances of content appearing in organic searches within that locale’s search engines and create a higher level of customer engagement, build brand awareness, and create meaningful and long-lasting connections with new international customers. 

For tutorials, software, and support articles, translation may work. However, some web pages and social media content may need Transcreation to modify the message. For other content like blogs, Content Creation is necessary to ensure the topics, examples, and links resonate with the intended audience. 

Other best practices include using a controlled source language. Each person on the content writing team should use style sheets, glossaries, and and have a review process to help maintain consistency across writers. This ensures translations are also consistent, accurate, and efficient. 

If using images, use a Simplified Image technique to reduce the need for localizing images. Software like Snagit has a built-in tool called Simplify for automating this process. 

Blog image with featured text translated to French.

Finally, launching a Once-And-Done style of management for your localization team helps keep everyone focused and working together to achieve the organization’s global goals. 

Monitor and measure localization success

After launching localized content, it’s important to monitor how well it’s performing. LSPs specializing in quality assurance can review translations, and analytics tools can track engagement and conversion rates to see if the content is resonating with the audience.

Conclusion

In today’s competitive market, businesses of all sizes can benefit from localizing their content to reach new regions. A good localization strategy helps companies connect with different audiences, build trust, and grow sales. This involves setting company-wide goals, using translation tools, and adapting content for various formats. Investing in localization helps businesses succeed globally by making their content more relevant and engaging across different cultures and languages.

Lauren North

Direct Marketing Specialist at TechSmith. I enjoy painting with watercolors, visiting our National Parks, and eating nachos.

Can Clipchamp Edit OBS Videos? A Complete Guide

Graphic of a green film strip with a timeline slider, clapperboard icon on the left, and fan symbol on the right.

If you’ve been using OBS Studio for screen recording, you might be wondering whether Clipchamp can help you take your videos to the next level with easy editing. In this post, we’ll explore whether Clipchamp editing software can edit your OBS videos, how it stacks up as a video editor, and when you might want to consider more advanced options like the user-friendly Camtasia editing software for professional results.

Can Clipchamp edit OBS videos?

The short answer is yes—as long as the video is in a supported file type. Let’s dig into the compatibility of file types and subscription obstacles below.

Keep in mind that Clipchamp can only export in 30 fps, so if you are recording in OBS in 60 fps, your recording will be edited in a lower resolution. 

Compatibility between OBS and Clipchamp

OBS Studio saves videos in formats such as MP4 or FLV, which are fully compatible with Clipchamp. Clipchamp also accepts MOV, WEBM, AVI, DIVX, FLV, 3GP, WMV, VOB, DCM, and MKV video container files, as well as a wide variety of video codecs. Not sure if your input file is supported? Simply add it and see if Clipchamp is able to recognize it. This means you can easily import your screen recordings into Clipchamp and start editing right away.

After you’ve recorded a video using OBS, you can upload it directly into Clipchamp’s video editor for basic trimming, cutting, and enhancement. The best video formats for Clipchamp (without having to wait for conversion) are .mp4 (MPEG-4), .mov (Quicktime Movie File), and .webm.

Editing features in Clipchamp

Powerful recorder

While you may be moving previously recorded OBS clips into Clipchamp, try out the screen recorder in Clipchamp. You can record your webcam with virtual backgrounds, blur, or green screen. These options do go away once you begin sharing your screen with your webcam, so record these as separate tracks. Another positive about Clipchamp’s recorder is that it has a built-in teleprompter and even a virtual Speaker Coach that will give you tips after you record for improvement. 

AI enhanced audio & captions

Clipchamp has a text-to-speech option with many AI voices to choose from, and you can convert your text in multiple languages. Say si, and oui, my friend! If you are using your own voice for the voiceover, Clipchamp can automatically remove long pauses for you, so if you mess up, just pause and keep going. Don’t forget to automatically add subtitles to your video!

Basic video editing

Clipchamp offers essential tools like trimming, cropping, and cutting, which work well for quick edits on your OBS videos.

Text and overlays

You can add text, transitions, and overlays to your videos, making it easy to annotate your OBS screen recordings. Keep in mind that unless you have a premium subscription to Clipchamp, you will not be able to animate graphics or text on your screen. Animating assets on your screen is not Clipchamp’s specialty, so play around with it first before deciding if you need a more polished video editor. 

Export options

Once edited, Clipchamp allows you to export your video in several formats, perfect for uploading to YouTube or social media.

The easiest way to edit videos

Stop wasting time and discover how Camtasia makes creating incredible videos easier than ever.

Free Download
An image of a laptop showing the camtasia drag-and-drop editing feature

How to edit OBS videos in Clipchamp

Step 1: Import your OBS video

First, record your screen with OBS Studio. You may choose to continue recording with OBS because of the ability to stream to YouTube or Twitch, or because you can pre-sync your audio and color-grade your webcam. After saving your recording in the compatible file formats mentioned above, head over to Clipchamp and click “Import” to upload your video.

Step 2: Use Clipchamp’s video editing tools

Use Clipchamp’s intuitive trimming tool to remove any unnecessary parts of your OBS recording. For a smoother look, apply transitions between clips of where you edited. Add text overlays and filters to enhance your video. Clipchamp’s drag-and-drop interface makes this process seamless.

Step 3: Export and share

After finishing your edits, choose your desired resolution and format, then export the video. Clipchamp supports exporting in HD, making it suitable for high-quality screen recordings captured with OBS.

Clipchamp vs. Camtasia: Which video editor should you choose?

When to use Clipchamp:

Basic editing needs: If you’re looking for a simple tool to perform quick edits like trimming or adding text, Clipchamp is ideal.

Free features: Clipchamp offers many free features that are enough for basic editing, making it a great option if you’re on a budget or working on shorter projects.

Online editor: Because Clipchamp is web-based, you can access it from any device with a browser, making it highly convenient. However, please remember to save often, as there have been reported syncing issues between the two platforms. 

When to choose Camtasia:

Precision editing:  Clipchamp has different tracks, but you cannot fine-tune your audio or any type of key-frame editing, which is important for any type of movement on the screen, let alone animation. If you only need text to appear on screen, Clipchamp is ok. But if you need control over where and how the text shows up, Camtasia is for you. 

Examples of moving text, lower-thirds, and animated arrows available pre-made in Camtasia.

Unlike Clipchamp’s simpler interface, Camtasia offers a full video editor suite, perfect for users looking to create polished, professional videos from their OBS recordings. Both programs are easy to use with drag-and-drop functionality. 

For more complex editing projects, having multi-track editing with the ability to “lock” a track so you can’t accidentally trim or to be able to select all to keep audio and the visuals in sync is going to save you from pulling out your hair using a basic tool like Clipchamp. Hide or group items on your timeline as well to keep things organized and keep you rolling on making a video. 

Gif of someone editing in Camtasia

With Camtasia, you can lock tracks, hide tracks or use the magnet to keep everything in sync. To move more things at once, select and shift things on your timeline.

Professional quality: Camtasia provides high-level tools like annotations, animations, and screen effects, making it ideal for professional presentations, tutorials, or long-form content. While Clipchamp offers a few motion graphics, these assets’ colors cannot be changed to match your company’s branding without a premium account. The assets they do have available are more catered to non-professional content. Keep that LOL-OMG-unhinged birthday cake out of your quarterly report, please! We want you to keep your job. 😉

Gif of a giant cake moving back and forth to show Clipchamp's animated graphics.

Clipchamp has an interesting amount of animated graphics, emojis, or text stickers available for personal use. 

Instead, try out some lower thirds, stock images, footages, motion text, and motion icons. Don’t want to be on screen? Try an audio-visualizer. These assets will add the necessary decoration to keep your videos engaging.

A gif of someone talking showing lines moving in reaction to audio.

Skip the bad hair days and use an audio visualizer on your next video to keep the content engaging. 

Library and templates: Who really likes repeating the same work over and over again? As you grow in your video editing journey, you are going to want to take some shortcuts. Editing videos already takes enough time!

With Camtasia, you can save your video as a template to easily drag and drop new video content in. Or, save your intro and outros to your library for easy use again. Do you find yourself making the same tutorial video again? Or do you clean up a webinar before posting it to YouTube? Save yourself time by utilizing templates and the Camtasia library. 

Step-by-step: Editing OBS videos with Camtasia

Step 1: Import OBS video into Camtasia

After recording with OBS, open Camtasia and drag your OBS video file into the media bin. Camtasia supports OBS’s file formats, making it easy to start editing right away. (((insert GIF))

Step 2: Edit with advanced features

Camtasia allows you to add multiple tracks, so you can layer video, audio, and effects easily. Unlike Clipchamp, Camtasia offers more professional transitions, annotations, and callouts to enhance your video. You can also record more footage directly in Camtasia to combine with your OBS video, offering flexibility for more dynamic content.

Step 3: Export in professional formats

Camtasia provides multiple export options, from standard MP4 to professional formats for different platforms. You can export your final video in full HD or 4K, depending on your needs. 

Conclusion: Clipchamp vs. Camtasia for editing OBS videos

While Clipchamp can effectively handle basic video editing for your OBS recordings, it’s limited when it comes to advanced features. If you’re looking for more professional-grade editing tools, Camtasia is the superior choice.

Try Clipchamp for simple edits or go with Camtasia if you need a robust, all-in-one video editor for your OBS videos.

The easiest way to edit videos

Stop wasting time and discover how Camtasia makes creating incredible videos easier than ever.

Free Download
An image of a laptop showing the camtasia drag-and-drop editing feature

Common questions about editing OBS videos with Clipchamp and Camtasia

Can Clipchamp handle long OBS recordings?

Clipchamp can handle longer videos but may not perform as efficiently with large files as Camtasia. For long-form projects, Camtasia is recommended.

Can Clipchamp export in 60 fps?

No, Clipchamp, whether on a paid or free plan, can only edit in 30 fps, which is a lower resolution. 

Do I need to convert my OBS video files before editing in Clipchamp or Camtasia?

No, both Clipchamp and Camtasia support the file formats generated by OBS, such as MP4 and FLV, so no conversion is necessary before importing.

Which tool is better for editing gaming videos recorded with OBS?

If you need advanced editing features like overlays, multi-track editing, and enhanced audio controls, Camtasia is the better option. For quick edits, Clipchamp will suffice.

TechSmith

TechSmith is the market leader in screen capture software and productivity solutions for daily in-person, remote, or hybrid workplace communication and customer-facing image and video content. Our award-winning flagship products, Snagit, Camtasia, and Audiate, empower anyone to create remarkable videos and images that share knowledge for better training, tutorials, and everyday communication.