

Screen recording is a valuable tool for sharing ideas, creating software tutorials, or even capturing gameplay footage. There are several ways to do this, including Xbox Game Bar on Windows or QuickTime Player on Mac OS, to cross-platform solutions like Camtasia. Another popular option is OBS Studio, and in this guide, we’ll walk you through how to set up OBS for screen recording.
What is OBS, or Open Broadcaster Software?
OBS Studio is a free and open-source software created for screen and video recording as well as real-time video streaming. OBS Studio screen recorder is available for Windows, Mac, and Linux computers. Gamers are the largest and most prominent user group for OBS Studio. OBS enjoys an active development community, with updates frequently made available, along with an ecosystem of plugins available to extend the software capabilities even further.
OBS is a good option for recording your screen, but it does have some limitations. First, the recordings you make are flattened, meaning the screen, webcam, cursor, and everything else is burned into a single file. Additionally, OBS does not contain any functionality for editing your video after you stop recording, so you will need to use a video editor such as Camtasia to trim your clips, add annotations, and more. Finally, it can have a high learning curve, and might not be a simple option for those new to screen recording or video editing.
Crystal-clear screen recording
Why settle for blurry screen content? Camtasia Editor’s screen recorder captures everything at up to 4K!
Free Download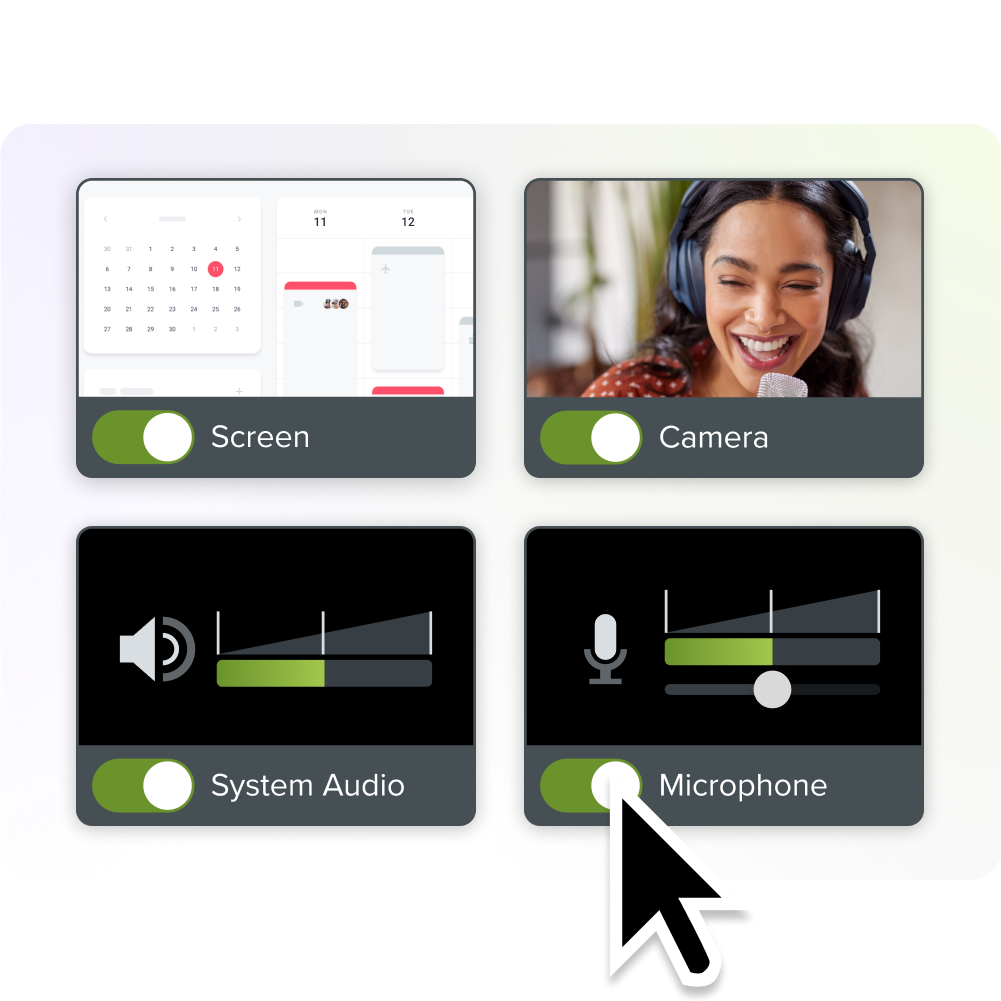
Now that you know what OBS Studio is and its benefits, let’s dive into the process of using OBS to record your screen. Follow the instructions below to get started:
Step 1: Install OBS
To begin, you’ll need to download and install OBS Studio on your computer. Here’s how:
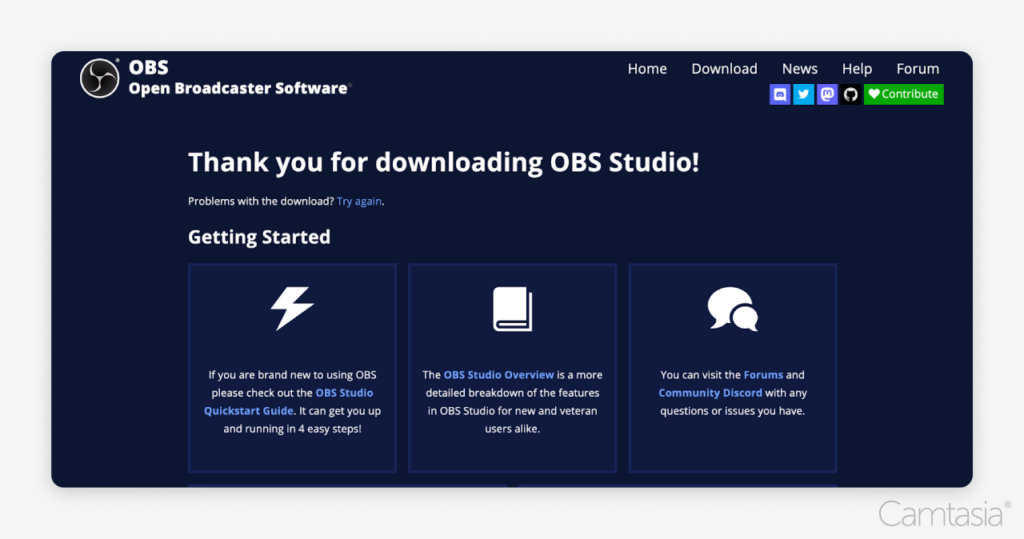
1. Go to the OBS Studio website: Navigate to obsproject.com and download the latest version of OBS for your operating system (Windows, Mac, or Linux).
2. Run the installer: Open the downloaded file and follow the on-screen instructions to install OBS.
3. Launch OBS: After installation is complete, launch OBS Studio to get started with your screen recording.
Step 2: Initial setup
Once OBS is installed, it will guide you through the initial setup process:
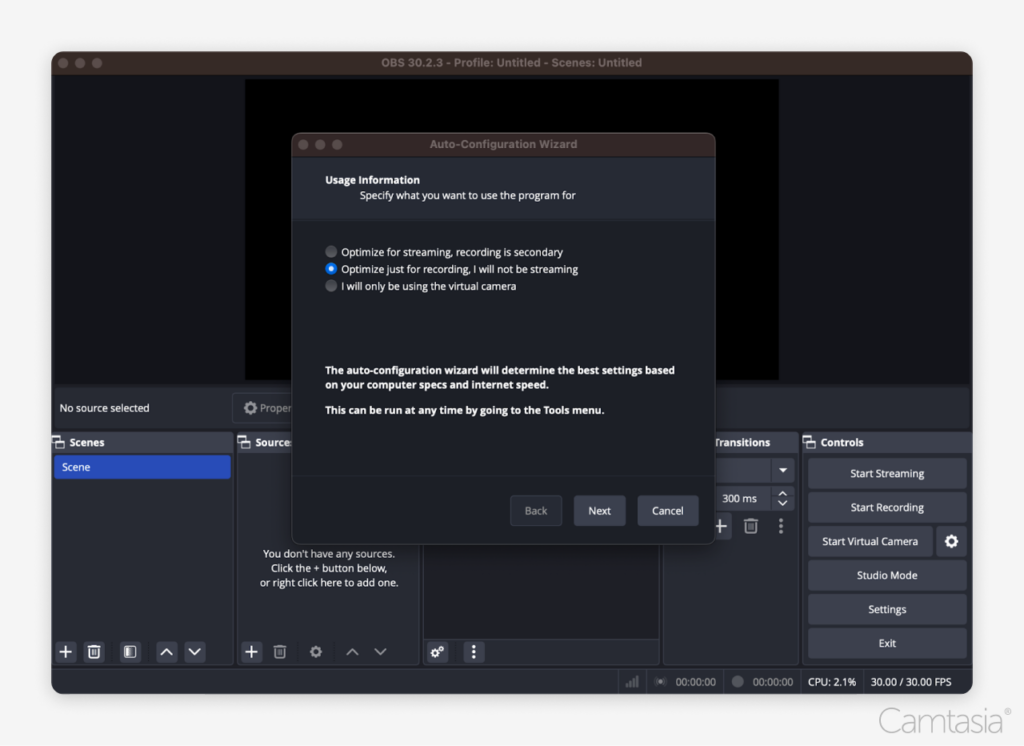
1. Auto-Configuration Wizard: Upon opening OBS for the first time, you’ll be prompted to use the Auto-Configuration Wizard. Select “Optimize just for recording” (if you’re not planning to stream) and click “Next.”
2. Resolution & FPS: OBS will recommend a resolution and frame rate (FPS) based on your system. You can accept the recommended settings or modify them if needed.
3. Complete Setup: Click “Apply Settings” to complete the initial setup.
Step 3: Adding inputs
To record your screen, you’ll need to add the sources or inputs you want to capture.
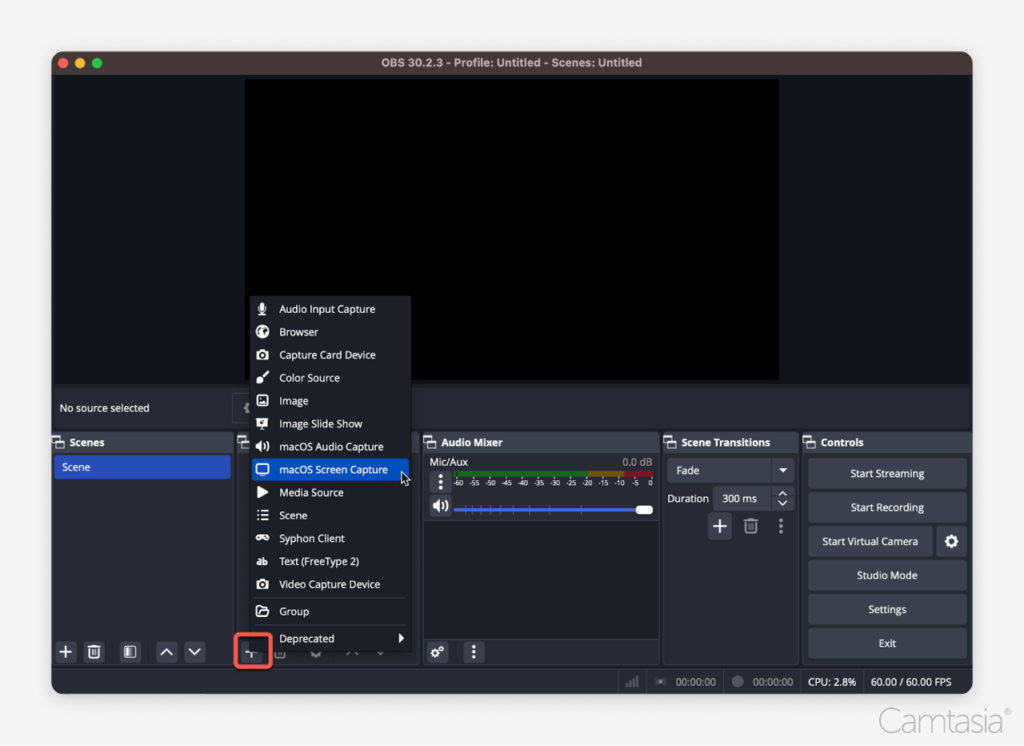
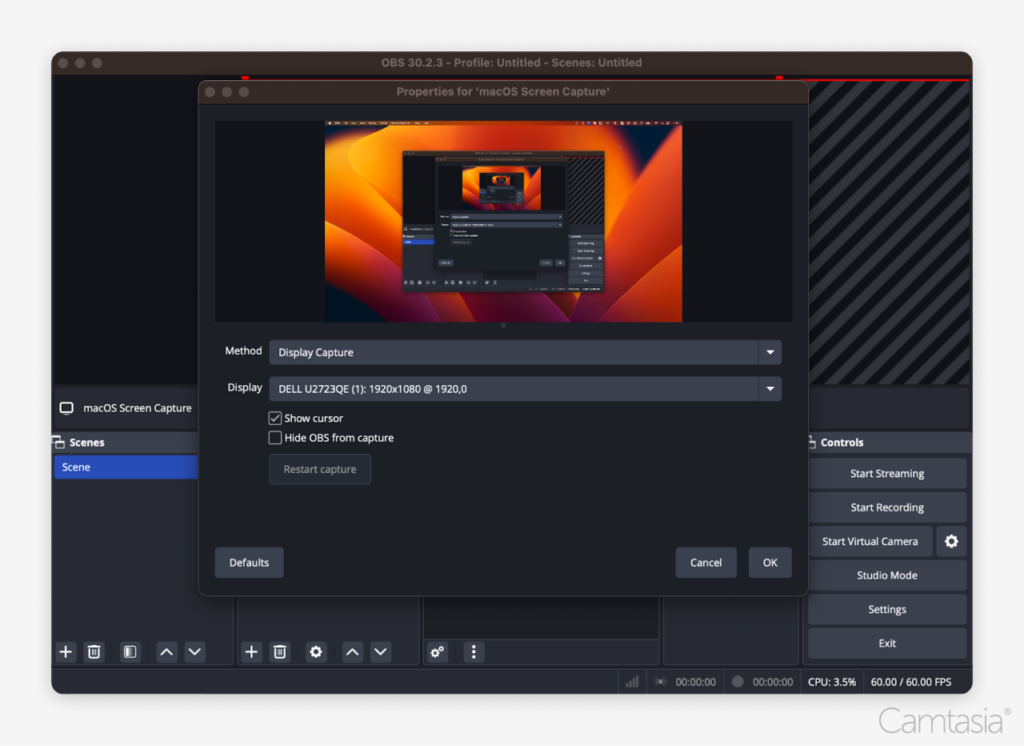
1. Add a Display Capture: In the “Sources” box, click the “+” icon at the bottom left and choose “Display Capture.” This will capture your entire screen. NOTE: When adding a Display Capture, be aware that your desktop resolution might be larger than the capture resolution in OBS. If this happens, you may need to manually resize or adjust the capture region to fit the screen properly within the recording area.
2. Configure Display Settings: A new window will pop up, where you can select the monitor (if you have multiple) and customize the display. Click “OK” to save. Essentially, you’re selecting the window capture area.
3. Additional Inputs (Optional): You can add other inputs, like a webcam or audio sources, by selecting “Video Capture Device” (for a webcam) or “Audio Input Capture” (for your microphone).
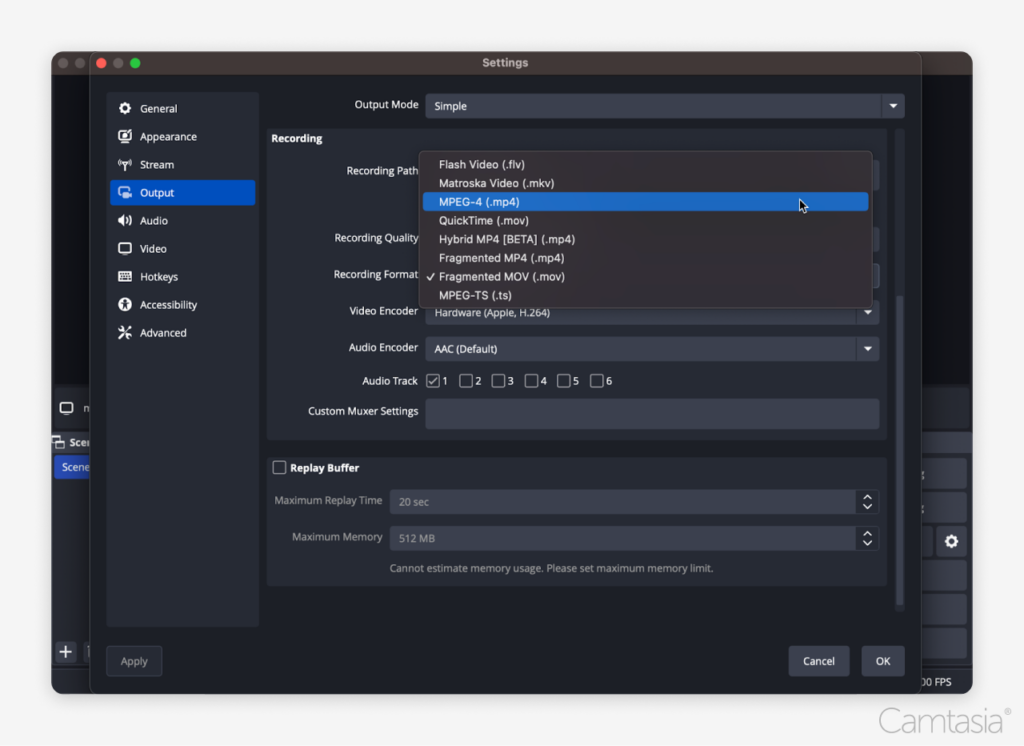
Step 4: Change recording format from MKV to MP4
By default, OBS saves recordings in the MKV format, which may not be compatible with all video editors. Here’s how to use OBS settings to switch to MP4:
1. Go to Settings: In the bottom right corner of OBS, click on the “Settings” button.
2. Navigate to the Output Tab: In the Settings window, select the “Output” tab from the sidebar.
3. Change the Recording Format: Under the “Recording” section, find the “Recording Format” dropdown and change it from MKV to MP4.
4. Adjust Recording Quality (Optional): In the same “Output” tab, you can change the recording quality under the “Recording Quality” dropdown. Higher quality settings will result in clearer videos, but will also produce larger file sizes and may require more system resources.
5. Save Your Changes: Click “Apply” and “OK” to save your changes.
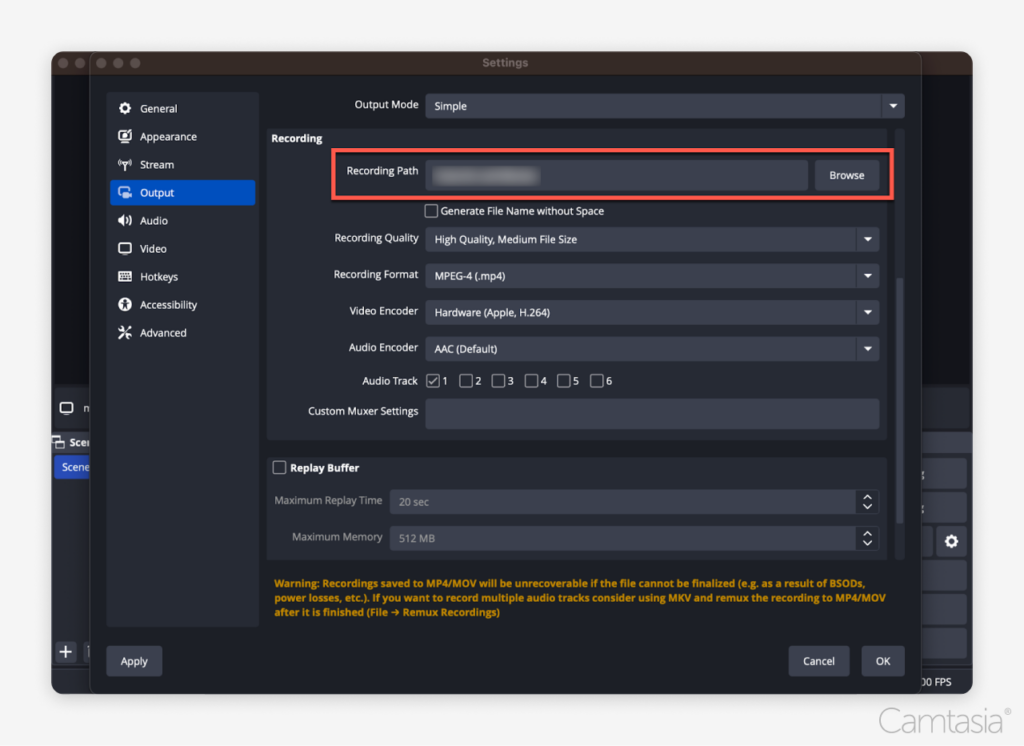
Step 5: Set the file save location
To control where your recordings are saved:
1. Go to Settings: Click the “Settings” button in the bottom right of OBS.
2. Output Tab: Under the “Output” tab, look for the “Recording Path” section.
3. Choose a Save Location: Click the “Browse” button and select the folder where you want OBS to save your video file.
4. Save Settings: Click “Apply” and “OK” to confirm.
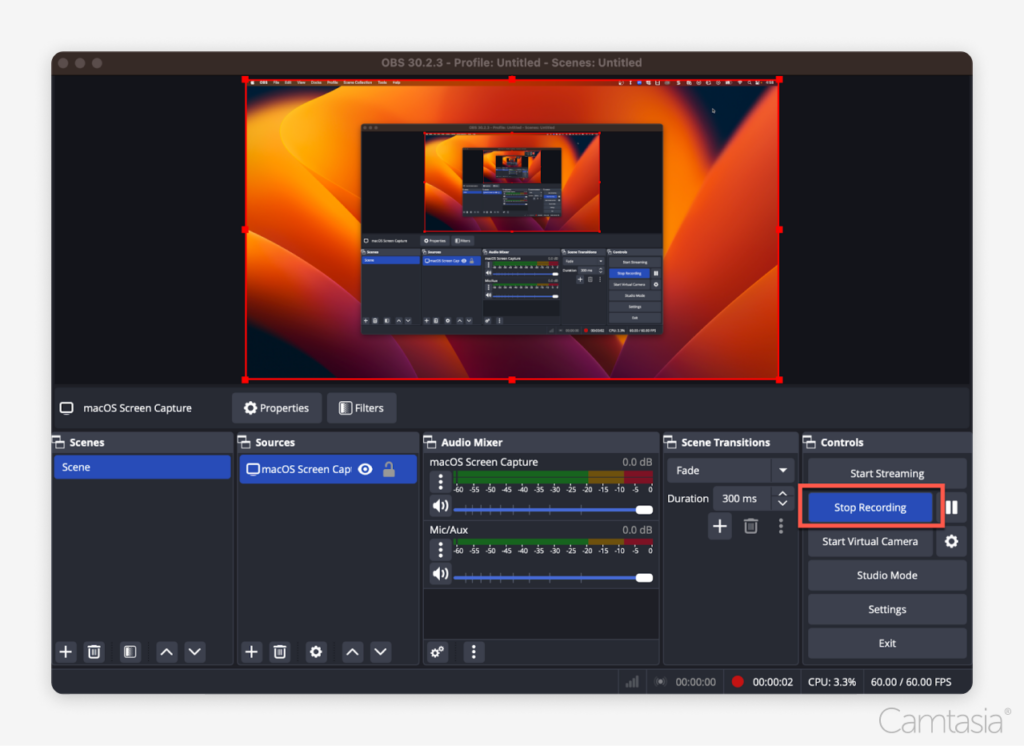
Step 6: Start recording
With everything set up, you’re ready to begin recording:
1. Click the Start Recording Button: In the bottom right corner of OBS, click the “Start Recording” button. OBS will begin capturing everything happening on your screen.
2. Minimize OBS: Once recording starts, minimize OBS to avoid recording the OBS interface itself, unless you need it visible for your demonstration.

Step 7: Stop recording
When you’re done recording:
1. Click “Stop Recording”: After you’re finished, return to OBS and click the “Stop Recording” button in the bottom right.
2. Find Your File: Your recording will automatically save to the location you set in Step 5.
Step 8: Edit your video elsewhere
OBS doesn’t offer built-in video editing tools, so you’ll need to use another program to edit your recording. Here’s how to do it:
1. Choose an Editor: You can use programs like Camtasia, Adobe Premiere, or Final Cut Pro.
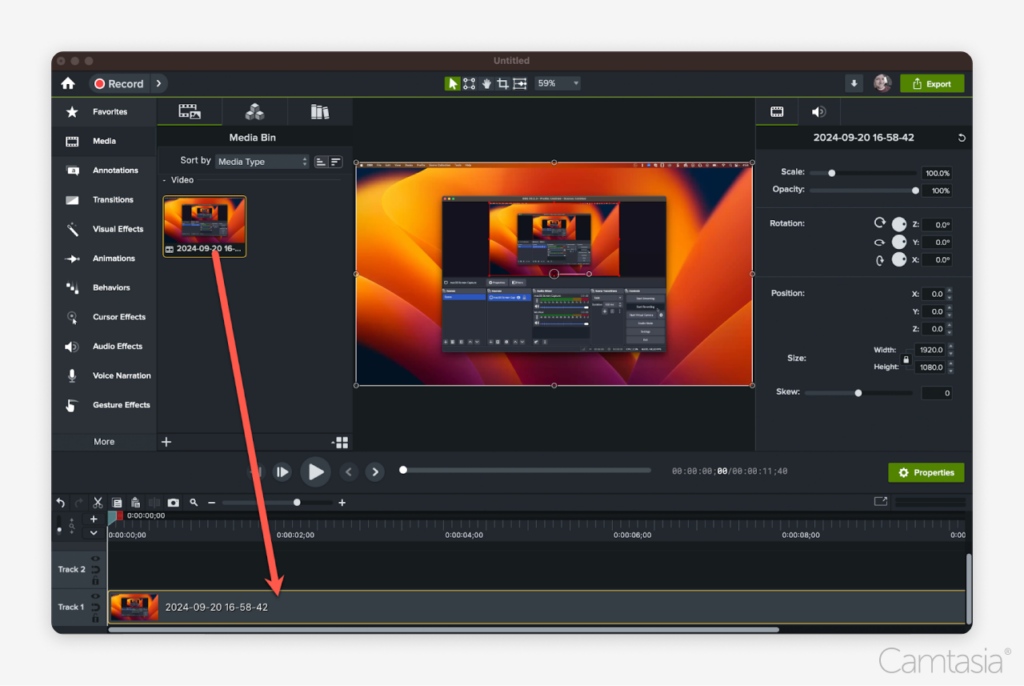
2. Import the Recording: Open your chosen video editor and import the screen recording file you just created.
3. Edit: By editing your video, you can trim unnecessary footage, add effects, annotations, and captions, or adjust audio levels. Editing allows you to enhance your video’s quality, making it more engaging and polished for viewers.
4. Add Transitions Between Screen Recordings: If your project includes multiple screen recordings, consider adding transitions between them for smoother flow. Transitions help maintain viewer engagement and make your video appear more professional by visually connecting different segments of your content seamlessly.
5. Add Voice Narration (Optional): Many video editors allow you to record and add voice narration as part of the editing process. This can be useful for explaining what’s happening on screen, guiding viewers through steps, or adding commentary to your recording.
6. Export and Share: Once you’ve finished editing, the final step is to export your video. Most editing programs allow you to export in MP4 format, which is widely supported. From there, you can easily share the file with others or upload it to platforms like YouTube, TikTok, or Instagram.
Conclusion
Screen recording with OBS Studio can feel intimidating, especially for those who are new to screen recording. Its interface and setup process may seem a bit overwhelming at first, and the fact that it flattens your recording—locking the screen, webcam, and other elements into a single file—might be limiting for some users. However, OBS is still a solid, free option for screen recording, offering flexibility and high-quality capture once you get the hang of it. It provides a great foundation for screen recording, and when paired with an editor like Camtasia, which offers robust tools for editing screen content, you have a powerful combo for telling compelling stories through your recordings.
Crystal-clear screen recording
Why settle for blurry screen content? Camtasia Editor’s screen recorder captures everything at up to 4K!
Free Download
Share