There are multiple reasons why it might make sense to record a meeting in Zoom. Communication happens everywhere, including remotely – and it tends to happen fast.
It’s easier than ever to connect with people with cloud recording software such as Zoom, which serves as a virtual bridge between participants.
Zoom has its own built-in recording features that allow the host to capture the contents of the conversation. However, sometimes the host of the session doesn’t enable recording or doesn’t have an easy way to share the video with everyone who participated or might have an interest in the content.
This allows other software programs, such as Snagit and Camtasia, an opportunity to shine.
User-friendly solutions such as these allow participants to capture and edit Zoom screen recordings for creating tutorials, reviewing the discussions, or even helping a team member who couldn’t attend the meeting.
Why record Zoom meetings?
Remote meetings offer an easy, synchronous way for family, friends, and coworkers to interact.
Instead of having to type out lengthy emails or trying to type out texts on the go, software like Zoom has enabled people to see video and audio of one another, even over a mobile device.
That human connection and ability to have robust conversations in the moment are incredibly important, but by default, there’s no written record to refer to later either.
That’s where a recording can be valuable. Team meetings, webinars, and training sessions are all typical business reasons for Zoom calls.
There’s a personal side to Zoom, too, as family and friends often use software such as this to catch up with one another or celebrate major life events. Having a recorded file is the perfect way to retain and remember these moments beyond just the Zoom call.
Later, these recordings can be used for documentation, revisiting specific details, or simply sharing what happened with those who could not attend during the live session.
How to record a Zoom meeting using Zoom’s built-in feature
Step 1: Enable Zoom recording permissions
Log into Zoom using the website link zoom.us/profile/setting.
You can choose the ‘Recording’ tab at the top of the page.

Make sure that the toggle switch “Record to computer files” is on.

Then, check the box for the appropriate recording options marked for local recordings and Zoom cloud recordings.
Tip: If these (or any of the other options in this tab) are disabled / grayed out, you must contact your Zoom account administrator to have those settings configured for access.
Step 2: Recording a Zoom meeting
When you are in a Zoom meeting (especially as the host), the toolbar at the bottom of the app is your best friend.
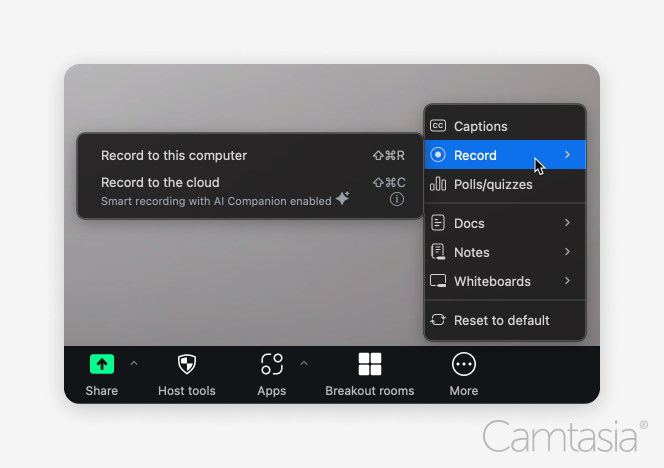
It has a ton of options. For the purposes of this blog post, you’ll want to press the ‘Record’ button towards the right to start your recording.

Tip: The Zoom desktop app allows you to customize which buttons are seen and the order in which they appear.
You may see one or two options depending on what features you have turned on.
You can record locally to your machine or you can record to the cloud.
Recording directly to your machine is generally faster if you want to work with the files later, such as editing them in Camtasia. However, recording them in the Zoom Cloud will make them more readily accessible to others when you want to share the recording as-is with an audience.
Once you’ve started your Zoom meeting and clicked the record button, you can pause and stop the recording.
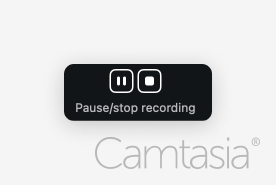
Pause and stop controls are along the bottom toolbar and in the upper right corner of your Zoom window.
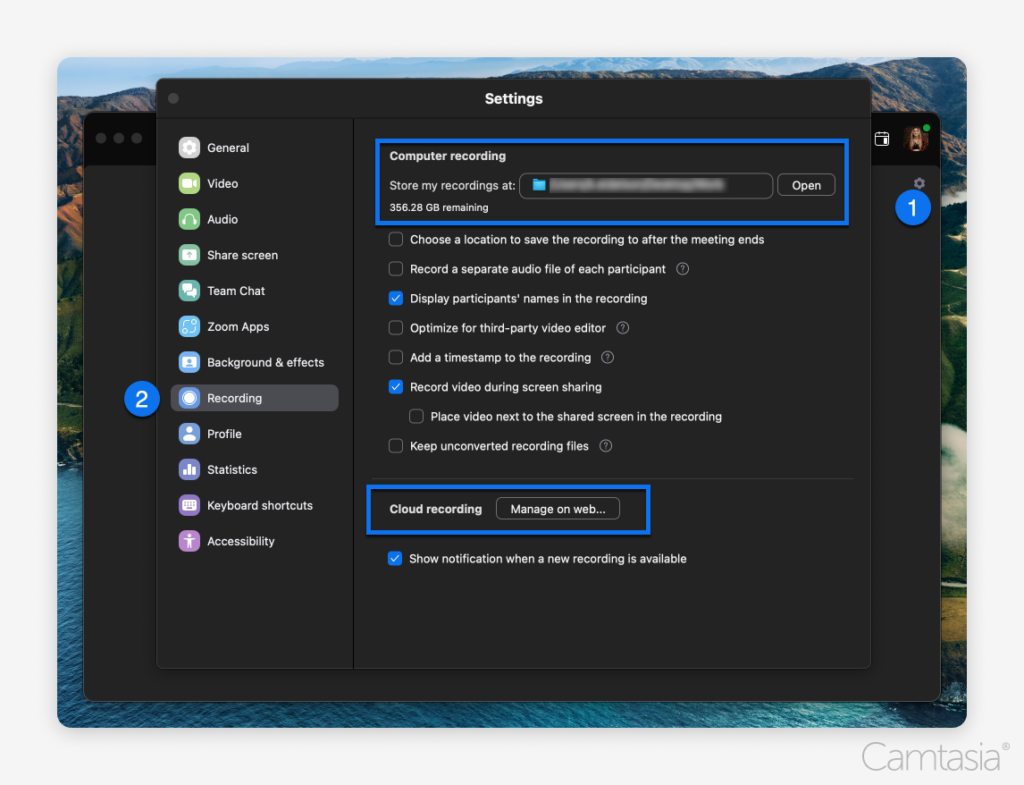
When the Zoom recording is stopped, it saves the recording as a video file. Depending on your settings, the file will be on your local machine or the cloud.
You can check and change those settings in the Zoom app by clicking the settings wheel and then going into the recording tab, where you can find those settings.
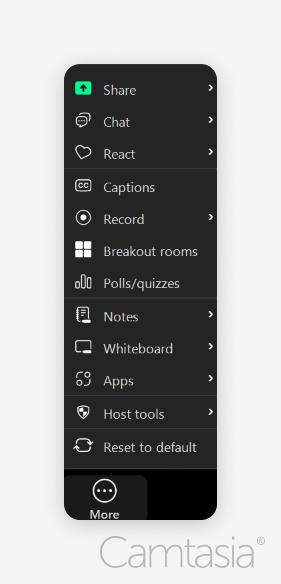
Tip: The “More” button in the Zoom interface will display more available options.
If you resize your Zoom application window to be smaller, there are only so many buttons that the app can display on that menu bar along the bottom.
If you can’t find a button you’re looking for, such as Record, click the “More” button, and you may see the feature you were looking for in a vertical menu pop-up.
Step 3: Limitations of Zoom’s built-in recorder
If you know that you will want a recording later, the most convenient way to make a video of a Zoom meeting is to use Zoom’s built-in recorder.
However, there are some limitations that you should be aware of.
Video recordings are in a particular format; if you plan to use them in another program, there may be compatibility issues. However, there is an option in the Recording interface that makes the recordings more readily compatible with more programs.
Also, video files can be quite large, so be mindful of storage space on your machine or in the cloud.
You don’t want to lose a recording due to storage restrictions.
Zoom also doesn’t offer a lot of editing features. If you forget to pause the recording during a break or try to omit something potentially sensitive, you may need to use a different editing program to trim those moments out later.
How to record a Zoom meeting using Snagit
Snagit is a fantastic tool for quick, easy recordings of the screen.
You might want to make your own recording of a Zoom meeting for multiple reasons.
Perhaps the host forgot to make their own recording, or you’re unsure if they will share it. Maybe you are only interested in a select portion of the meeting and don’t want to have to sift through a recording of the whole thing later.
These and more are valid reasons to have Snagit set up and ready to record some or all of a Zoom meeting.
Step 1: Setting up Snagit for screen recording
You will want to make sure you have everything ready before you start.
Do you want part or all of the screen? Are you only looking to record the audio from the meeting? Or do you want your own microphone to be in play here so you can narrate over it?
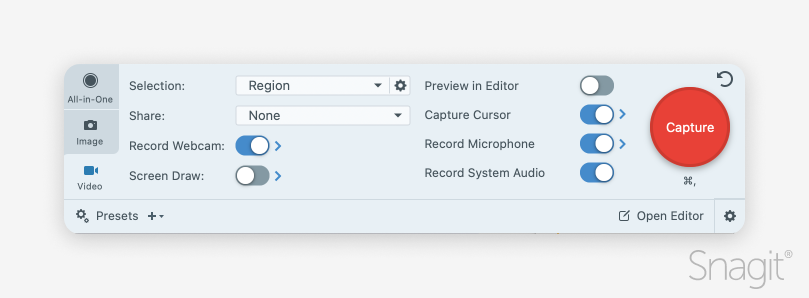
This tutorial on using Snagit to record a video will carefully walk you through the options and help ensure you get the best results.
Tip: You can also use Snagit for image captures. This can be particularly handy if you’re only interested in capturing and later annotating a few moments of the meeting, such as a graph or some other visual.
Step 2: Recording your Zoom meeting with Snagit
There’s a great deal of flexibility in Snagit’s recording toolbox.
You can choose whether you want the entire screen or just a section of it.
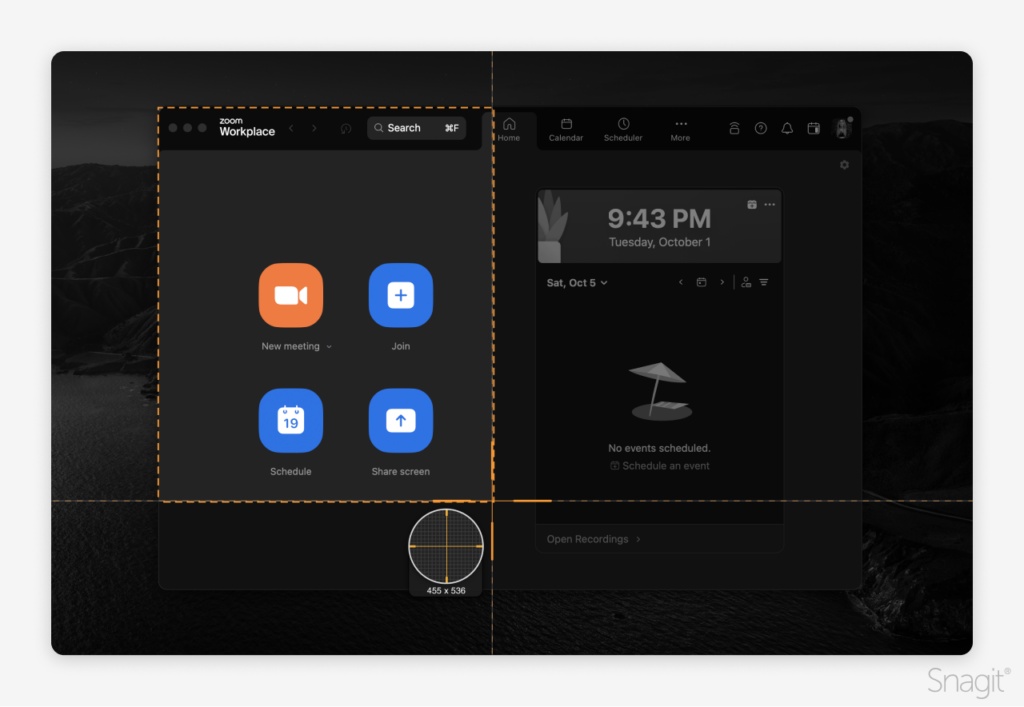
It is worth noting, however, that there are things you can do to make this recording a success.
Close programs you don’t intend to use during this time. It may help prevent notifications from popping up on your screen or unwanted sound effects from showing in your recording.
Also, as a rule, the fewer programs you actively run on your machine during a recording, the more resources it has and the less likely you are to encounter any performance issues.
If I know I will be recording something important, I will often reboot my machine and only start the software I know I will need during the recording. This gives my machine a clean slate.
Step 3: Editing your Zoom recording with Snagit
Snagit’s ability to trim, annotate, and enhance your recordings makes it an appealing option to touch them up before sending them out to others or even when referencing them later yourself.
The most obvious use cases are when you want to highlight important items from the meeting with callouts or trim off parts that aren’t relevant or shouldn’t have been recorded in the first place.
I’ve been in meetings where the host forgot to pause while everyone took a fifteen-minute break. It only takes a few of those over the course of a longer session to add nearly an hour of dead space to the recording that doesn’t serve any purpose when watching it again later.
Tip: The tutorial I linked to before has a video and instructions on how to effectively edit a video in Snagit as well.
Record your screen with Snagit
Snagit makes it easy to share quick updates and how-to’s by capturing exactly what’s happening on your screen.
Get Snagit
How to record a Zoom meeting using Camtasia
Step 1: Why use Camtasia for screen recording
Snagit is a fantastic tool for quickly and easily capturing images and video, and as mentioned above, it is relevant to Zoom meetings. However, sometimes you know that you want more performance and power in your recordings and editing, and that’s where a program like Camtasia can help.
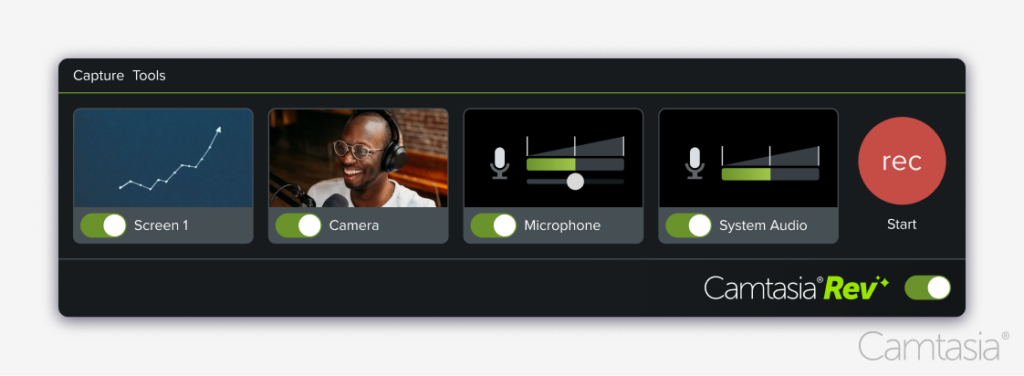
Step 2: Recording your Zoom meeting with Camtasia
The basics Snagit provides, such as audio inputs and choosing what you want to record on your screen, are available in Camtasia. Camtasia is much more robust yet easy to learn.
Many of the same tips about prepping your machine apply, such as closing out unnecessary programs.
It is always a good idea to do a quick test recording first to make sure you’ve configured everything to your liking, giving you a better sense of confidence when it’s showtime.
Step 3: Editing your Zoom recording in Camtasia
Camtasia provides many quick, basic editing options, such as annotating and trimming your videos.
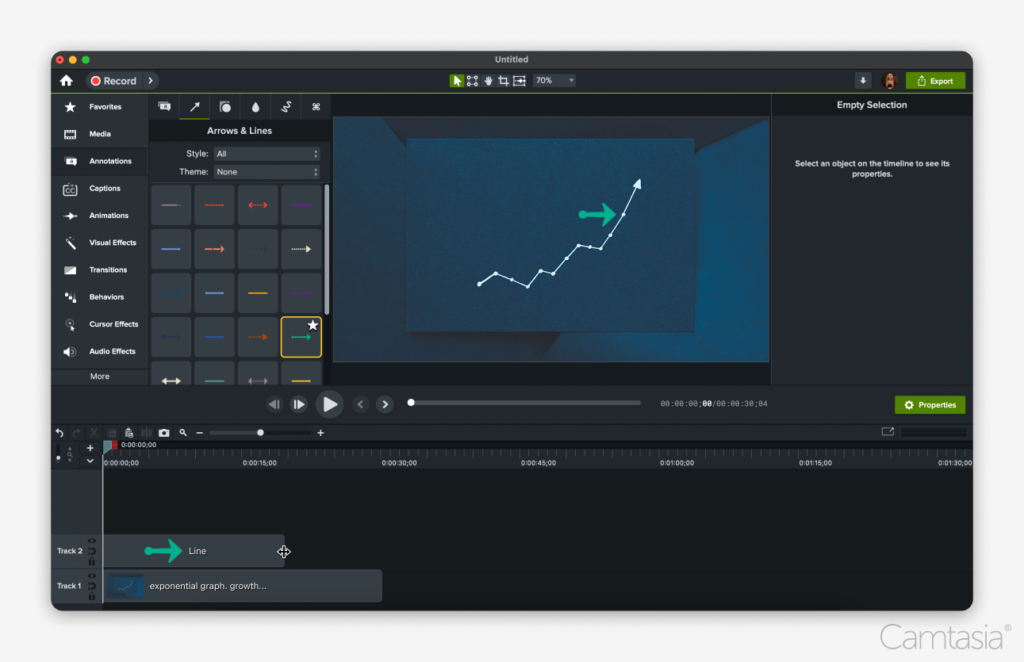
Its timeline allows for a lot of very flexible editing, such as moving multiple clips at once, adding markers to build out a table of contents, and ways to add flair to your video with transitions, animations, and more. You can see a variety of tutorials on these and other topics.
Tips for better Zoom meeting recordings
A little preparation goes a long way toward creating a good recording. So optimize your audio and video settings before getting started.
Be mindful of your surroundings
Are you in good lighting? Is there ambient noise like a fan blowing? Will there be visual distractions, such as people walking in and out of your video? Getting the lay of the land in advance to minimize potential distractions is key.
Make sure your hardware is ready
First, quit any unneeded applications. Zoom leverages your webcam and microphone. Make sure the webcam is cleaned for the best possible image. Have your microphone close to picking up your voice and not other nearby sounds. Be mindful of audio feedback if you’re not using an echo-canceling microphone and speaker.
Be kind, and let your participants know they are being recorded, if possible
Zoom by default displays a message in the app when it’s recording. Other participants might not notice it until later, and if you’re using a third-party program to record the screen, they’ll receive no notifications unless you tell them.

Record only what you need
If you don’t need the entire screen, reduce your recording to a cropped size when capturing with Snagit or Camtasia. Computer performance will improve during the Zoom call and your file sizes will be smaller. A smaller recording area will cut out unnecessary clutter.
Tip: Remember that if you are recording as the host, make use of your pause button to remove parts you don’t want people to see later, like breaks. If you’re using Snagit or Camtasia, you can also pause your recording, or trim out the excess later during editing.
The easiest way to edit videos
Stop wasting time and discover how Camtasia makes creating incredible videos easier than ever.
Get Camtasia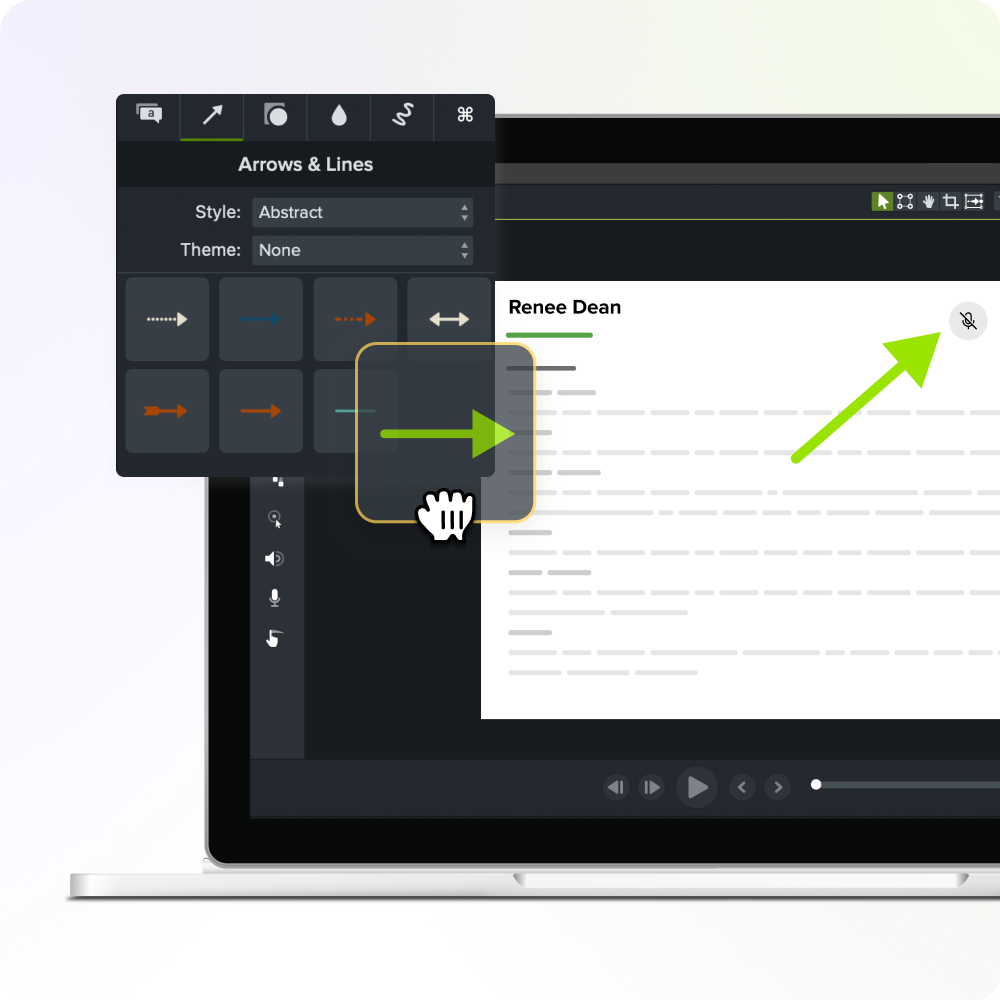
Ready to record your next Zoom meeting?
While it’s great that Zoom offers built-in recording, you can do so much more using Snagit or Camtasia. They have more options for customizing your recordings and robust features for optimizing them after the fact.
You can download a free trial of Snagit and Camtasia and see if they suit your needs. Camtasia and Snagit also provide help online.
FAQ: Zoom screen recording
Yes, you may – as long as the host has the setting enabled within Zoom. Even if they do not, you can use software such as Camtasia or Snagit to record it as you watch it.
The best way to do this is to import the recording into software such as Snagit or Camtasia. In particular, the latter has a robust set of tools that make editing easy and powerful.
The non-linear editor, when combined with features like annotations, callouts, animations, transitions, and captions, provides a lot of options to add focus and polish to the content.
You can share a Zoom recording by downloading it, or you can go to the recording section of the Zoom web portal and use the provided share options.
You can share your recordings from Snagit and Camtasia. Snagit provides multiple options, including sharing with many of the major file-hosting sites. Camtasia has a different set of sharing options, including directly to YouTube, Screencast.com, and other file-hosting sites.


Share