

Are you concerned that your PowerPoint presentations might be boring?
According to a recent trends report, 50% of workers favor content containing images or videos over plain text. You can make your content more dynamic by using videos in your emails and presentations.
This step-by-step guide on how to embed videos in PowerPoint will teach you everything you need to know.
Faster video creation with Rev
Make videos as easy as click, click, done! Camtasia Rev is so fast it’s like magic!
Free Download
Why embed video in (PPT) PowerPoint?
Text-heavy presentations fail to inspire and engage. Embedding a video in your presentation can significantly improve the overall impact and effectiveness of your message.
By using videos you can capture attention and break the monotony of text-heavy slides. They engage your audience emotionally, making your presentation more memorable.
Plus, visual storytelling can make complex ideas or processes more easily understood. A video can explain your points in a way that words alone may not convey.
Video adds variety to your presentation, catering to different learning styles—visual, auditory, and kinesthetic—thus reaching a broader audience. By using a well-produced video, you can enhance your credibility and demonstrate thorough preparation, reflecting positively on you and your message.
Understand media files
Audio and visual data need to be compressed and stored. Different video formats choose different approaches to encode and package content. Common video formats include:
- MP4: A widely used format known for its balance of quality and file size
- AVI: An older format that offers high quality but with larger file sizes
- MOV: A high-quality format developed by Apple that may have compatibility issues on non-Apple devices.
- WMV: A Windows Media format that provides good quality at smaller file sizes, though it may not work well on non-Windows platforms.
- MKV: A flexible format that supports multiple audio and subtitle tracks. While it offers excellent quality, compatibility can be limited.
Check the video format
The easiest way to find the format is to look at the file extension after the dot in the filename (e.g., .mp4, .avi, .mov, .wmv, and .mkv).
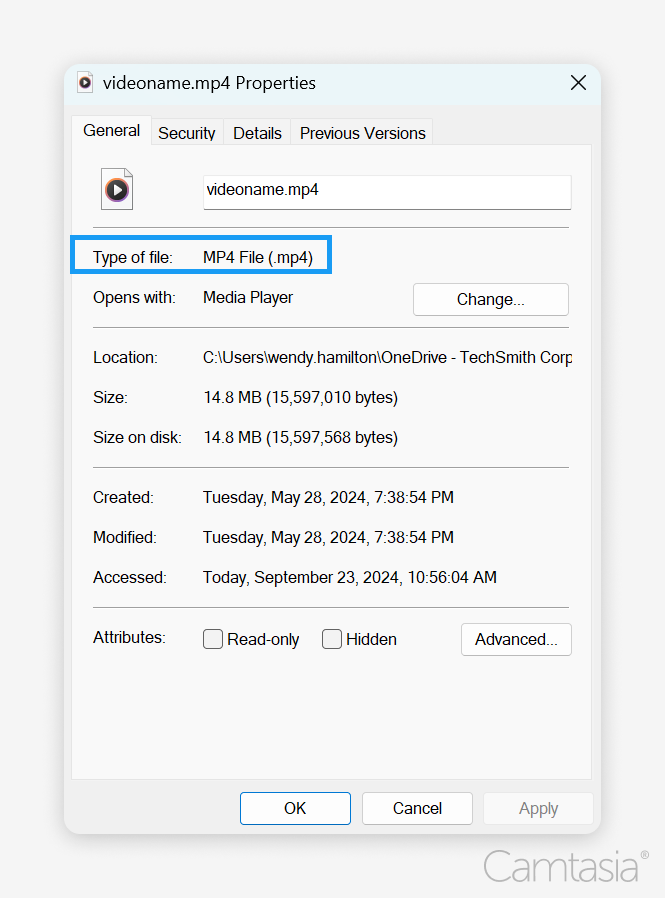
Or, you can check the file properties:
- On Windows R:ight-click the video file and select “Properties.” You will see the format under the “Type of file” section on the video format tab.
- On Mac: Right-click (or Control-click) the file, select “Get Info,” and check the “Name & Extension” section.
Another method is to open the video in a media player (like VLC or Windows Media Player). Many players display the format information in their “File” or “Properties” menu.
Choose the right format
Different video formats have pros and cons, affecting your PowerPoint presentation in various ways.
Compatibility is the most important because if your file is not compatible, it will not play. Whenever possible, try to use MP4 which is the universal format. It works across Windows and Mac systems so you don’t have to worry about any issues in compatibility.
Larger file sizes consume storage space and may reach upload limits. Formats like AVI fall into this category but can also provide higher quality. Be mindful of the quality-to-size ratio. A high-quality video file may look great but not be possible to upload because of the large file size.
Again, MOV and MKV formats can provide superior quality but may encounter playback issues. We recommend you stick to MP4 to avoid any size issues, but double-check that your file format is compatible with the version of PowerPoint you are using.
Microsoft recommends using MP4 files encoded with H.264 video and AAC audio. Other supported video formats also work, including .asf, .avi, .mp4, .m4v, .mov, .mpg or mpeg, and .wmv.
Edit your video before you embed
Before you add your video to PPT, you need to make sure that it is edited properly. By editing your video you can add professionalism to your presentation and clarity to the information you’re sharing. Let’s dive into how to quickly edit a video.
Camtasia is the leading video editor and top screen recorder. As a desktop application, accessing your media on the device is easy, as required for PowerPoint integration.
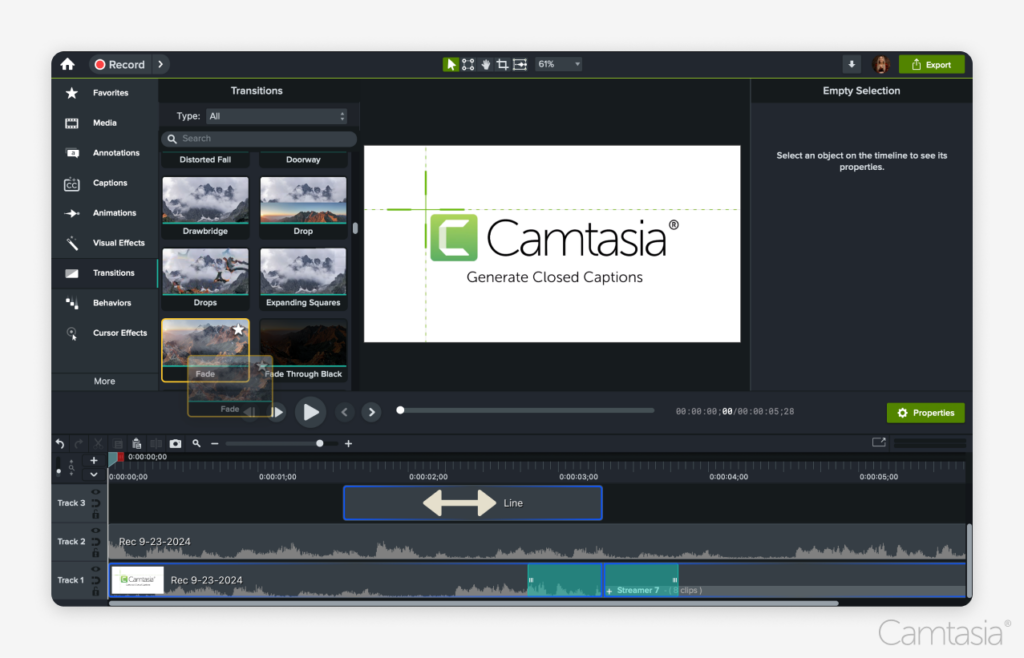
Start by importing your video file into Camtasia. Simply drag and drop the file into the media bin or use the import option. Drag the video to the timeline to start the editing process.
Use the timeline to trim unwanted sections. Dragging out the edges to remove parts you don’t need ensures a polished final product. Remember to keep your video concise and intentional. Don’t drag it on and overshare on unnecessary details.
To add more emphasis to key points in your video, add text, shapes, or arrows. Use the annotation tools to create engaging visuals that guide your audience and transitions to smooth out the flow between clips. This will improve clarity and understanding in your presentation.
Now video isn’t only visual, and if there is audio playing you need to ensure it is clear and understandable. Nothing ruins a good video more than unintelligible audio. Improve audio quality by adjusting volume levels, removing background noise, or adding music and sound effects.
Lastly, add captions. By adding captions you can create a bridge to people who may have issues understanding video content in the first place. PCamtasia allows you to create and edit captions easily, helping to connect with more people.
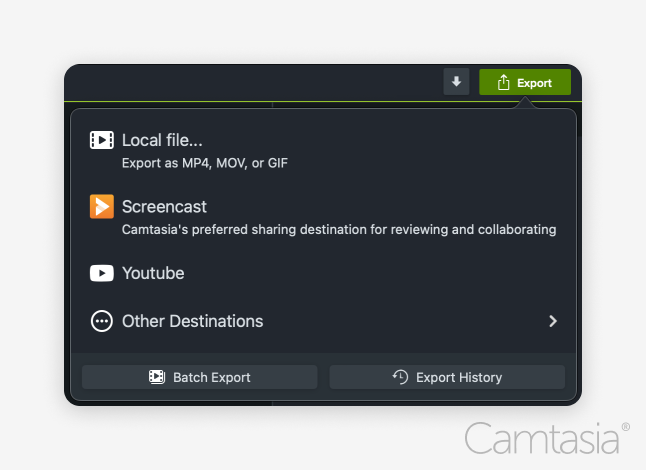
Once you’re done, find the video file format that works for you and export your files.
The easiest way to edit videos
Stop wasting time and discover how Camtasia Editor makes creating incredible videos easier than ever.
Free Download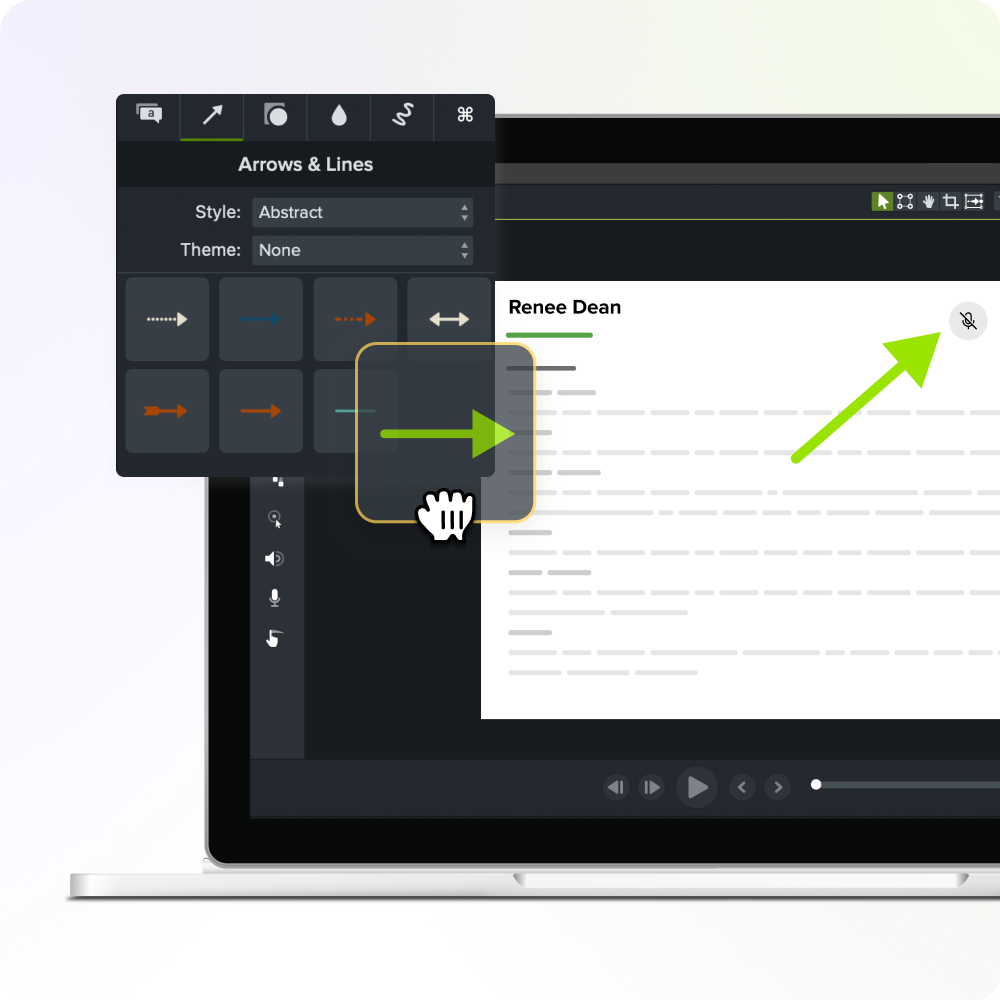
How to add video in PowerPoint
After opening the presentation and navigating to the desired slide, find the Insert tab. Click “Insert,” then “Video.”
Depending on your device, the next tab may look different. Try to find a variation of ”Video on My PC,” “This Device,” or “Movie from File” on Mac, then select your video from your computer.
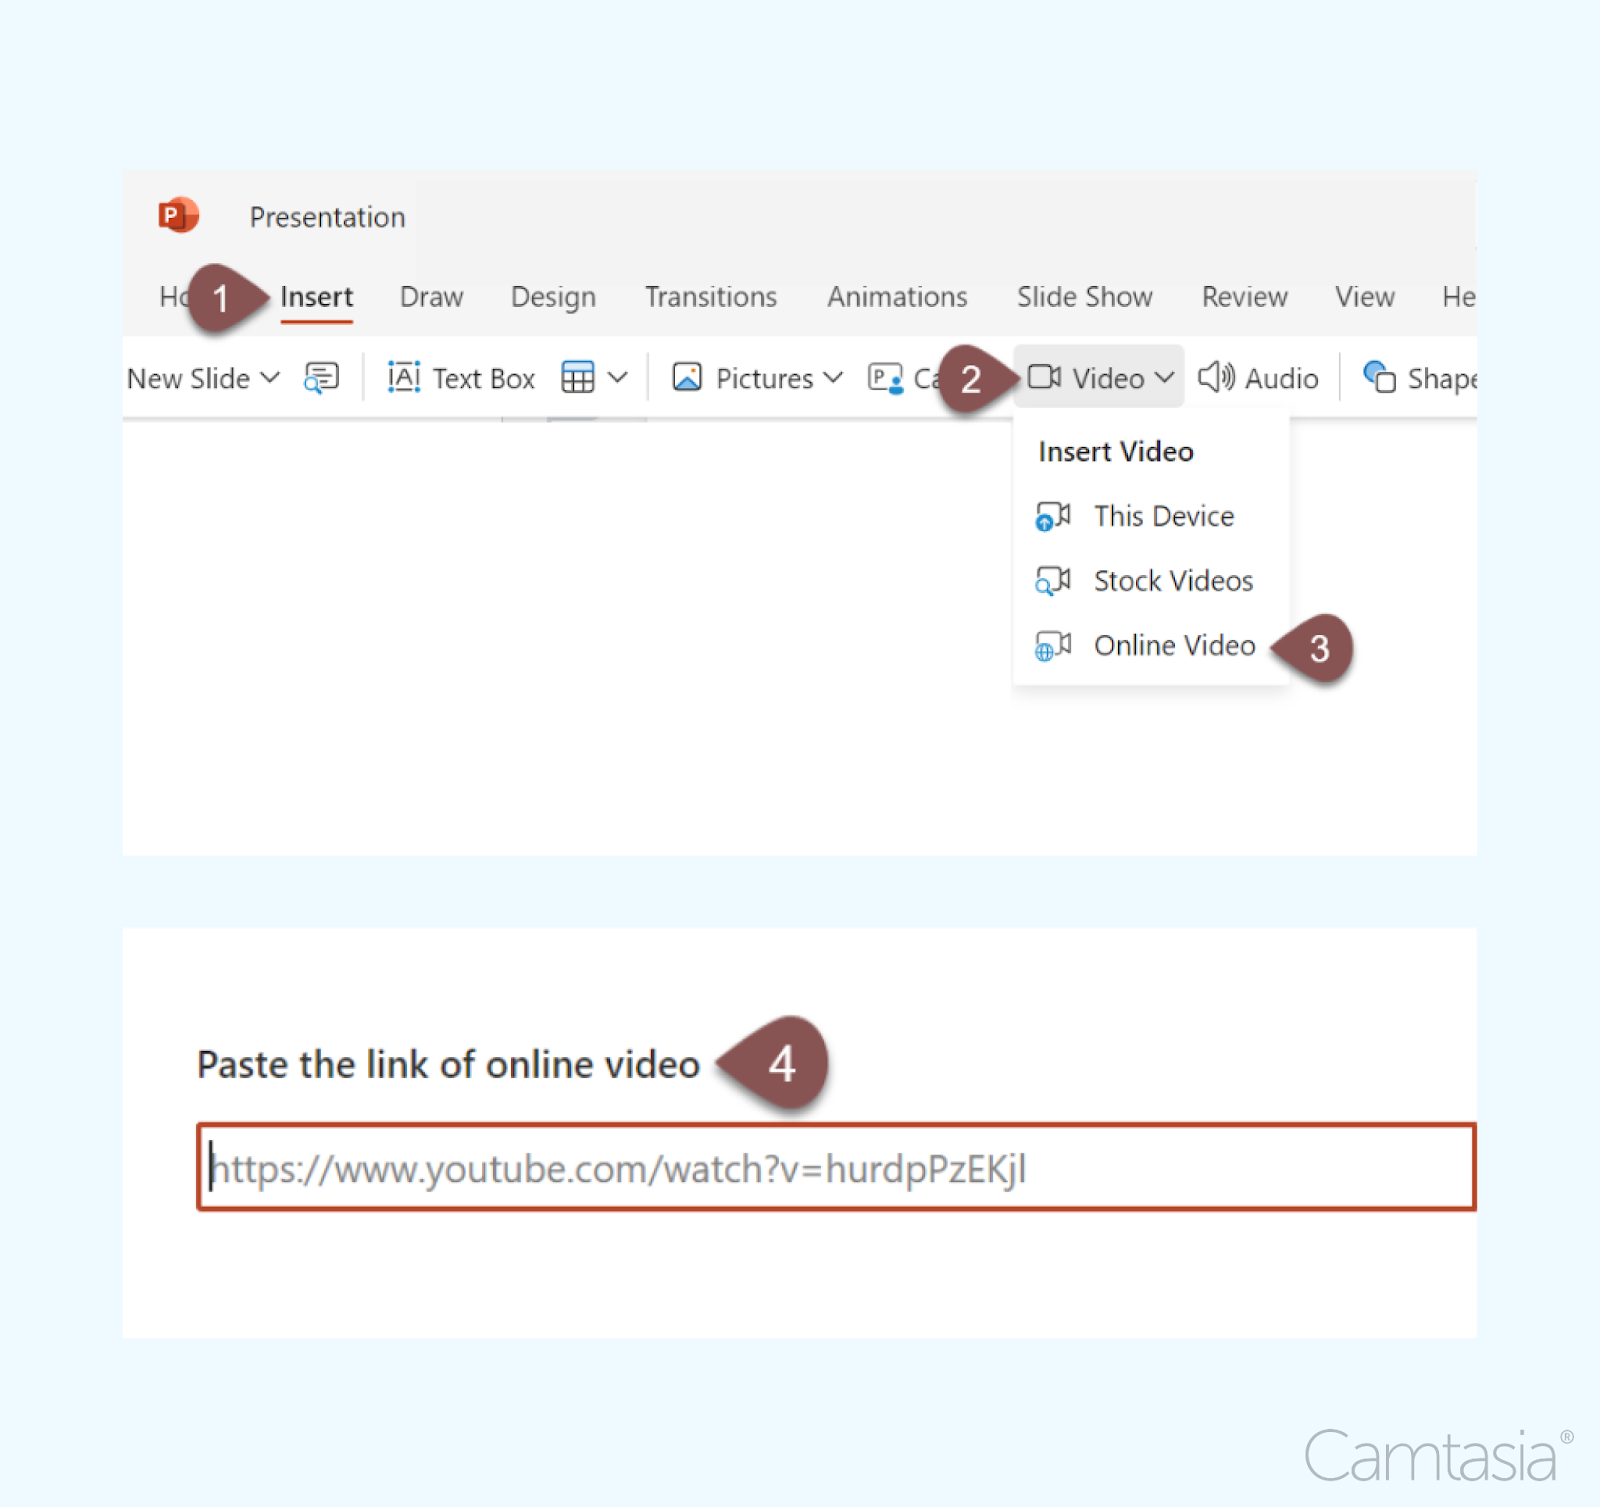
To insert a video from YouTube into your PowerPoint slide follow these steps:
After selecting the slide, click “Insert”, “Video”, and “Online Video,” then paste the video URL.
Customize the size and position of the video on the slide until it’s just right.
Options to play a video
When embedding videos in PowerPoint, selecting the right playback tab settings is crucial for maintaining audience engagement. Here are some key options to consider:
Pick the automatic option from the drop-down menu, and it will play the video as soon as the slide appears. This maintains momentum in your presentation.
“In Click Sequence” or “When Clicked On,” allows you to control when the video starts. Use this to pause to set up context or ask questions before the video plays.
Either way, you’ll be able to play the video on your terms!
The last detail is to add playback controls. You can choose between showing or hiding the controls during playback. This one is fully up to personal preference.
Share