

It has become a popular format for conveying expertise and building personal connections with audiences.
Main reasons you would use a talking head video:
Building trust: Talking head videos humanize a brand by putting a face and personality behind it, which can help build trust with customers and stakeholders. We’ve come a long way from our caveman days, but recognizing facial expressions is important. Seriously, scientists think it’s why we evolved to have eyebrows.
Creating a personal connection: Talking head videos can create a more personal and engaging connection with the audience than written content or static images. Engaging viewers by creating a personal, conversational tone. This style is used in corporate videos, YouTube content, and interview-style videos to humanize brands and communicate key messages.
Delivering educational content: As an educator, you need every engagement power you have. Research suggests that combining talking heads and annotations in asynchronous video lectures yielded the highest learning performance, longest watch time, and highest satisfaction, engagement, and attitude scores. No more “wa-wa-wa-wa-waaa” for you, Charlie Brown.
Promoting knowledge retention: Talking head videos provide content in both visual and verbal formats, which can help the audience retain knowledge.
Microlearning: Talking head videos are ideal for microlearning, which is a type of learning that is delivered in short, bite-sized pieces. Tutorials, training videos and explainer videos would be a great use of microlearning.
Lower production costs: Talking head videos can be relatively quick to pull together, which can keep production costs low. These types of videos do not need a full studio to film in and with the right video editing software, you can create an engaging video with a simple picture-in-picture or a DIY green screen with some great lighting. Product reviews, testimonials, training videos, explainers, and tutorials are other great use cases for talking head videos.
Types of videos best suited for the talking head format
Here are the types of videos that the talking head video style works best for in no particular rank order:
- Corporate videos
- Demos of software or whatever is on your screen
- Explainer videos
- Interview style videos (think 60 Minutes, not Indeed.com)
- Product reviews
- Subject matter expert / Thought leadership
- Training videos
- Tutorials videos
- YouTube content
Styles of talking head videos
It’s easy to get in our heads when creating videos, but do not let perfection get in the way of creating something engaging. You have to make bad art to make good art eventually, and this rule applies to the art of video. Whenever you start to feel nervous about creating your first video, or gasp – showing your face, just remember that the visuals are more powerful than text; and having a speaker in the camera lens is even more powerful.
So never fear, let’s start somewhere by choosing from the spectrum of polish that you can use for your talking head video.
Picture-in-picture video (also known as PiP)
A video style that allows the narrator’s webcam/camera input to play in a small window, while the narrator demonstrates other content on the screen. You may do PiP everyday when you screen share at work without even realizing it while using Microsoft Teams, Slack, or Zoom.
Green screen effect
The “green screen effect” on social media has become ubiquitous because it is more engaging than a voiceover. You can create one of these with Capcut or native social platforms like TikTok or Instagram.
If you are looking to create a quick explainer video on your desktop, download a free trial of Camtasia, which allows you to record your screen in a variety of “green screen effects” layouts to choose from with professional looking backgrounds behind your screen content and webcam filters to make you look good. You can create a video as fast as you can share your screen.
Synthetic talking heads (AI avatars)
Synthetic talking heads have gained popularity over the last few years as AI’s ability to create a digital representation of a person mimicking human movements like gestures, facial expressions, and speech is rapidly improving.
One of the main reasons behind their popularity is because they can replace the need for human actors. With most of the software platforms that allow you to create AI avatars, they also have the ability for the same synthetic talking head to speak in 80+ languages.
For companies with a global footprint, translation can be an issue, but AI avatars can be seen as a more efficient way for video editing. Because of the consistency in AI avatars, companies do not have to worry about needing to refilm the talking head actor when content changes or needs to be reupdated.
Professional camera stream
For more polished videos, using a professional camera is recommended. From corporate marketing and communications videos to YouTubers who would like to monetize, professional cameras are used as the main input.
It’s up to you on whether you film in a sound proof, professionally lit studio, or create a comfortable area in your house to get the same effect. If you are looking to create your own DIY recording studio, check out our other blog for more great tips.
The easiest way to edit videos
Stop wasting time and discover how Camtasia Editor makes creating incredible videos easier than ever.
Free Download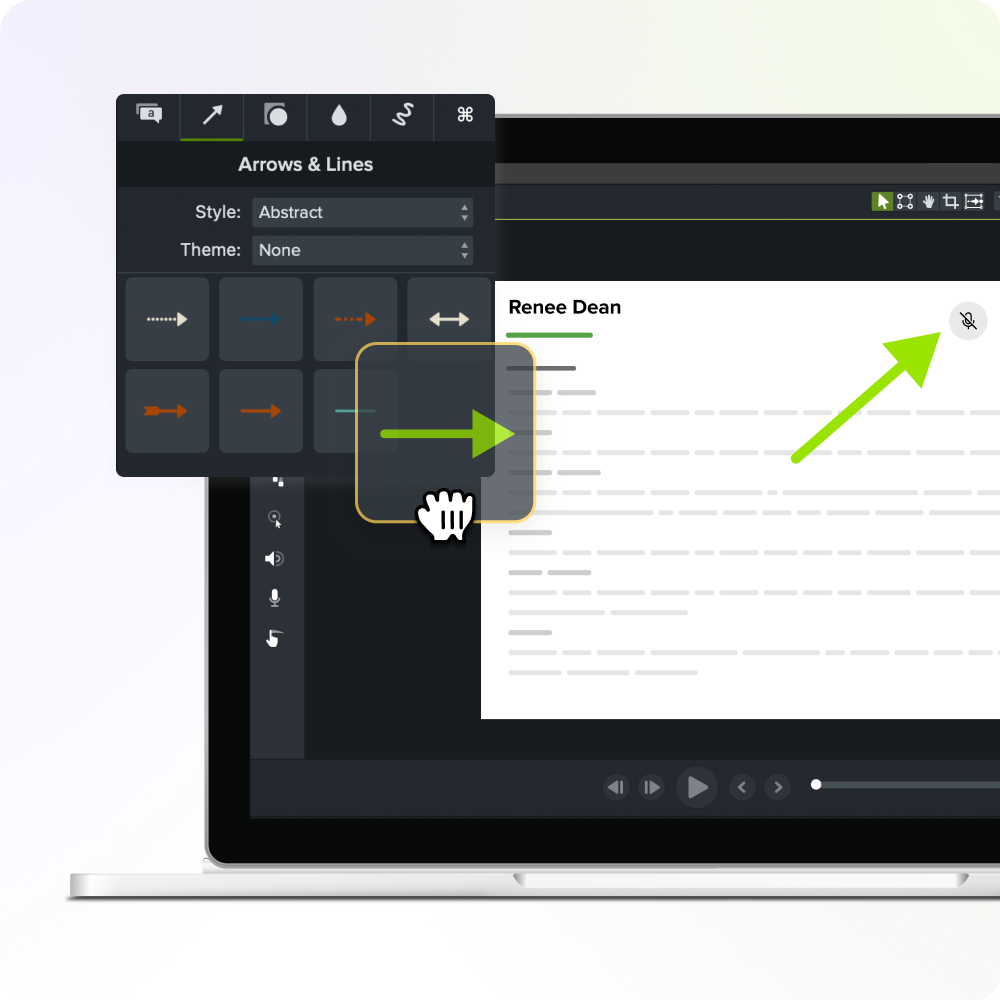
Pre-production: Planning your talking head video
Defining your purpose and audience
This may seem obvious, but it’s the first step in grounding yourself in the context of your audience, so you can begin scripting and editing your most engaging video. Clearly defining the purpose of your video and understanding the audience you’re trying to reach is important to help nail down the tone.
Many corporate videos will differ in tone and content from more casual or creative talking head videos. Here at TechSmith, our YouTube videos are high-energy and often silly. While a talking head video from our HR department’s tone is sincere and informational.
Writing a strong script
A well-written script is crucial for keeping the video on track and ensuring a clear message. Focus on keeping sentences short and conversational, and include multiple calls-to-action, two at a minimum, including a shorter one in the beginning and a final call-to-action at the end
Create a two-column script with what annotations or images might be flashing on-screen with the second column having what the narrator is saying.
Your talking head videos must include annotations to keep engagement and be successful. Research shows that pure talking head videos without any annotations or other effects on the screen are only marginally more effective than voiceovers with the speaker’s picture.
Choosing the right subject matter expert
Selecting a credible and engaging speaker for your video, whether it’s a subject matter expert or someone within your company, is important. The speaker’s tone, energy, and delivery will affect the final video.
When recording with a subject who is not comfortable in front of the camera, say someone from senior leadership, or an executive, consider using an interview-style format of video to make your speaker feel at ease and seem more natural than a scripted video where the narrator has to focus on reading the teleprompter or remembering their lines.
If you are the only presenter and are a bit shy to be in front of the camera, try to choose a natural setting where you feel comfortable. If you can, it’s better to have more people in the room for your first couple of takes so that they can encourage and listen to your takes.
Sometimes, the presenter might say the wrong word or trail off on a sentence, so multiple takes are necessary. If you are still feeling flustered, here’s more content to get you psyched up.
Best practices for recording engaging talking head videos
Maintain eye contact and speak clearly
This is when it is wise to either maintain eye contact in making the video feel personal and engaging or invest in a good teleprompter. If you do not have the budget for a professional grade teleprompter, consider a smaller model that can turn your phone into a portable teleprompter. Instruct your speakers to look directly into the camera lens to connect with the audience.
If there are moments where it’s obvious on the playback, there are a handful of software programs that use AI to make it look like your eyes never strayed from the webcam or professional camera.
Keeping It Short and focused
Keeping talking head videos concise to avoid losing the audience’s attention. Focus on delivering key points effectively within a short time frame. Inserting a video table of contents with marker names in your description on your YouTube or into your corporate’s LMS will help your audience retain the information better.
Using visual cues to reinforce key points
While a table of contents will help your audience understand the outline of your video, adding visual cues like highlighted text or images can help reinforce the main points and make the content more memorable. You could add text to your screen, animate images, or lower thirds with the speaker’s title.
Post-production: editing talking head videos in Camtasia
For this example, we will use Camtasia, an easy-to-use video editor. If you would like to follow along, download our forever free trial, no credit card needed here. Keep in mind that whatever you create under Camtasia’s free trial, will have a watermark at export until you purchase the software.
Step 1: Record your screen and camera or Import your video file
Camtasia makes it easy to record your screen, camera, and audio. Remember when we talked about how you can make a video as fast as you can share your screen? Accelerate your video creation with the Rev workflow, which lets you choose the size, layout, background, effects, and filters quickly.
This workflow is great for tutorials, training videos, presentations, and informational YouTube content. If you are making a different type of video or have a different storyboard in mind, keep rolling with the regular record option which will let you customize your outline on the timeline later.
Importing your media is as easy as clicking a plus sign after you have saved your talking head file to your computer.
Step 2: Make basic edits after recording
After importing or recording your footage, it’s time to make some edits. You can trim unnecessary sections, adjust audio levels, and add transitions to make the video flow smoothly. Camtasia’s editing tools make it easy to polish talking head videos, especially when combining recorded footage with screen captures or annotations.
If you already downloaded the free trial of Camtasia, we have a free trial of its sister product called Audiate, which helps you edit video faster and easier than ever before. Click on the Properties panel, select the audio tab, and edit in Audiate. This will send your video file to Audiate where you can remove um’s and ah’s and hesitations in one click!
No more scouring the timeline or having to listen to the playback. Edit your video like you would edit a Word document. After making your edits here, send it back to Camtasia where your video has now been perfectly edited to match your audio. Synching your audio does not have to be a chore thanks to the Camtasia Audiate integration.
Step 3: Incorporating Graphics and Lower Thirds
Hopefully at this step, you can refer back to your script or storyboard to see what visuals are required to accompany your talking head on the screen.
If you were using a PiP video or screen sharing, it’s a good idea to enlarge your cursor, or highlight it and maybe add some click effects. Screen sharing is great, but sometimes the UI or the text on the screen is still too small. Use the zoom feature to focus your viewer’s attention on one portion of your screen.
You can also highlight, darken, or blur other areas of your screen. Lastly, you can annotate on your screen with an arrow. It’s easy to customize any annotation you add and animate the movement with “behaviors”.
For content that does not revolve around a computer screen, it’s still important to add elements like lower thirds (text at the bottom of the screen) to introduce the speaker or provide key points.
Use simple graphics or bullet points to reinforce the message without overwhelming the viewer. If your video is longer than two minutes, use stock images or footage (also known as B-roll) to give your viewer a break of the same talking head. Inserting a presentation slide with your chapters of your outline will also suffice to avoid making your video 100% talking head.
While you can purchase premium royalty free assets under one of our Camtasia plans, check out library.techsmith.com for free customizable assets like videos, images, and music that we do not include in the Camtasia library.
Step 4: Export your video
Woohoo, you did it! The Export menu contains settings optimized to share videos to your local hard drive, Screencast, YouTube, and more. If you only want to export a selection of the video, you can do this as well.
Do you need someone to provide feedback on your video? Or do you need an easy link to share your video with your audience? Screencast is a cloud-based solution for collaboration and feedback. Here your audience can leave comments, annotations, and emojis at specific times in a video. The best part is that your viewers can engage with your content without setting up an account. On a paid plan of Screencast, you will have access to auto-generated captions to your videos.
Conclusion
Incorporate talking head videos to build trust and create a personal connection. Whether it’s with microlearning or longer form content, talking head videos have been proven to drive knowledge retention for training videos and for educational content.
Talking head videos have a spectrum of polish from a simple PiP video or green screen effect on social media to a professional camera stream.
Do not skip defining your audience or planning out a strong script that maps out your on-screen content with the narration.
Find a video editor that can help you edit any type of video from AI avatars to adding animated text to your screen. Download Camtasia today and discover how you can create professional, high-quality videos for your projects!
The easiest way to edit videos
Stop wasting time and discover how Camtasia Editor makes creating incredible videos easier than ever.
Free Download
Share