

In social media and online entertainment, video gaming content reigns supreme. Platforms like Twitch and YouTube showcase stellar gameplay alongside polished, engaging, and narrative-rich content that you can only craft with skillful YouTube video editing. If you need a professional video editor with years of experience, convenient screen recording and video editing software like Camtasia can help boost video quality quickly and easily.
So, what do YouTubers use to edit their content? Let’s discuss how using Camtasia has evolved the video production process and impacted growing YouTube channels.
Stardom awaits!
Camtasia is the perfect way to create exciting content for YouTube, TikTok, Instagram, and more!
Free Download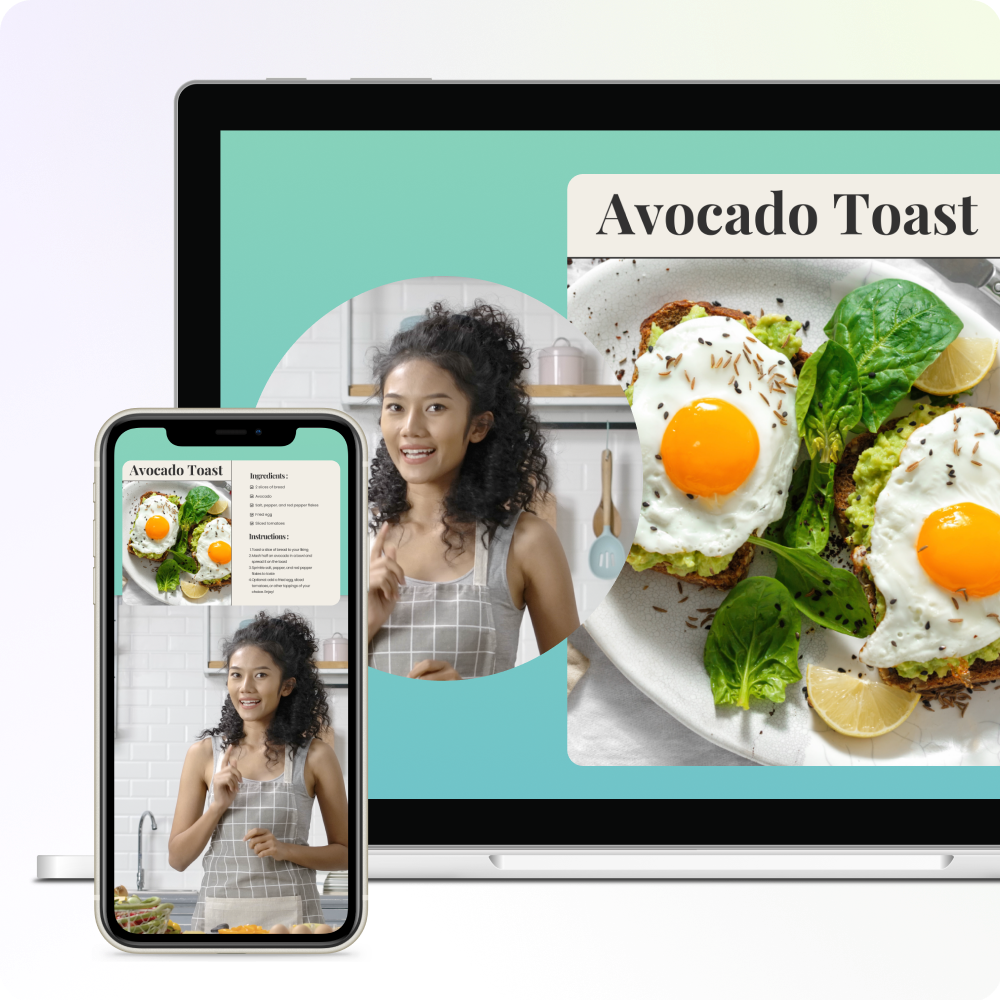
Streamlining the video creation process
Camtasia allows YouTubers to take their content to the next level without spending countless hours learning complex editing software. As a creator, it’s all about efficiency. With so many other responsibilities, you can only afford to spend as much time as necessary on the editing process.
Camtasia streamlines the workflow and allows you to experiment and grow your skills as a content creator without overwhelming you with the extensive features that more advanced software might have.
Focusing and experimenting with ideas
A YouTube video starts with an idea. To organize your ideas, we recommend keeping track of different video games in your niche, your ideas for exciting video game tutorials and gameplay footage, and your rating on how difficult it would be to make a video on them.
Finding that sweet spot where what you want to make attracts an audience can be challenging, but this process can help. Then, take those thoughts and start on your video script.
Writing a script and workflow optimization
Having a plan and a script is vital. By creating a script template, you can speed up the process tremendously. The script is the backbone of YouTube videos, guiding you through the recording and editing phase. As you work through the script, continue to fine-tune your video idea and think about what the video thumbnail should look like.
Using Camtasia’s features and recording
The next step is to open a new Camtasia project immediately and title it. By working on the beginning of your video early on—even before you start recording—you can help determine its style and pace.
Then, it’s time to record! If you’re going to record a no-facecam video without a webcam, record gameplay footage and then use Camtasia’s voiceover narration tool to create an audio recording on the back end. The process changes a bit if you show your facecam footage in the video.
For Mac users, we recommend recording yourself through your iPhone, which automatically connects with a Mac, and Camtasia then will record audio and video simultaneously. Feel free to add color filters to your facecam through Camtasia to make the lights or scenery in your background pop.
Many YouTubers use the free screen recorder and open-source tool OBS Studios to record game footage. Then, you can go into the game, get a collection of video clips, import those into Camtasia, snip them, and edit them the way you want for your finished YouTube video.
This might be a different process for someone with a PC or Android phone using a different operating system like Windows 10 to screencast and record. You can’t edit on OBS, and the software is highly complicated, so using it for the raw video capture file and the MP4 you need and then uploading those into Camtasia is a solid solution.
The easiest way to edit videos
Stop wasting time and discover how Camtasia makes creating incredible videos easier than ever.
Free Download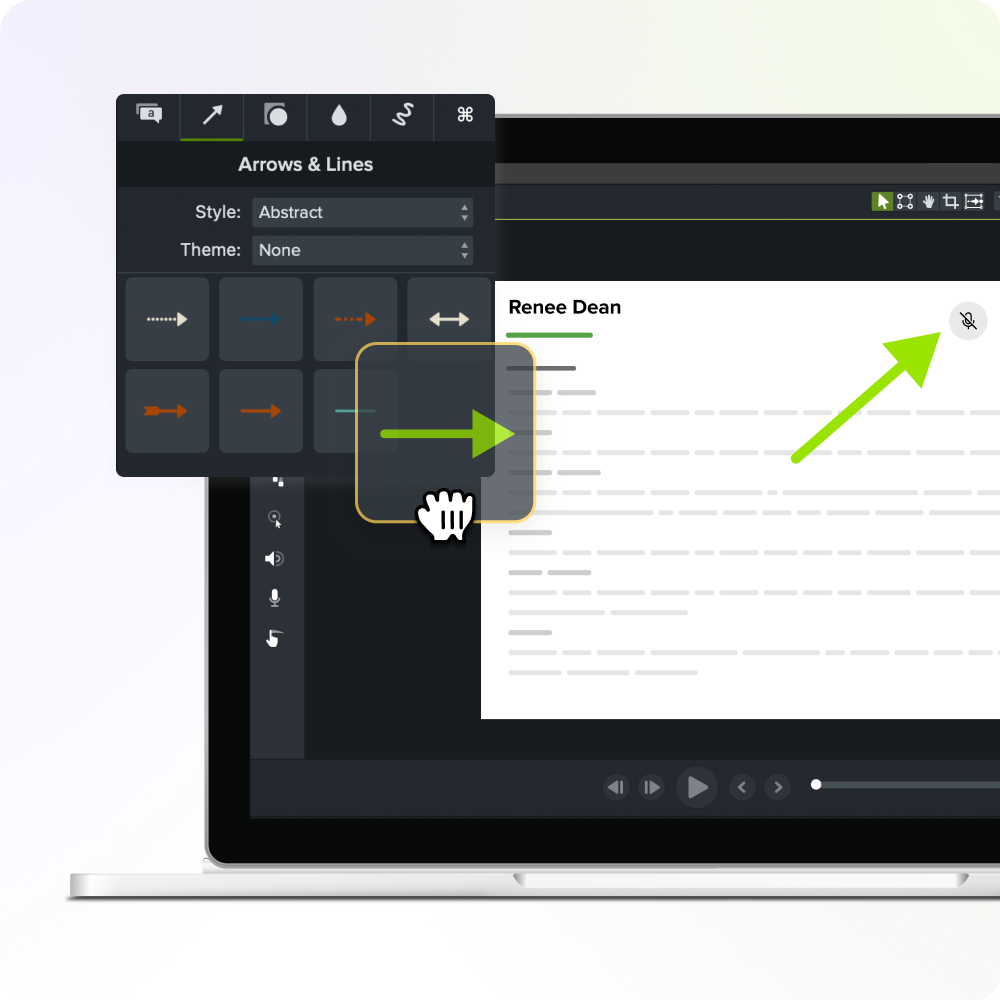
Overcoming time constraints and striving for social proof
For a YouTuber, time is always a challenge. You may always ask yourself, “What’s the most useful thing I can do with the time I have for my YouTube channel?” The solution is to make the whole process standardized as much as possible.
With Camtasia, you can create a library of assets to represent your visual brand in every video. From different arrows that come up on the screen to sound effects to textiles, saving branded assets in Camtasia in your assets library so they can easily move from project to project can save you a ton of time.
Another big hurdle YouTubers face is coming up with new content regularly. There’s a lot of pressure to keep up a consistent uploading schedule, especially early on in a YouTube career.
However, the biggest challenge is establishing social proof. If you’re just starting out and only have a small amount of subscribers and video views, people might automatically disqualify your video. You need to build your credibility in other ways in the beginning.
With good video editing through Camtasia, you can give yourself an element of social proof to make yourself look more professional or more prominent than you are. How you add transitions or do your cuts—all these little subtle things you can do can help make your videos stand out and make you look like you know what you’re doing. Eventually, you’ll get those subscribers and those views.
Tips and tricks for content editing with Camtasia
You need to have a few Camtasia video editing tricks under your belt. As previously stated, we recommend building a library of elements outside the software, such as Canva for custom arrows, watermarks, intros, outros, and other visual aids, and then importing them into Camtasia, saving you time on repetitive tasks.
Leveraging Camtasia’s behaviors and animations and understanding how and when to use them can also drastically improve the professional look of your content. Camtasia has predefined animations where you can automatically zoom in on stuff, but the custom animations are slightly more flexible if you’re recording yourself. You can use custom animations to zoom in on your video gradually. It’s a very subtle movement that brings people in.
On the other hand, behaviors are a great way to add words, annotations, subtitles, and screenshots that pop out in your videos. One example is taking a screenshot of your video game recording with Snagit and copying and pasting it into Camtasia to add a behavior to make it more active and engaging.
Lastly, investing in a high-quality external hard drive for storage and a good lighting setup is invaluable for maintaining a smooth editing experience. Camtasia video project files can be large, so when you’re done with your Camtasia project, make sure to zip it up so it keeps the project intact, save it on an external hard drive, and then you can get rid of all the other video files on your computer. This can help you save a ton of storage space.
Stardom awaits!
Camtasia is the perfect way to create exciting content for YouTube, TikTok, Instagram, and more!
Free Download
SEO tips for gaming content
When you have your finished file, it’s time to optimize and upload your video. The first step is keyword research. Do a quick Google search to see what your audience is searching for and integrate those keywords into your video titles, video descriptions, and tags.
It’s essential to stay on top of industry trends and popular searches within the gaming space—it’s a fast-moving, saturated market, and staying ahead can give you a significant advantage.
Impact on content quality and audience engagement
The polished look Camtasia gives YouTube videos makes them more professional-looking and engaging. Gaming is all about visuals; every second counts in a space where attention is the ultimate currency.
Camtasia allows YouTubers to keep the audience’s attention with a visually stimulating presentation. Higher-quality videos see increased watch time and higher interaction rates.
With help from Camtasia’s full-screen capture and video editing software, you can confidently create video tutorials that are insightful and compelling from start to finish.
Comparing other video editing apps
There are numerous video editing programs available for YouTubers to experiment with. We’ve broken down the pros and cons of some of the top programs, so you don’t have to.
Apple iMovie
Pros
- User-Friendly: Extremely intuitive interface, making it ideal for beginners
- Free for Apple Users: Comes pre-installed on Mac OS
- Efficient: Offers robust performance without a steep learning curve
Cons
- Limited Editing Features: Less advanced editing capabilities compared to professional software
- Mac-Only: Not available for Windows users
Final Cut Pro / Final Cut Pro X
Pros
- Professional Quality: High-end editing capabilities suitable for professional content creators
- Optimized for Mac: Smooth performance and fast rendering times on Apple hardware
- Powerful Tools: Advanced features like multi-cam editing, motion graphics, and color correction
Cons
- Expensive: High upfront costs might be prohibitive for some users
- Mac-Only: Exclusively available for Mac users
Adobe Premiere Pro
Pros
- Industry Standard: Widely used in the professional film industry
- Cross-Platform: Available on both Mac and Microsoft Windows
- Extensive Features: Comprehensive toolset for color grading, special effects, and audio editing
Cons
- Steep Learning Curve: Can be challenging for beginners
- Subscription-Based: Requires a monthly or annual Creative Cloud subscription
DaVinci Resolve
Pros
- Professional Color Grading: Unparalleled color correction and grading tools
- Free Version Available: Offers a robust free version with plenty of features
- Cross-Platform Compatibility: Available for Mac, Windows, and Linux
Cons
- Complex Interface: May be overwhelming for less experienced users
- Resource-Intensive: Requires a powerful computer for smooth operation
Adobe Premiere Rush
Pros
- User-Friendly: Simplified version of Premiere Pro, perfect for quick edits
- Mobile App: Edit on the go with its mobile application
- Cross-Platform: Available on Mac, Windows, iOS, and Android
Cons
- Limited Features: Not as feature-rich as Premiere Pro
- Subscription Costs: Requires an Adobe subscription
Lightworks
Pros
- High-Quality Tools: Professional-grade video editing capabilities
- Multi-Platform: Available on Mac, Windows, and Linux
- Free Version: Offers a free version with essential features
Cons
- Complexity: Steep learning curve, not ideal for beginners
- Export Limitations: The free version has restrictions on export video formats and resolutions
PowerDirector
Pros
- User-Friendly: Intuitive interface suitable for both beginners and advanced users
- Fast Rendering: Efficient performance with quick rendering speeds
- Affordably Priced: More budget-friendly than some competitors
Cons
- Windows-Only: Limited to Windows users
- Occasional Bugs: Some users report instability issues
ShotCut
Pros
- Open Source: Completely free to use without any subscription or license fees
- Cross-Platform: Available on Windows, Mac, and Linux
- Advanced Features: Offers features like video transitions, audio filters, and a multi-track timeline for extensive editing
Cons
- User Interface: Can be less intuitive and polished compared to other paid software
- Learning Curve: It may require some time to master all features and functions
Filmora
Pros
- Easy to Use: Simple, user-friendly interface makes it accessible for beginners
- Affordable: Reasonably priced with various plans available
- Built-In Effects: Comes with numerous presets and effects for creative editing
Cons
- Limited Advanced Features: May not meet the needs of professional editors
- Watermark in Free Version: Adds a watermark in the free version unless upgraded
Adobe After Effects
Pros
- Advanced Effects: Industry-leading motion graphics and visual effects tools
- Integration: Seamlessly integrates with other Adobe apps like Premiere Pro
- Versatile: Ideal for creating animations, titles, and complex effects
Cons
- High Learning Curve: Requires significant time to master
- Subscription-Based: Continuous payment is required for use
In conclusion, each video editing software has strengths and weaknesses, catering to different needs and skill levels. For YouTubers who prioritize ease of use and integrated screen recording capabilities, Camtasia is a top choice.
Taking the leap into content creation
If you’re a beginner wanting to enter the video game content creation space, our advice is to jump in and start recording and experimenting with computer screen recording tools. The best way to learn is by doing, and beginning with Camtasia can make the process far less intimidating than working with more complex software.
Don’t be afraid to make those first few videos that might not be perfect—each one helps you become a better content creator. There’s less of a learning curve with Camtasia than with another video editing tool. It’s a lot easier to grow in Camtasia than it would be to grow with other software.
User-friendly recording options like Camtasia can enhance your content, but your unique voice and ideas will genuinely capture an audience. Happy creating!
The easiest way to edit videos
Stop wasting time and discover how Camtasia makes creating incredible videos easier than ever.
Free Download
Share