Have you ever needed to show someone how to use an app, create a quick tutorial, or capture a bug on your iPhone? Screen recording helps content creators and teachers by letting them easily capture everything on their iPhone screens.
In this guide, we’ll show you how to record the screen on an iPhone and edit your recording.
What is screen recording?
Screen recording is an iPhone feature that allows you to capture video of everything happening on your screen.
Recording your iPhone screen is great for creating:
- App tutorials or step-by-step guides demonstrating how to use specific apps.
- Software demos that showcase app features and functionalities for potential users.
- Recording and sharing glitches or issues with developers.
- Educational content for teaching software or other digital skills.
- Engaging and informative clips for social platforms like Instagram, TikTok, or YouTube.
Record your iPhone screen with Camtasia
Don’t settle for the built-in tools. With advanced recording and editing features, you can take your screen recordings to the next level.
Try Camtasia FreeHow to set up screen recording on an iPhone
Before you start capturing your screen, make sure your iPhone is ready for screen recording. If you haven’t already, you may need to enable the screen recording feature.
Check your iOS version
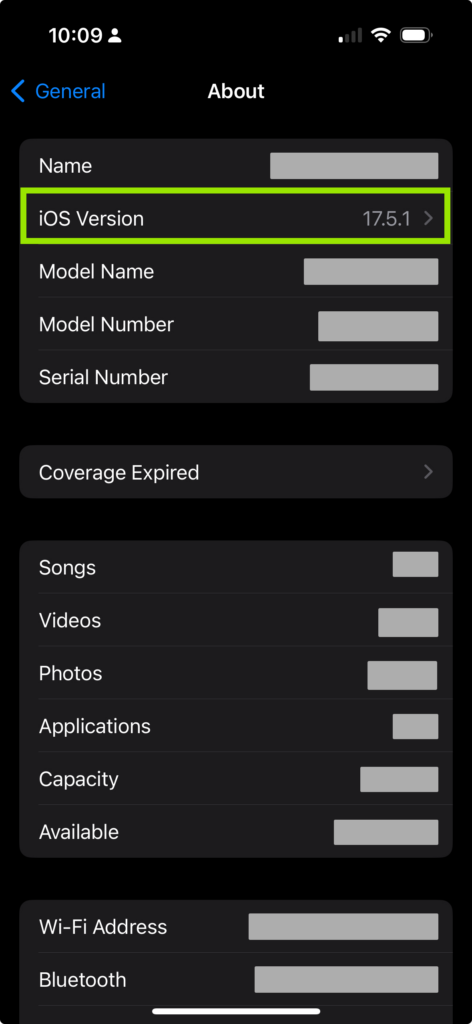
First, make sure your iPhone is running iOS11 or later. You can check this by going to Settings > General > About.

Enable screen recording in Control Center
To enable screen recording on your iPhone, follow these simple steps:
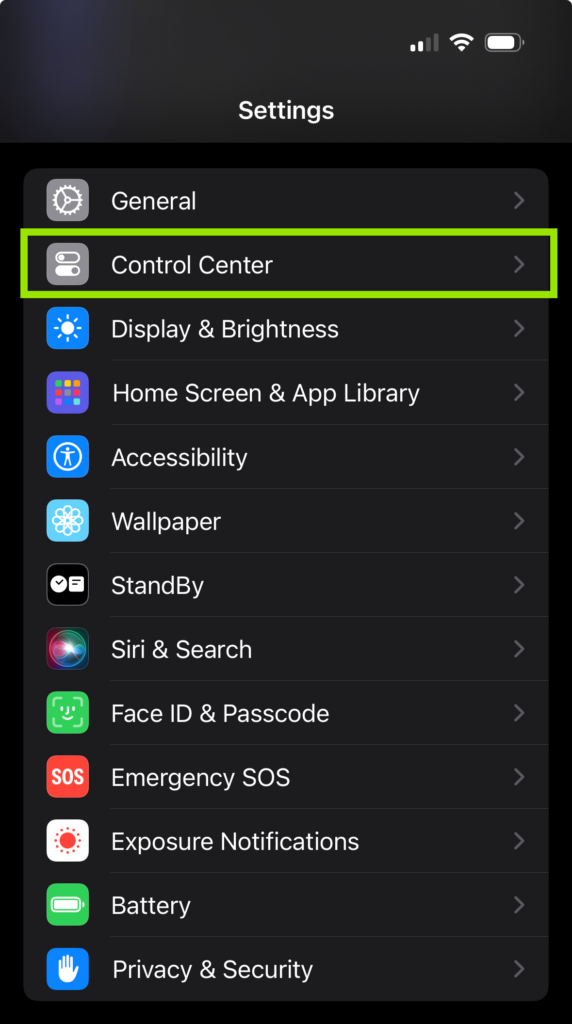
- Open Settings: Tap the Settings app on your home screen.
Access Control Center: Scroll down and tap on “Control Center.”

Included Controls: Make sure to add “Screen Recording” to the “Included Controls” section if it is not already there. You can do this by tapping the green plus sign.
How to start screen recording
Now that screen recording is enabled on your iPhone, you’re ready to start recording!
To open the Control Center, swipe down from the top right corner of your screen and tap the screen recording button. (For some iPhone models, you will swipe up to access the Control Center.)
You can record your microphone audio as well. Simply long-press the Screen Recording button and tap the microphone icon.
Stopping and saving your recording
When you’re ready to stop your recording, simply open the Control Center and tap the Screen Recording button again. You can also tap the red status bar at the top of your screen and select “Stop.”
The Photos app will automatically save your screen recording, where you can make some basic edits and share them. To find your screen recordings in the app, tap Albums, then Screen Recordings below Media Types.
Editing your iPhone screen recordings
Once you’ve captured your screen recording, it’s time to polish it up. There are a few ways you can get started with some basic editing built-in on your iPhone:
- Trim your video: Open the recording in the Photos app and tap “Edit.” Then use the sliders to trim the beginning or end of your video to remove any unwanted parts.
- Adjust colors: Use the adjustment tools to change the brightness, contrast, and color balance.
For a more professional result, consider a video editing app like Camtasia. It’s an all-in-one screen recorder and video editor that offers more advanced features like:
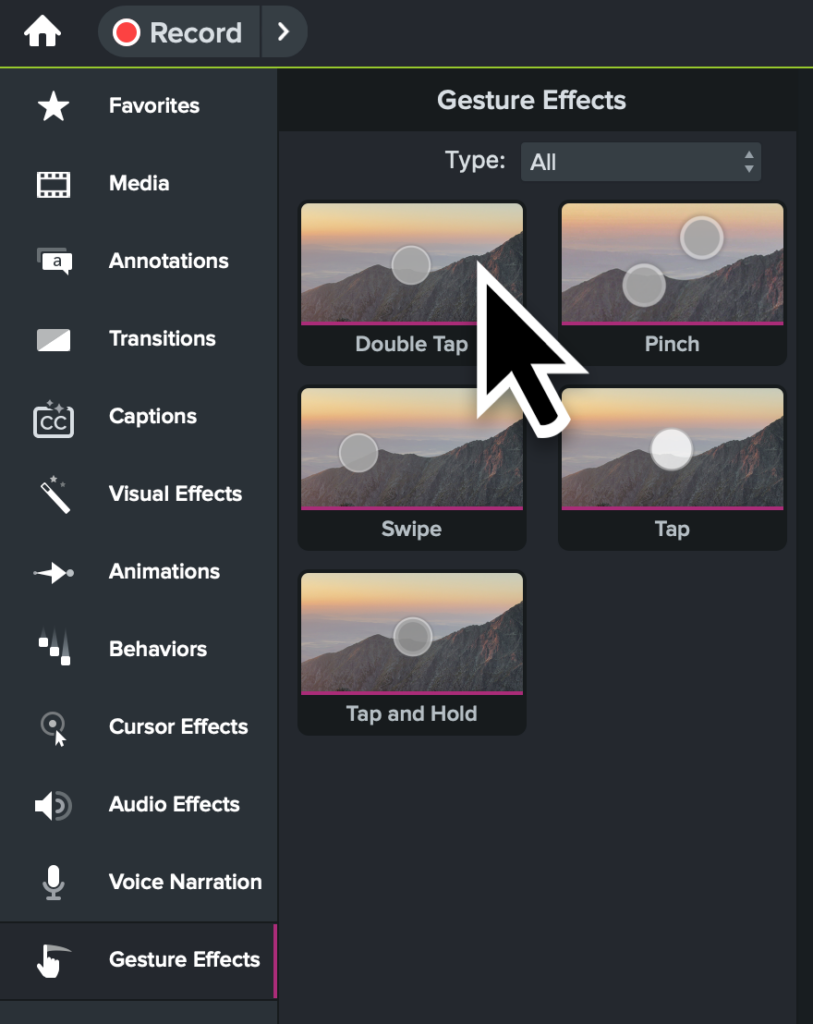
- Professional annotations: Easily add callouts, arrows, and text to highlight important parts of your recording. Create screen-first content effortlessly with Camtasia. Easily add annotations and gestures to show users exactly where to tap on their screen.
- Transitions and effects: Smoothly transition between scenes and add visual effects or animations to make your videos more engaging.
- Device frames: With Camtasia Assets you can frame your iPhone screen recordings in the device for additional context.
If you are a Mac user, you can even record your iPhone screen with Camtasia instead of using the built-in app.

Now that you’ve learned the ins and outs of screen recording on an iPhone, it’s time to put your skills to the test. So go ahead—hit that record button and start capturing and editing your screen like a pro!
Create professional videos with Camtasia
Easily add annotations, effects, and more to create tutorials and demos that stand out.
Try Camtasia FreeFrequently asked questions
Yes, the screen recording feature on iPhone captures the sound from the app or video you are recording. If you want external sounds (like your voice or background noise), you need to enable the microphone. To do this, long-press the Screen Recording button in the Control Center and tap the microphone icon to turn it on.
Apple blocks audio recording during phone or VoIP calls due to privacy and legal issues. The same rule applies to apps like FaceTime and WhatsApp. This restriction is in place due to concerns related to privacy and legal issues.
When you screen record during a call, the video captures the screen, but it doesn’t record the audio.
Some apps, like banking or streaming apps, may block screen recording on an iPhone. This prevents the recording of sensitive or copyrighted information. If you try to screen record these apps, you might find that the recording either stops or results in a blank screen.
It’s also not possible to screen record while using the iPhone’s screen mirroring functionality.


Share