
File formats are a real pain to figure out. Since different formats mean different features and uses, it’s important to choose the correct file format for your intended use. WebP to PNG converter tools are helpful to facilitate that process.
This guide shows you how to change WebP to PNG in just a few steps and explains the difference between the two.
WebP vs PNG, what is the difference?
Before you convert WebP images to PNG, you need to understand the difference between them. This knowledge can help you decide which output format is best for you.
Here are some key differences between these two image formats:
- Compression: Both WebP and PNG support lossless compression, but WebP is the star when creating smaller files. If you’re looking to speed up your website’s loading times, WebP might be the answer. However, neither image type loses quality in conversion.
- Quality: With top-notch image quality, the PNG format is like the HD TV of image files. However, while WebP can support similarly high-quality images, it can also be compressed further than a PNG, while only compromising a sliver of quality.
- Support and compatibility: PNG has become one of the most widely-used image formats on the web, and as such it’s supported across the board. On the other hand, WebP is supported on modern browsers and some software but hasn’t quite reached universal appeal.
- Animation: Here’s where WebP shows off a bit. Unlike PNG, WebP supports animation, making it a one-stop shop for high-quality static and animated images.
WebP is designed to keep pictures and images looking sharp but with a much smaller file size than traditional formats like JPEG or PNG.
The PNG, or Portable Network Graphics, is another digital image file type most commonly used to replace JPEG files. And have reliable image quality because of lossless compression. PNG files also support transparent backgrounds which is great for creating logos, icons, and other graphics.
Annotate and edit screenshots with Snagit
Professional mark-up tools and powerful features make it easy to create helpful images.
Try it Free
How Do I Convert WebP to PNG?
Using Snagit
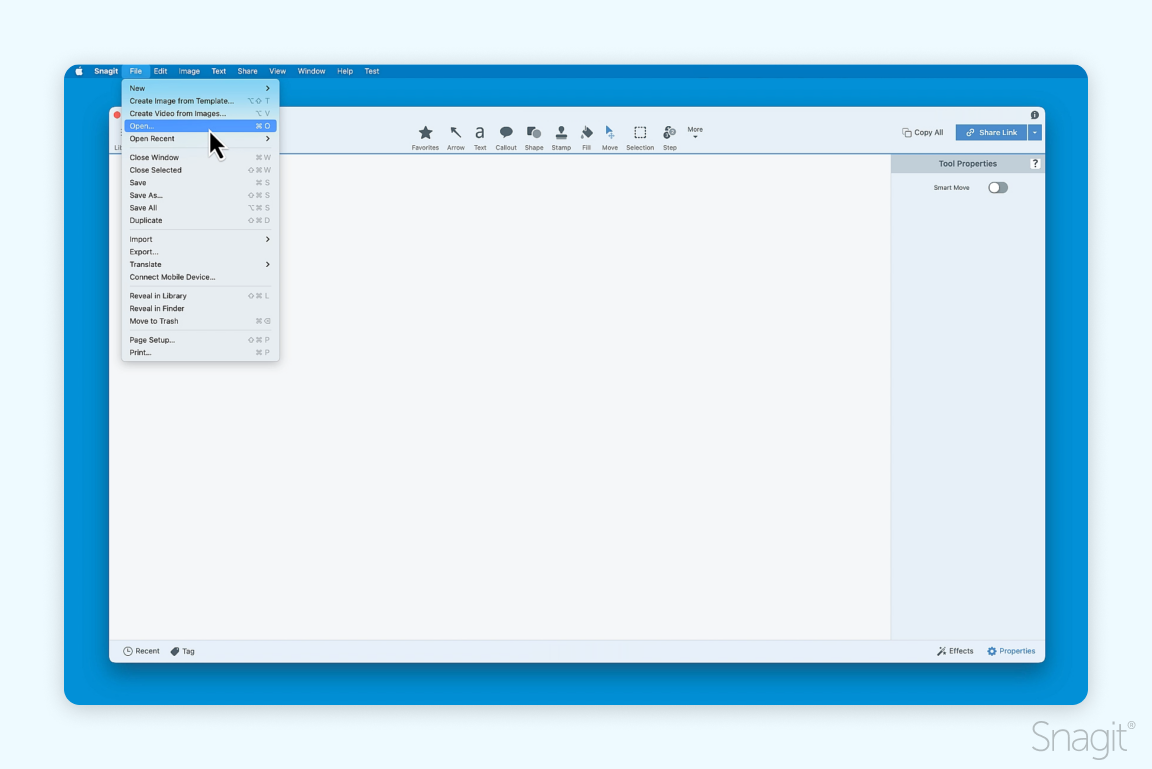
Start by opening Snagit. If you’ve not used Snagit before, you’ll be glad to know that Mac and Windows users can download and try Snagit for free.
Click on ‘File’, then ‘Open’, and select the WebP file you want to convert.
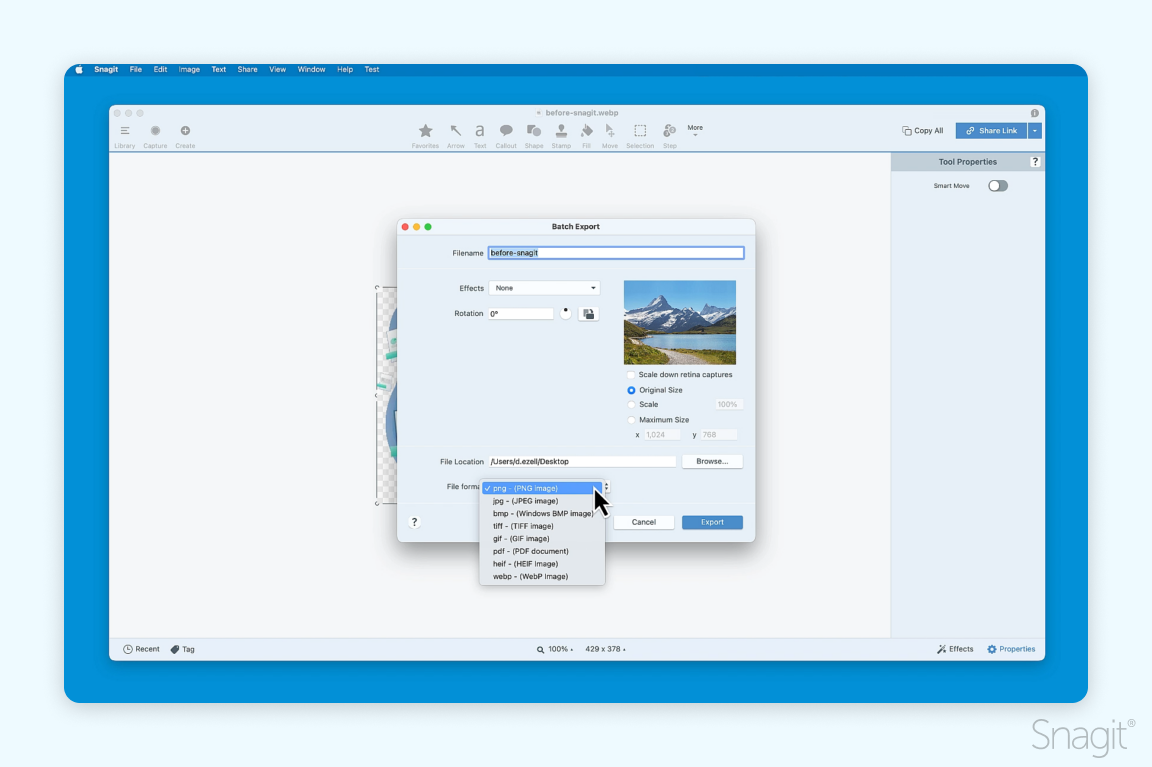
Once the image is open, head back to the ‘File’ menu and click on ‘Export’, which will open a new window.
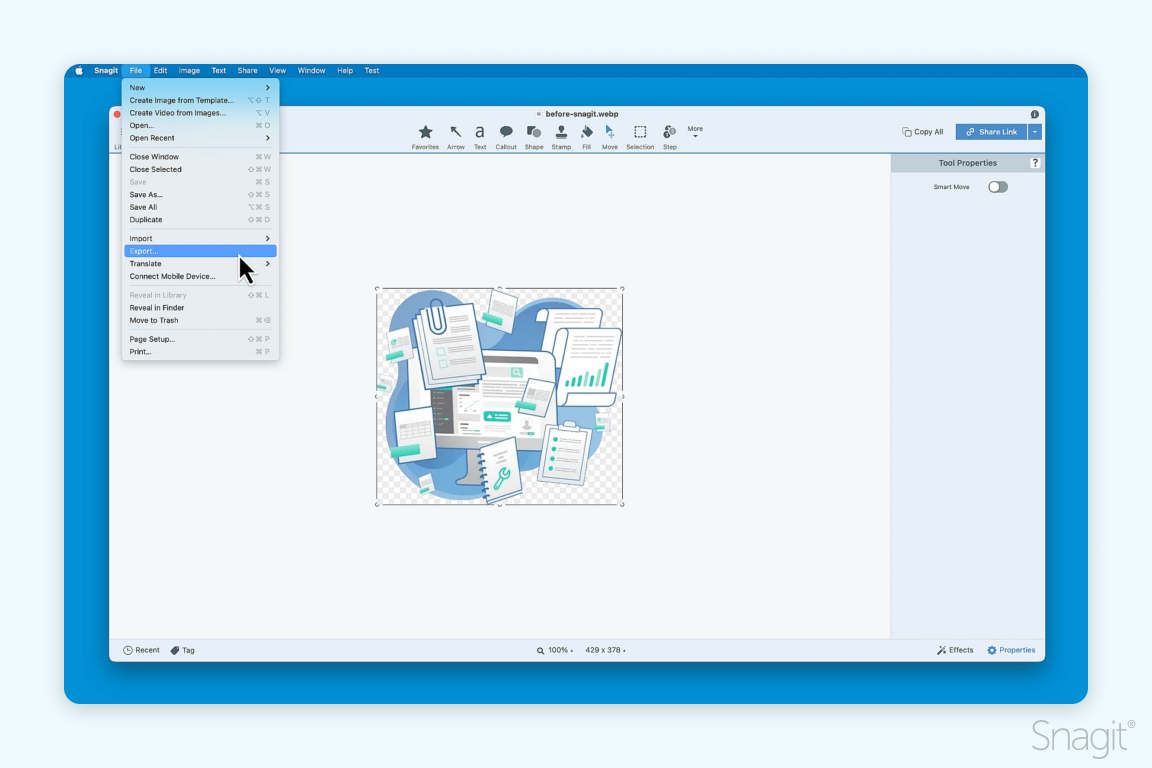
Next to ‘File format’, you’ll see a drop-down menu. Click it, and select PNG.
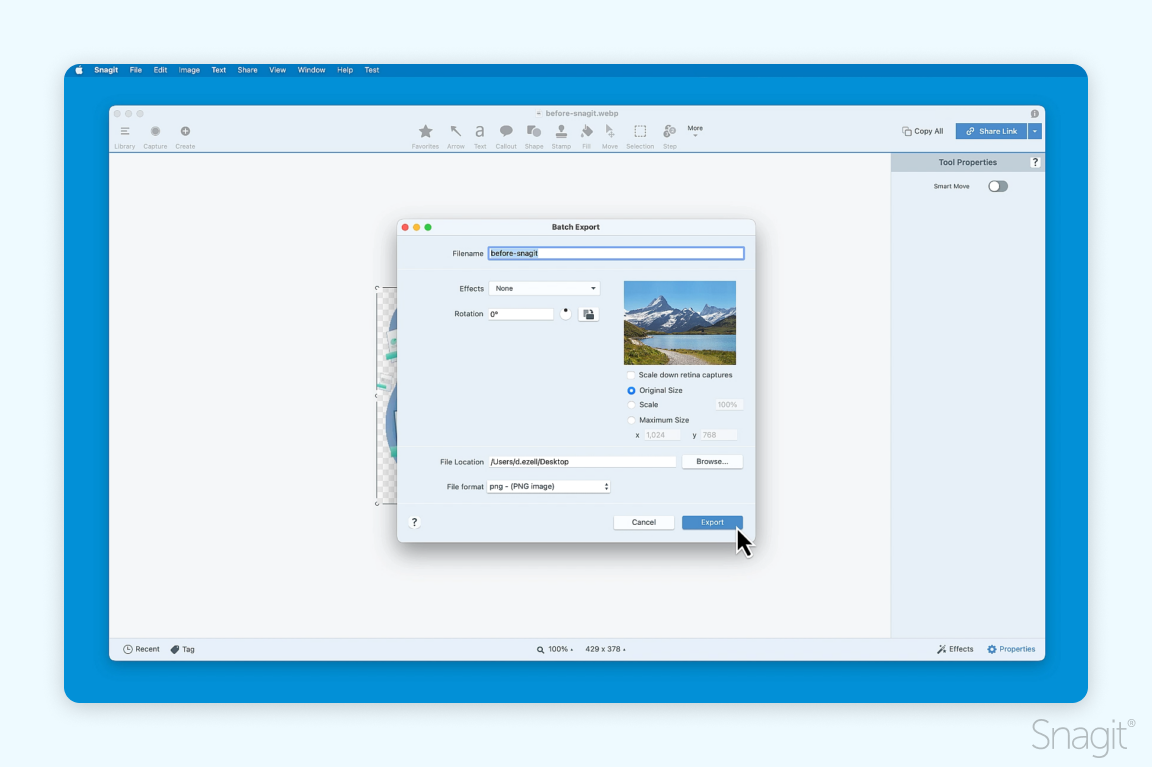
Finally, choose where to save your PNG by clicking the ‘Browse’ button next to ‘File Location’. Then, when you’re ready, click ‘Export’.
Snagit converts your image into any file type you need. Yes, this process works for other file formats too!
Using a Mac built-in tool
- Open your WebP file in Preview. You can do this by right-clicking the file and it will open automatically in Preview.
- Click on ‘File’ in the menu bar, then select ‘Export’.
- Click the drop-down menu labeled ‘Format’ and select ‘PNG’.
- Finally, choose where you want to save your PNG image and click ‘Save’.
If your image has a transparent background, you’ll also want to make sure that the box next to ‘Alpha’ is ticked.
On Windows
- Open your WebP file with Paint. You can do this by right-clicking the file, selecting ‘Open with’, and choosing ‘Paint’.
- Click on ‘File’ in the top left corner, hover over ‘Save as’, then select ‘PNG Picture’.
- A dialog box will open. Here, choose where you want to save your PNG image.
- After you’ve selected the location, click ‘Save’.
Now you know how to save a WebP as a PNG — we told you it was easy.
Streamline workflows with Snagit Assets
Transform your screenshots with ready-made templates, custom themes, and unique stamps.
Get Started
Using Photoshop
Adobe Photoshop is a popular image editing software with many advanced features and powerful editing tools.
- Launch Photoshop and open your WebP file. You can do this by clicking on ‘File’ in the top menu, then ‘Open’, and selecting your file.
- Once your image is open, go back to the ‘File’ menu, but this time select ‘Export’.
- Next, select ‘PNG’ from your options.
- Once you’ve decided where you’d like your PNG image to be saved, click ‘Save’.
Annotate and edit screenshots with Snagit
Professional mark-up tools and powerful features make it easy to create helpful images.
Try it Free
Share